User Settings and Preferences
ConnectUC Users can manage and view their User Settings and Preferences by clicking their user icon found at the top-left-hand corner.
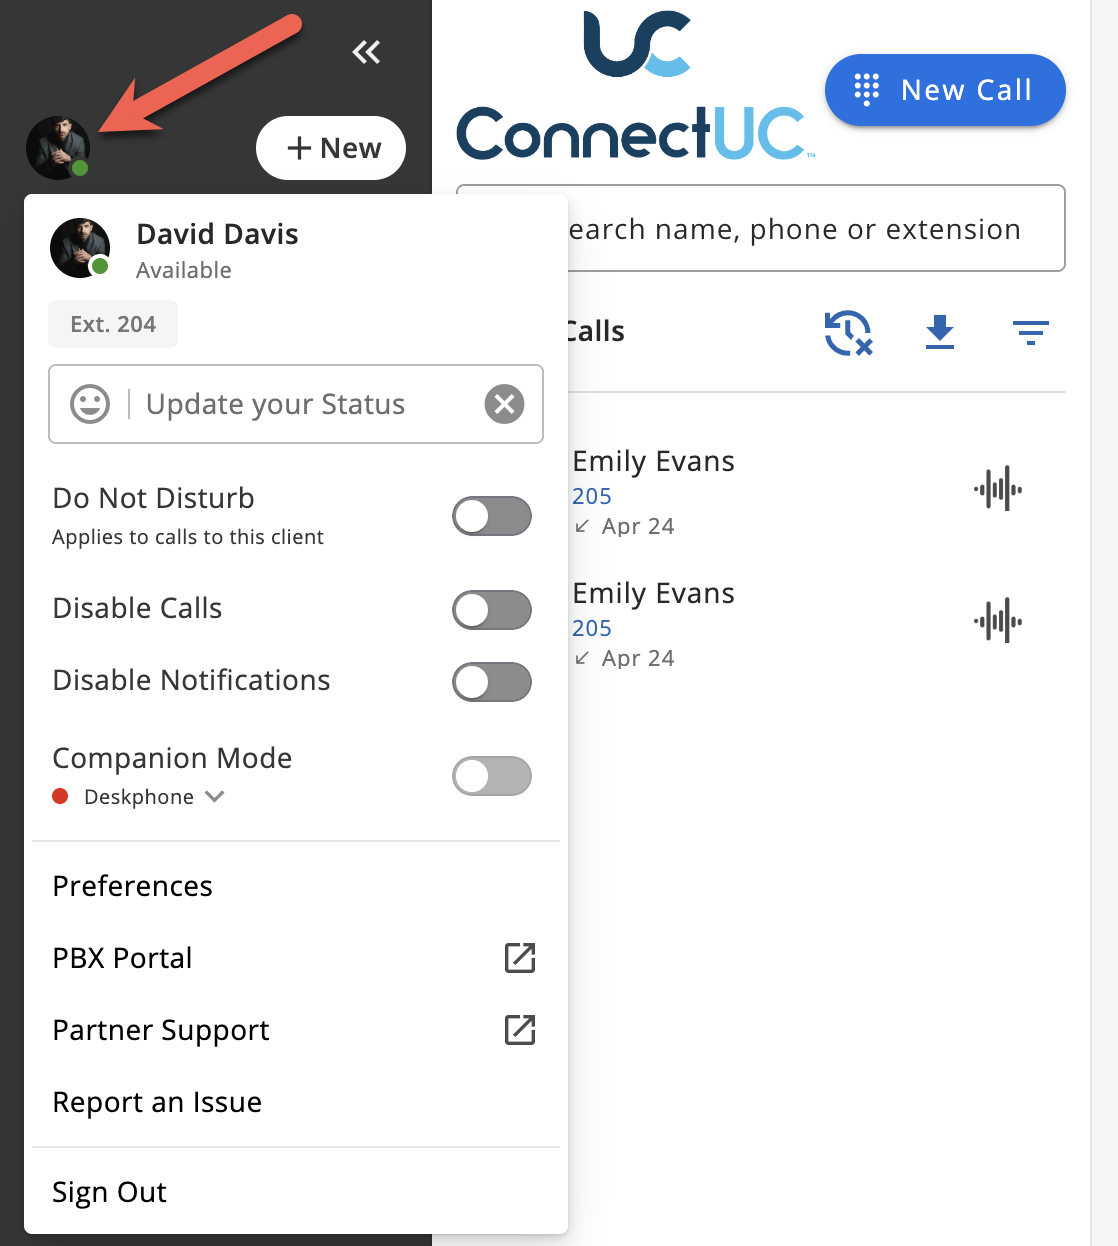
From the User Settings and Preferences menu, users can set their status and notification preferences, manage companion mode settings, manage profile and contact information, manage audio/video device settings, manage blocked numbers, call settings, and notification settings. Additionally, users may Sign Out of ConnectUC, go directly to their PBX Portal via the ‘PBX Portal’ button, and they may select ‘Report an Issue’ from the left-side menu.
For more information on the Report an Issue feature, please visit our Report an Issue article.
User Status, Do Not Disturb, Notification, and Companion Mode Settings
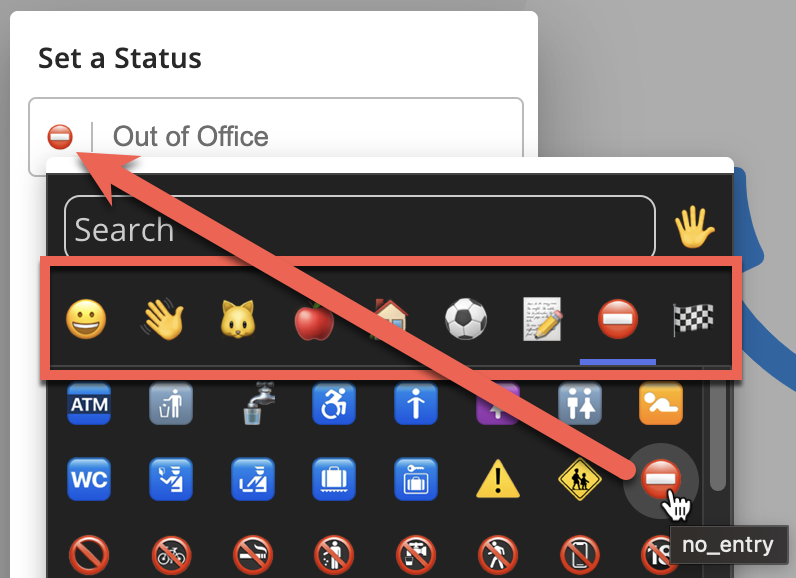
ConnectUC users can change their status by clicking the ‘Update your Status’ section. Once selected, the user can choose an Emoji icon and the accompanying status message. Once the status message is saved, it will display for other users until the status is cleared.
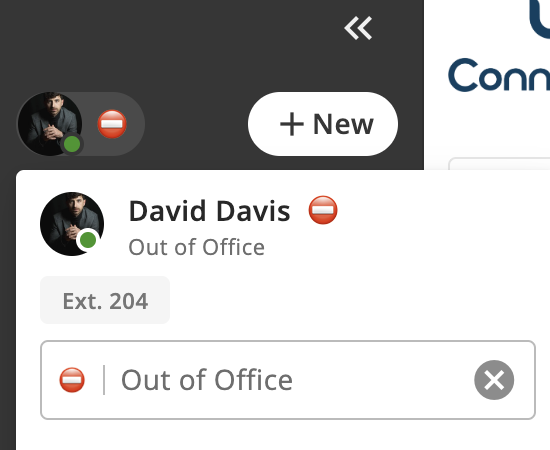
Note: To clear your user status, click the grey “X” button to the right of the status message (Pictured above).
When creating a new user status, select an icon in the top row to specify the icon "category" and then select the icon you wish to use from the options underneath.
Once a status has been created, it can be conveniently selected from a list of recently used statuses.

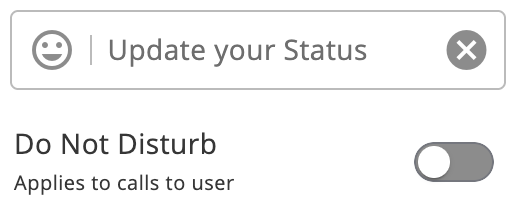
ConnectUC users may also manage their Do Not Disturb (DND) and notification settings via the toggle switches seen below.

- When DND is ON: Disable Calls and Disable Notifications will be greyed out (it's like turning on both).
- When DND is OFF: Calls and Notifications will depend on the other two settings (which are set-back to their initial stats before the DND was set to ON).
- The 'Disable Calls' button will disable calls from ringing to the device. Application Notifications are not affected.
- The 'Disable Notifications' button will disable application notifications. Calls are not affected.
Additionally there are system level parameters that can be set to determine if DND is a System DND (impacting all of a user’s devices), or just a local DND that applies only to the user’s client. These parameters are configurable for Web/Desktop and Mobile independently.
- If these parameters are set to System, under the Do Not Disturb toggle, it will read "Applies to calls to user"
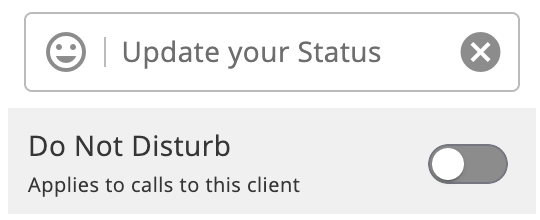
- If these parameters are set to Device, in ConnectUC menu, under the toggle it reads "Applies to calls to this client"
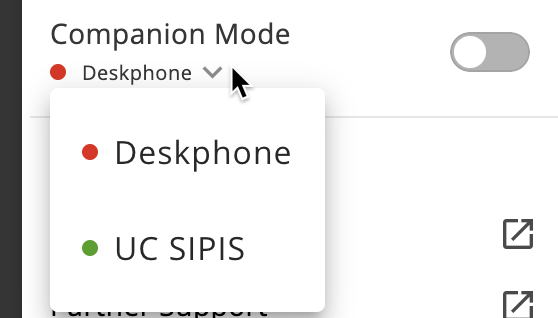
Companion Mode settings can be configured in the side bar menu, allowing users to toggle the feature on/off and also select which registered device you want to use to make or take calls via the device drop-down menu.

Additional settings for Companion Mode can be found by navigating to Preferences > Calling and these settings are described in the 'Calling' section below.
Note: Poly and Yealink phones are known to work with this feature, and your mileage may vary when using the feature with other devices.
User Preference Settings
ConnectUC’s User Preferences allow users to manage their user profile, audio device settings, video device settings, blocked numbers, Calling and dialing rules, and Notification settings.
Table of Contents
Profile Settings
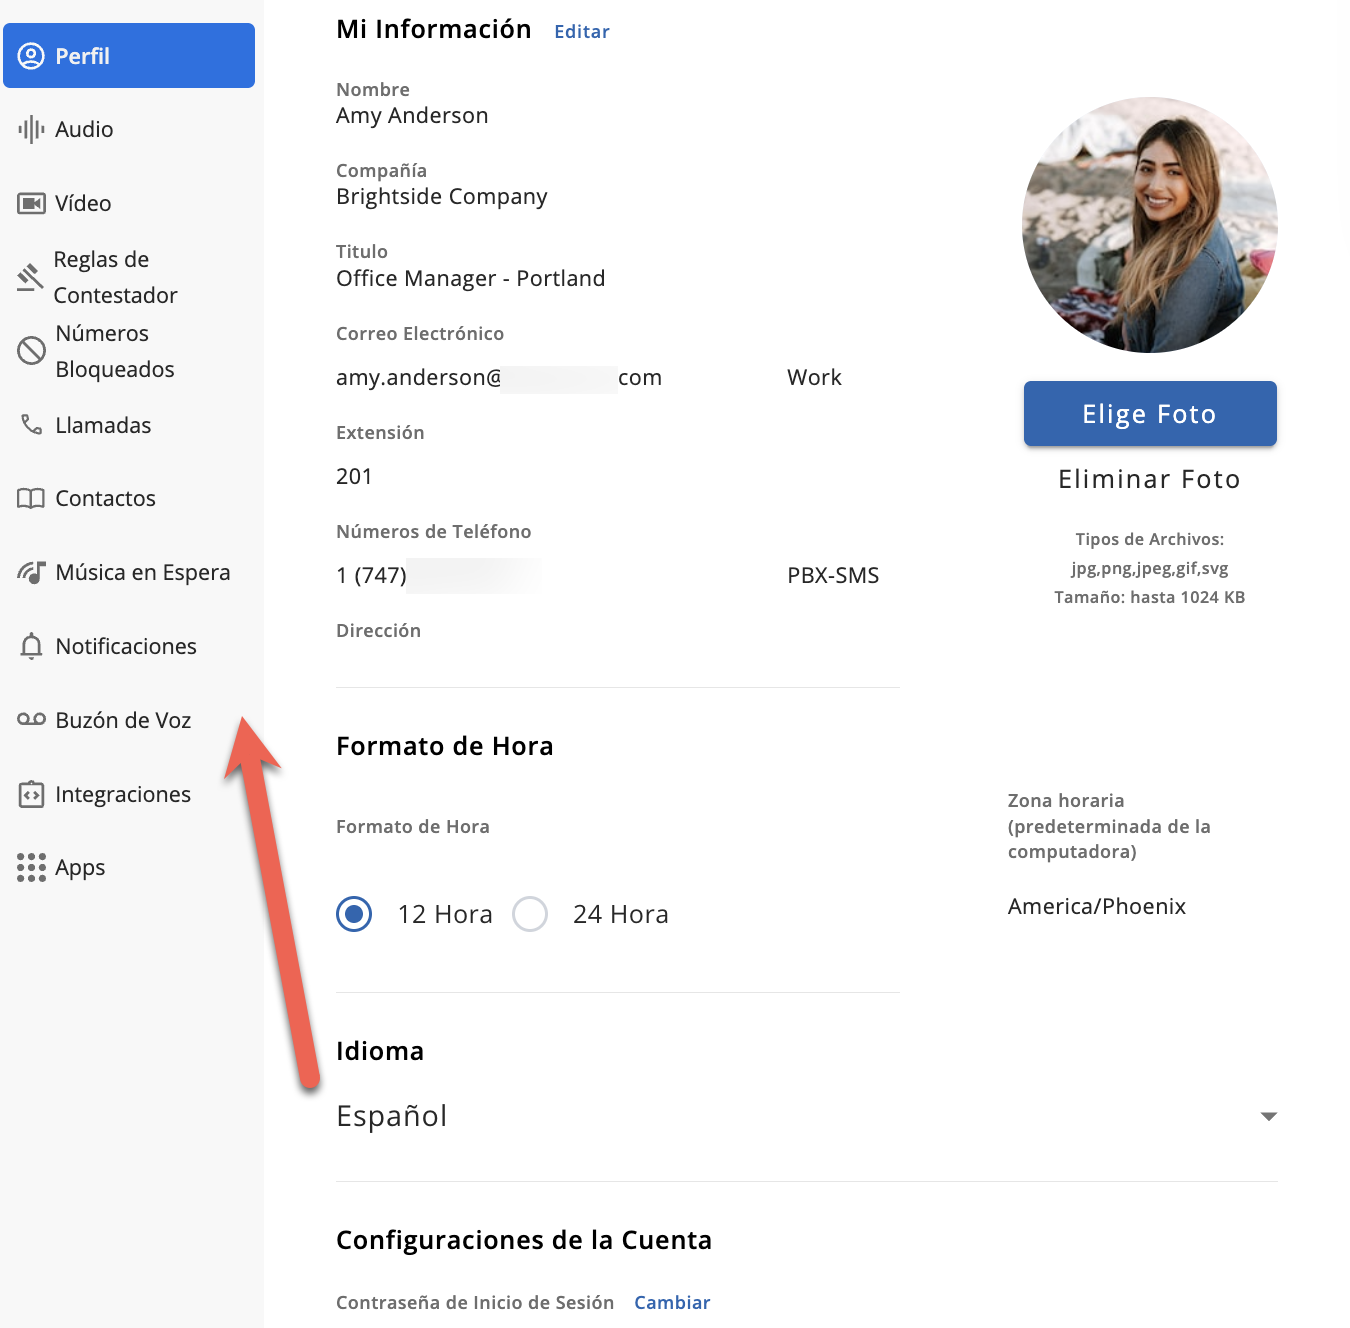
The Profile section allows users to manage and edit their user information, including name, email, phone number(s), address, and user image. Users may also set their language, time format, and timezone preferences. Lastly, users can change their sign-in password under the ‘Account Settings’ section.
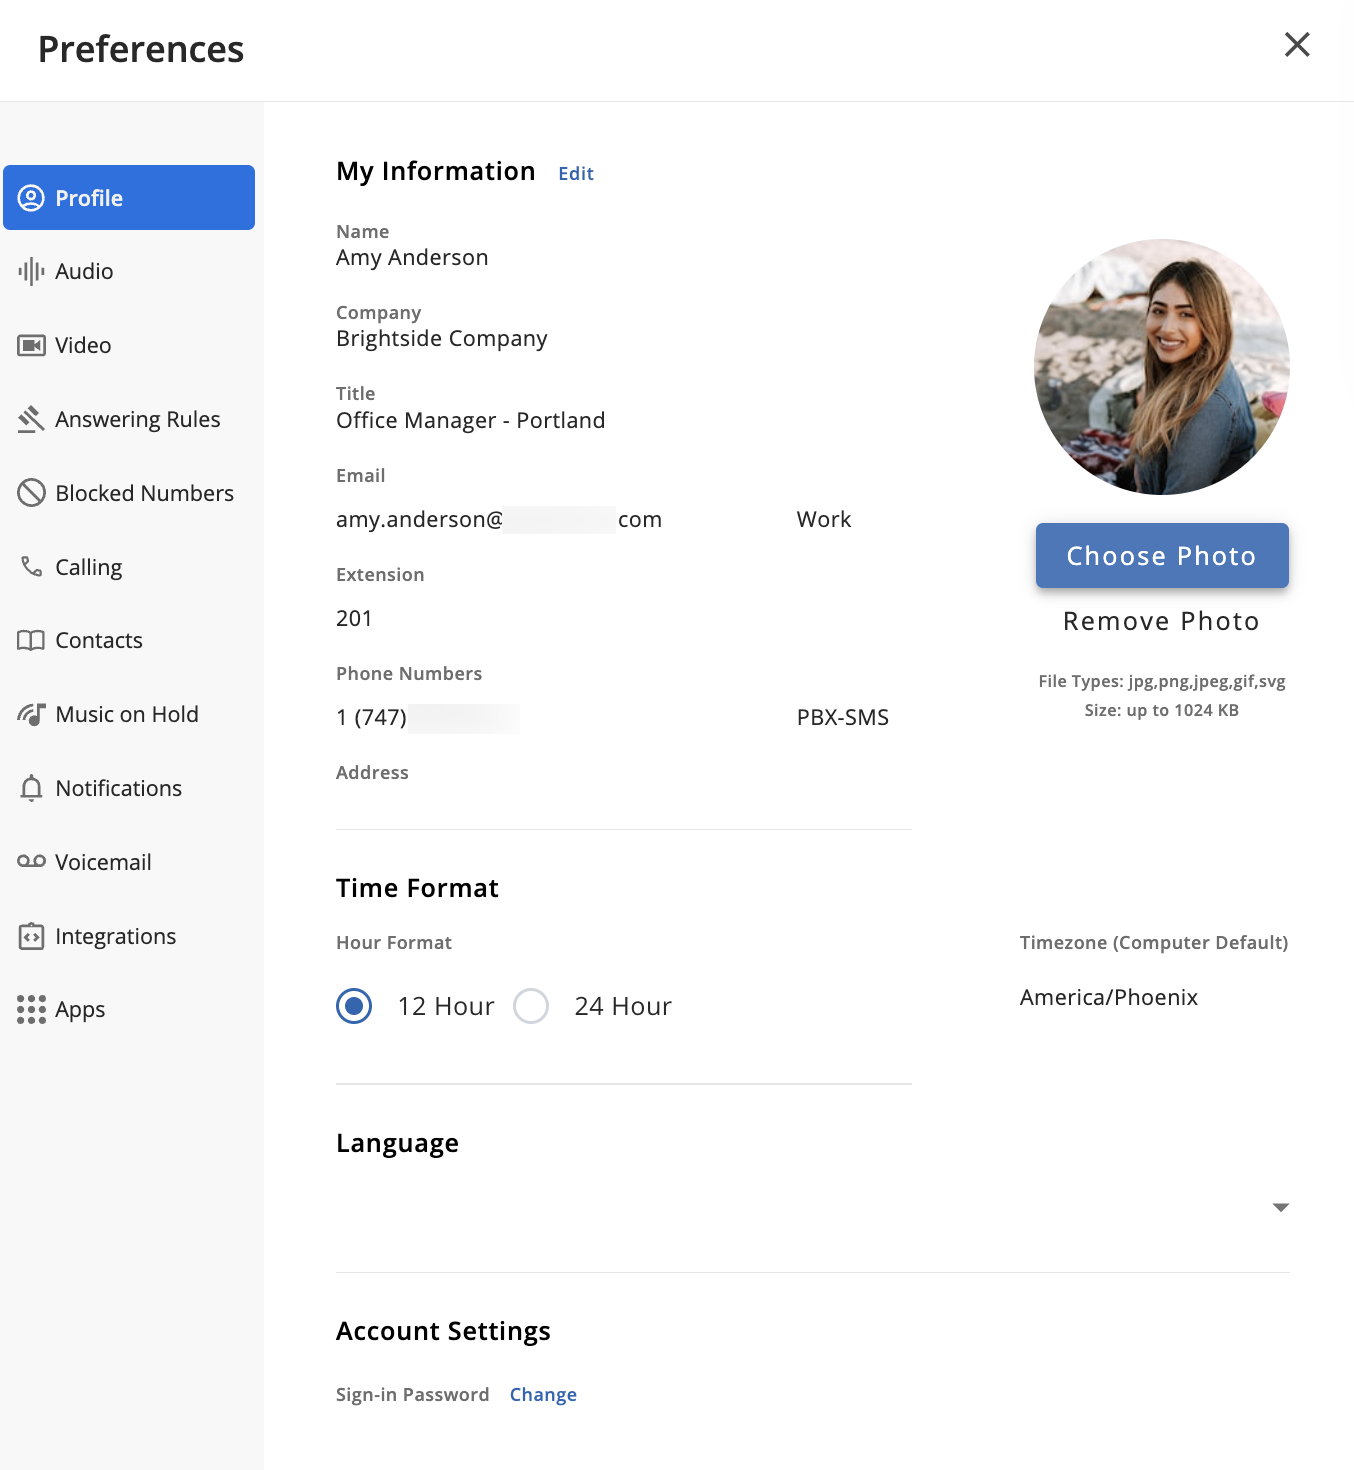
Note: Language settings go into effect as soon as they are selected.
Audio Device Settings
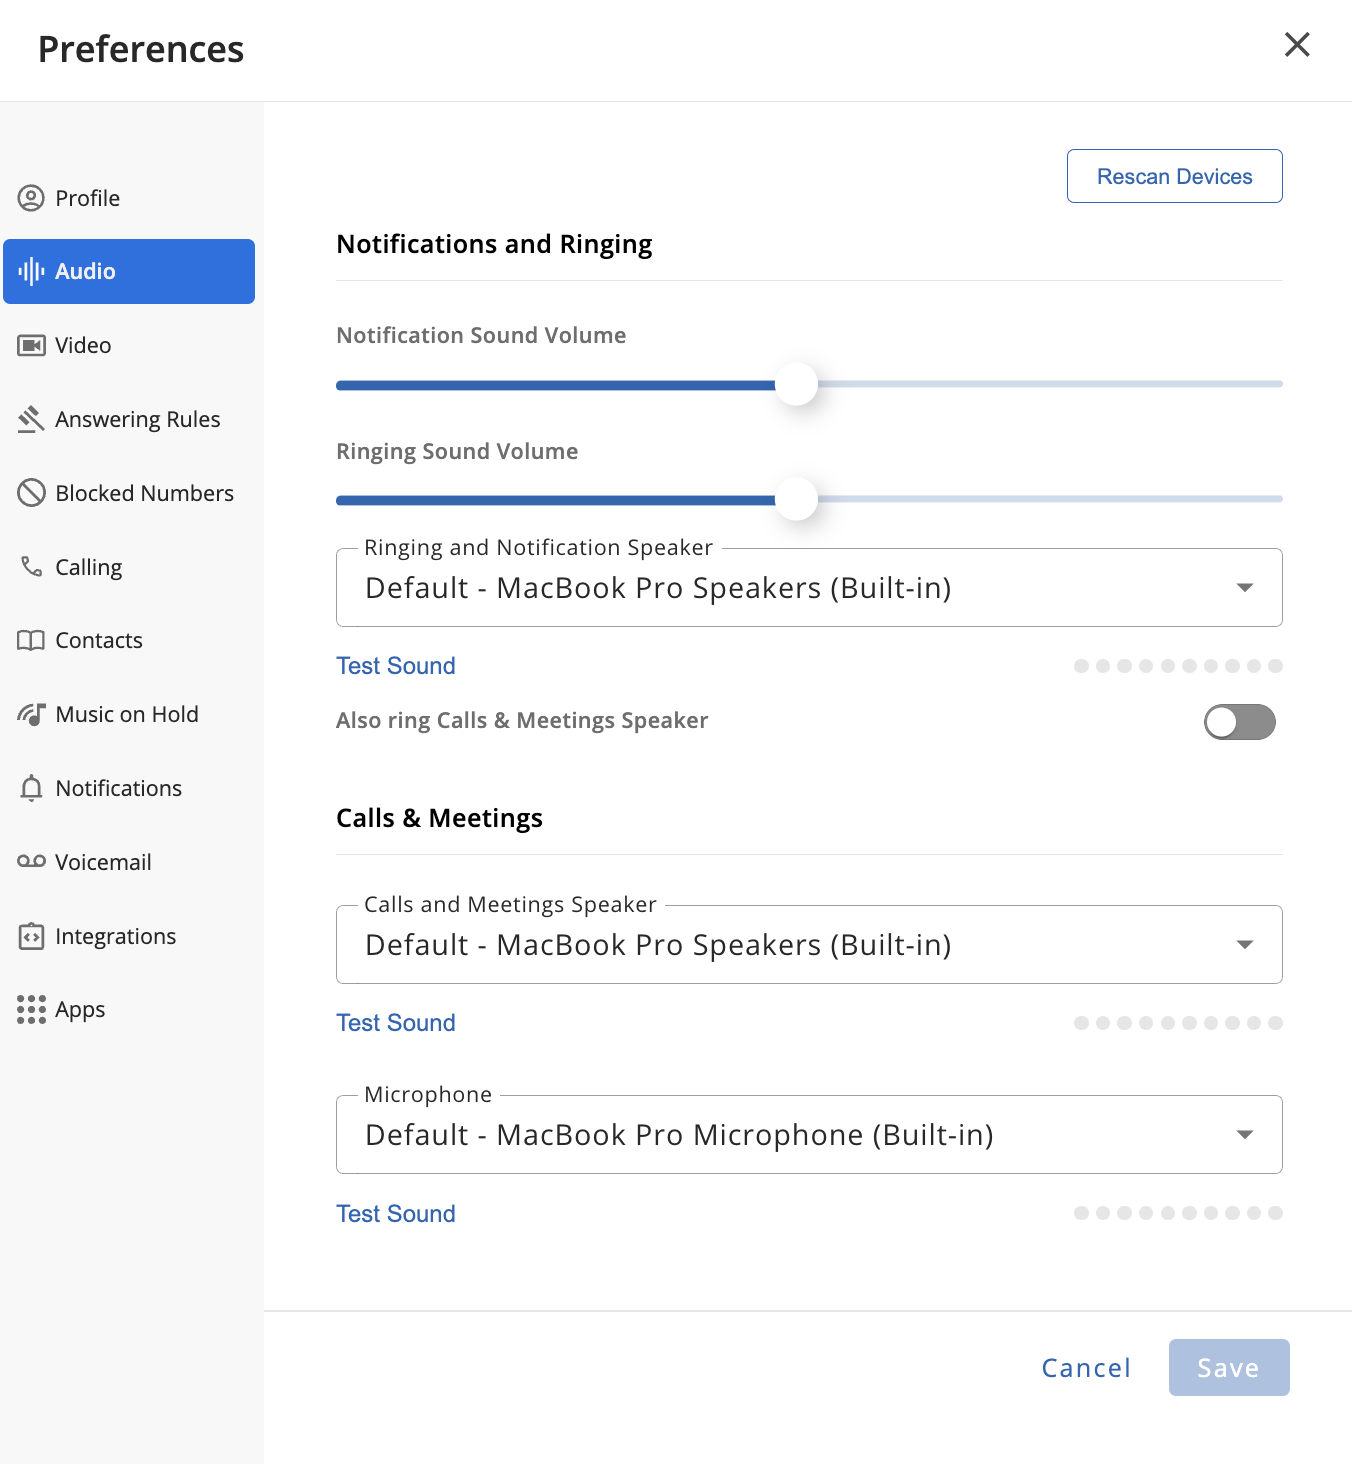
The Audio section allows users to manage and test their audio devices. The “Test Sound” option will help ensure the device’s audio input or output is working properly, and users may increase or decrease the notification/ringer volume via the volume sliders.
If a device is not already recognized, be sure to click the ‘Rescan Devices’ button at the top-right-hand corner of the screen. Once a device is recognized, users may switch between devices at any time from this menu.
Video Device Settings
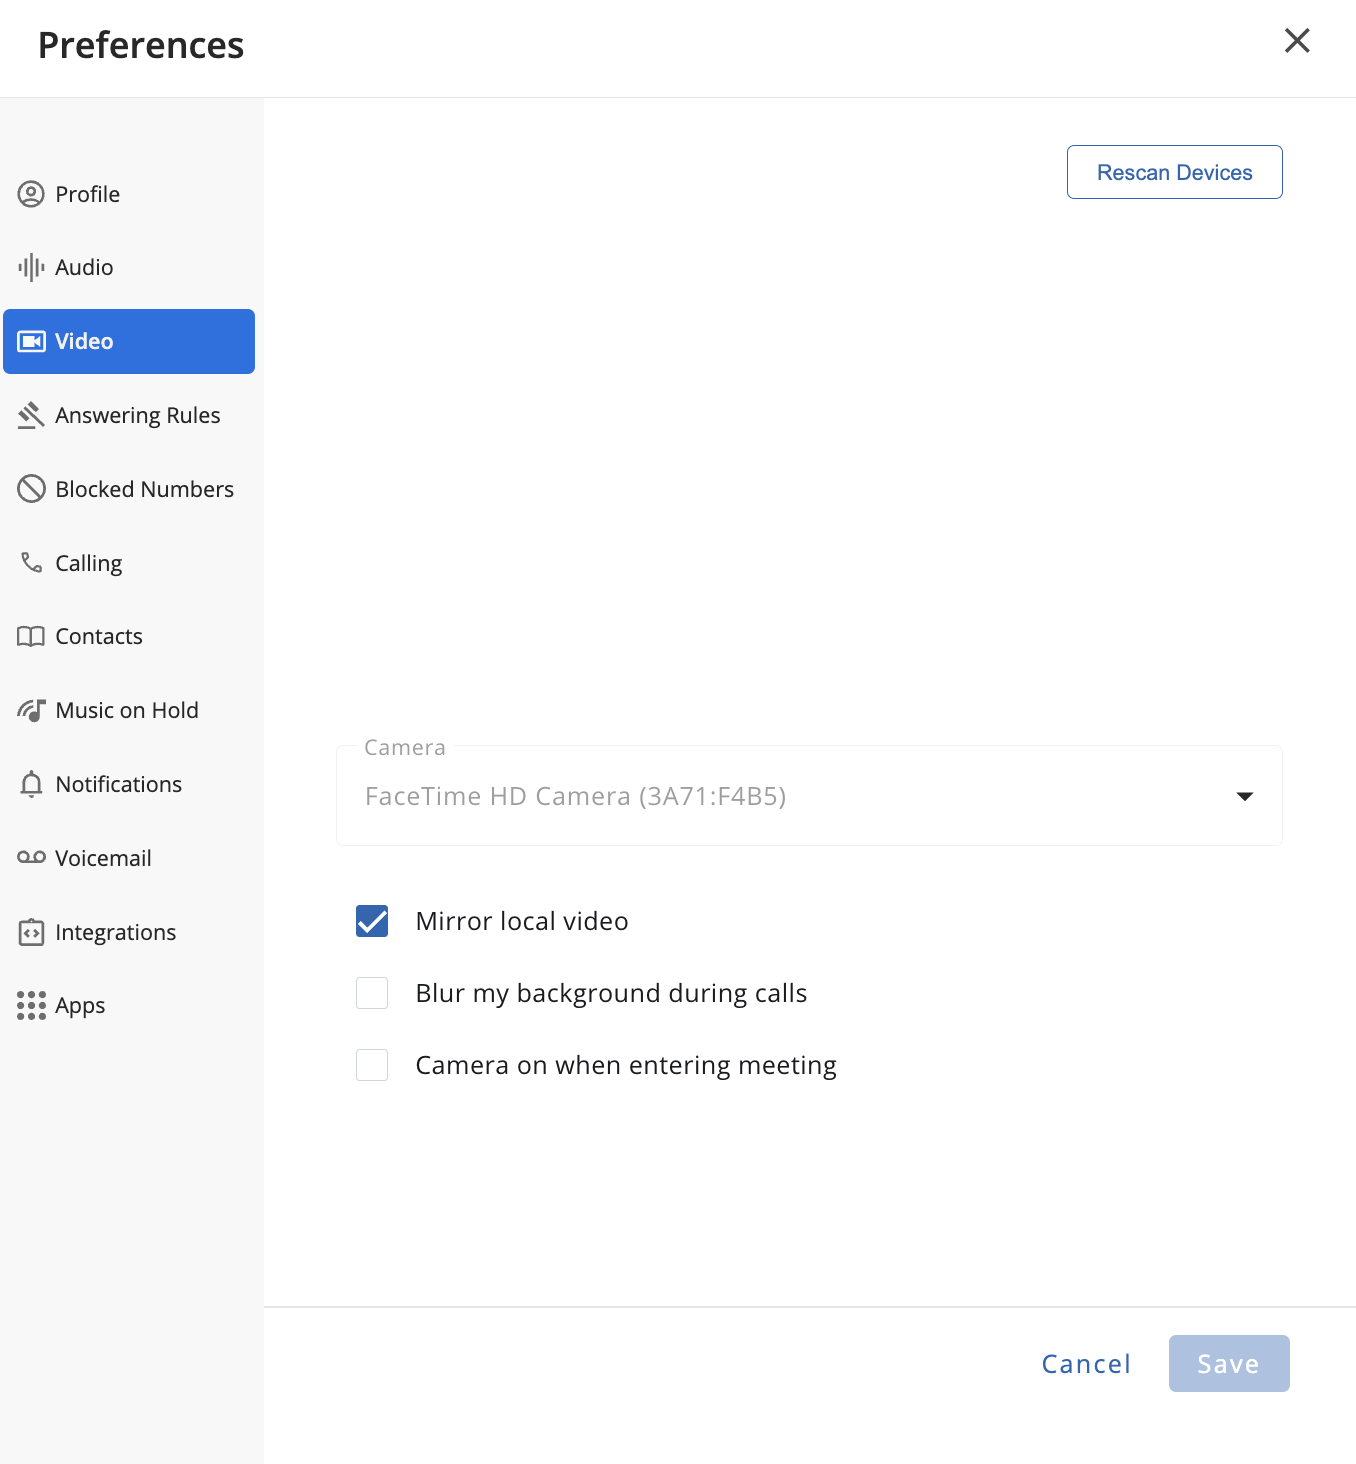
The Video section allows users to manage and test their video-capable devices. When entering the Video section, any connected cameras will be tested and display video if configured properly.
- If ‘Mirror Local Video’ is enabled, the currently captured video source will be “flipped” horizontally, meaning it will appear as if looking into a mirror rather than a camera.
- If ‘Blur my background during calls’ is enabled, all background elements will be blurred from the video source, and only figures/objects close to the camera will be in focus.
- If ‘Camera on when entering a meeting’ is enabled, the camera will automatically be enabled each time the user enters a meeting.
If a video-capable device is not already recognized, be sure to click the ‘Rescan Devices’ button at the top-right-hand corner of the screen. Once a camera is recognized, users may switch between devices at any time from this menu.
Answering Rules Settings
The Answering Rules section allows users to manage their Ring Timeout, Answering Rules, and Time Frame settings.
The 'Ring Options' sub-section allows Ring Customization, such as configuring the 'Ring for' time, allow/deny multiple incoming calls, enable Auto-answer calls, and set Auto-answer time.
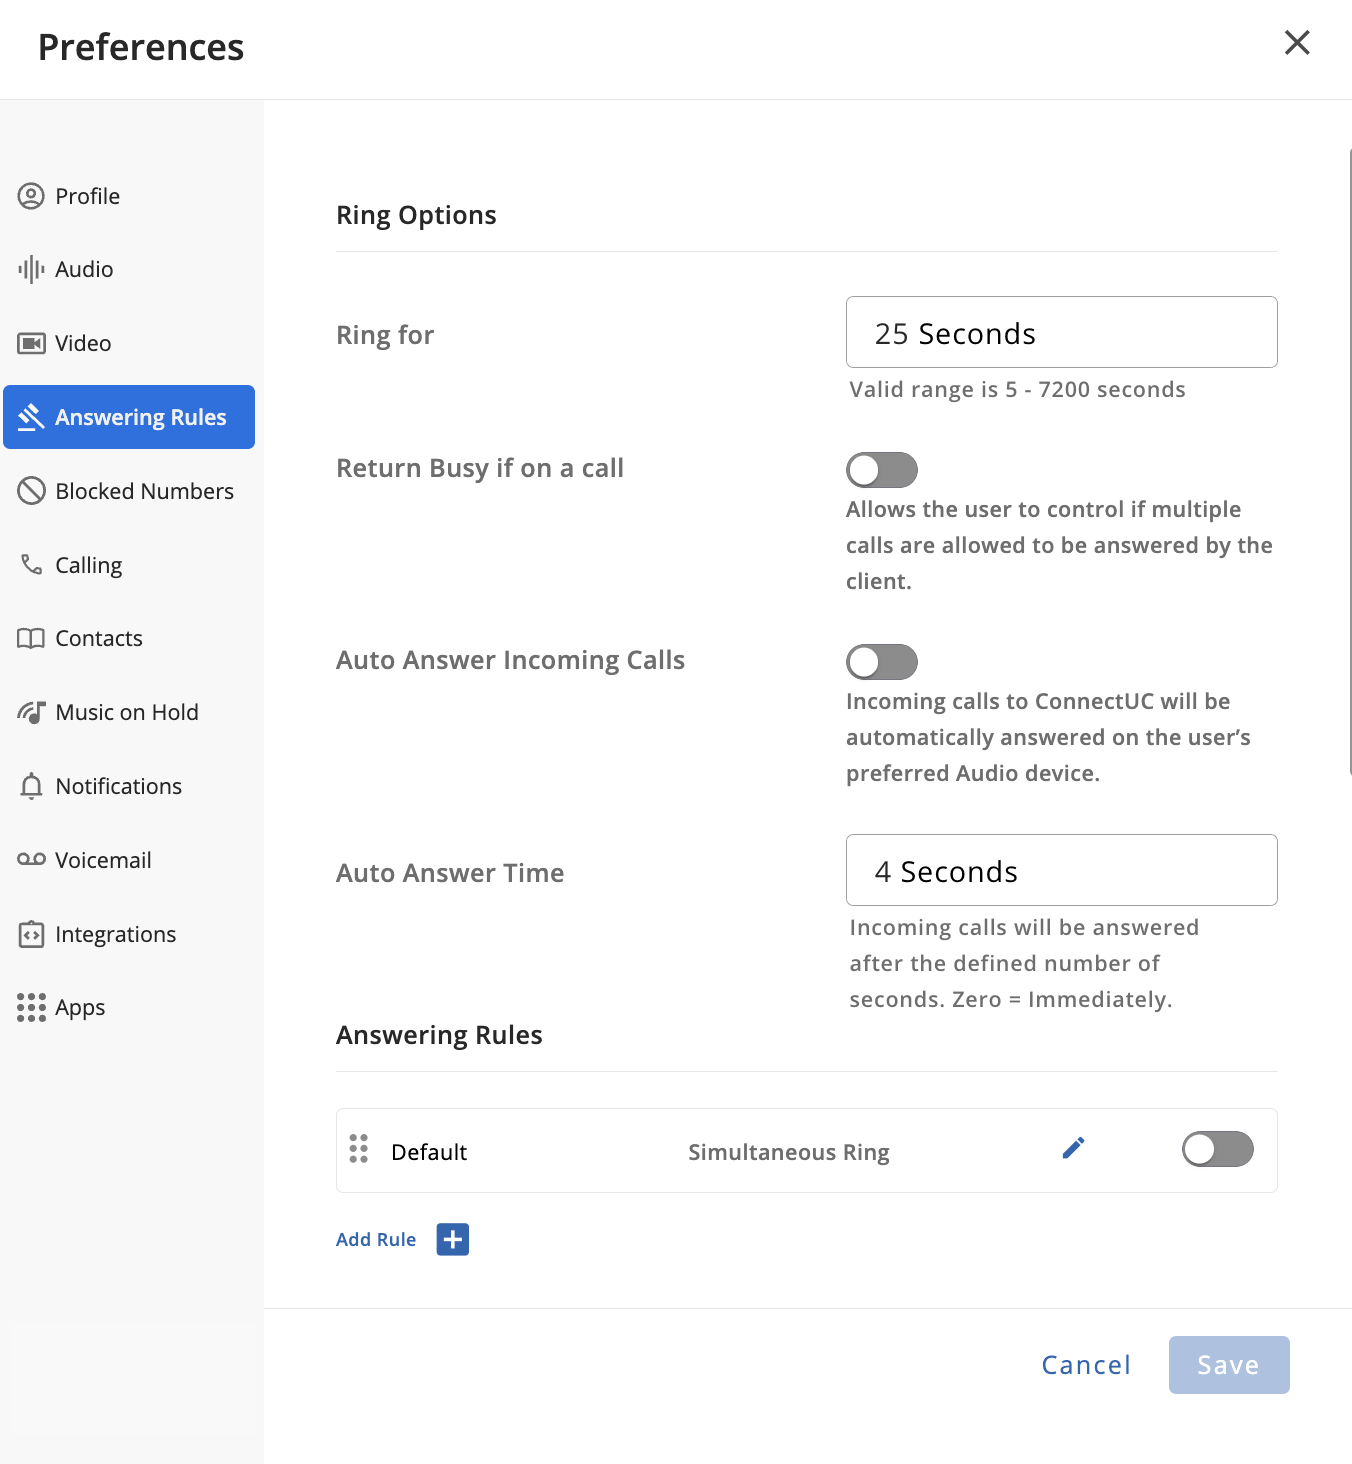
The 'Answering Rules' sub-section allows answering rules to be created (via the Add Rule + button), edited (via the "Pencil" icon to the right), or toggled (via the toggle switch to the far right).
When adding or editing Answering Rules, users will need to select or create an applicable Time Frame and ringing behavior before the Answering Rule can be Saved.
 Ring Behavior options include:
- Forward All Calls
- Do Not Disturb
- Only Ring Primary Deskphone
- Simultaneous Ring
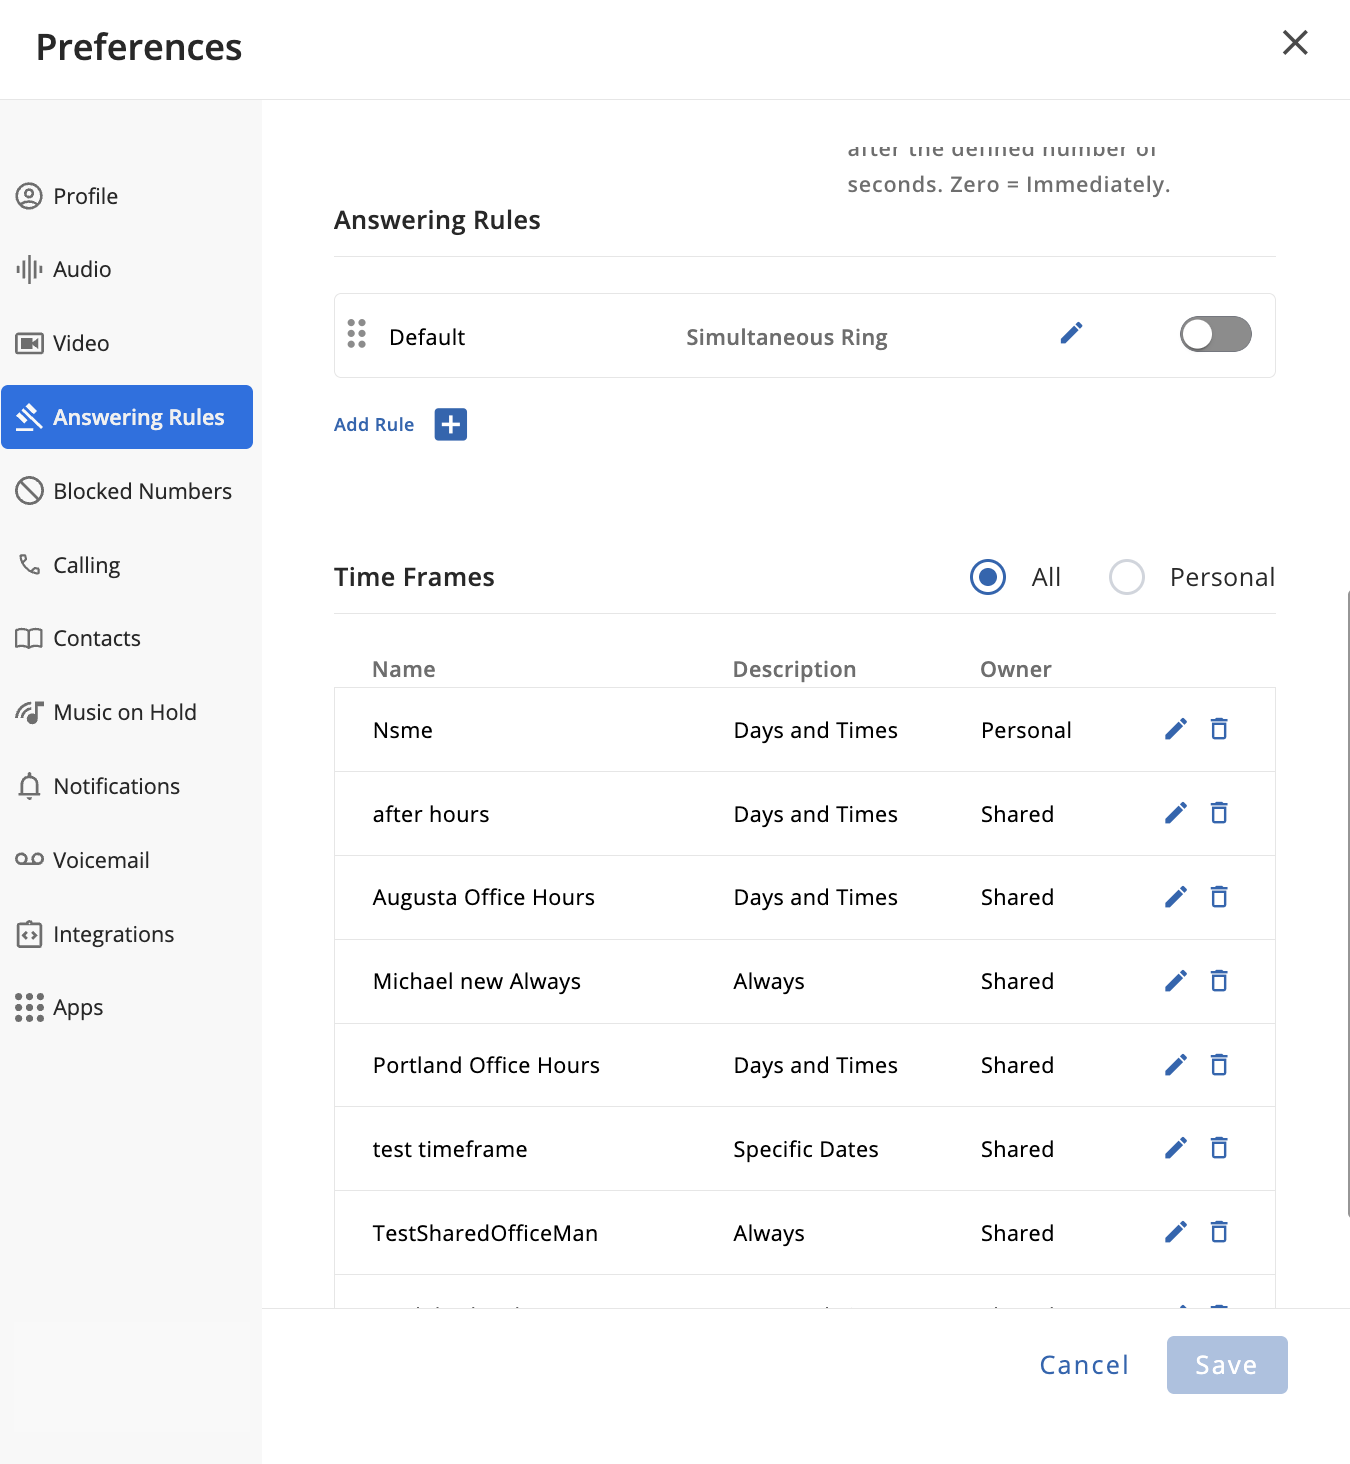
The Time Frames sub-section allows users to manage their shared and personal time frames. The toggle at the top right side of this sub-section allows you to filter to view all Time Frames or just the user's Personal Time Frames.

When adding/editing a Time Frame, users are asked to provide a name for the Time Frame and specify when it is applicable, including the ability to select specific hours and days.

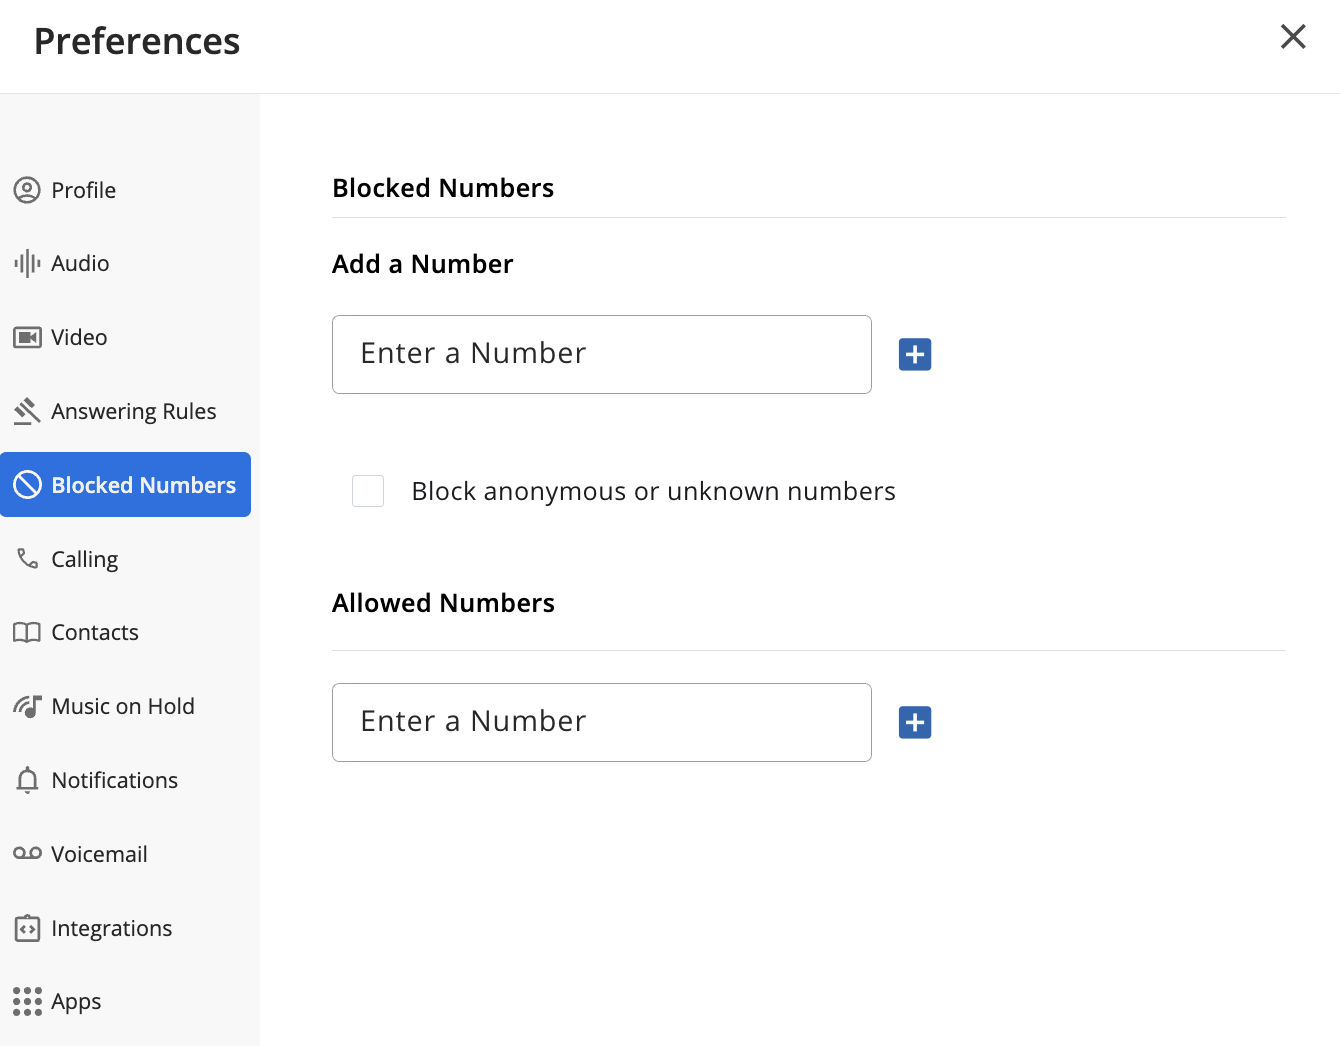
Blocked Numbers Settings
The Blocked Numbers section allows users to manage their Allowed Numbers and Blocked Numbers.
- If ‘Block anonymous or unknown numbers’ is enabled, any anonymous or unknown numbers will automatically be blocked if they attempt to call the user.
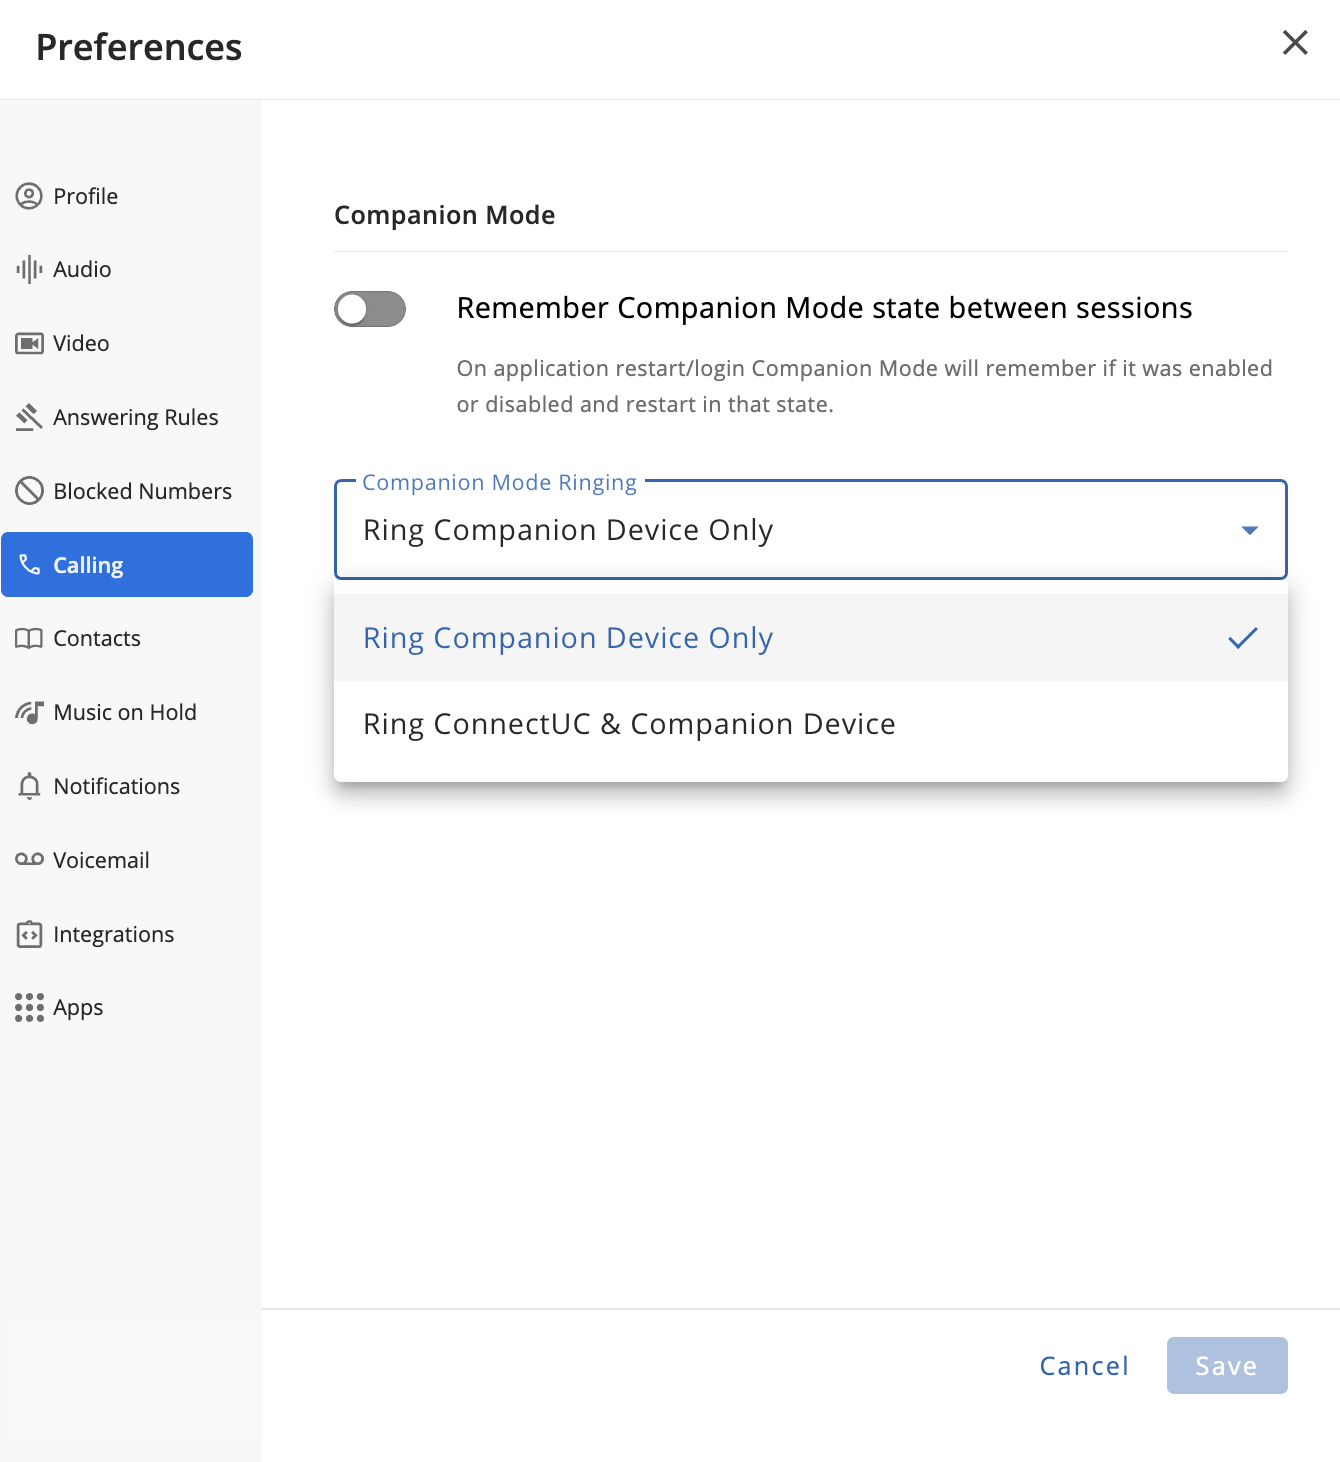
Calling Settings
The Calling section allows users to manage their Companion Mode settings.
- If the 'Remember Companion Mode state between sessions' option is toggled on, ConnectUC will remember if the Companion Mode state was enabled or disabled and will keep the status on restart or login.
- The 'Companion Mode Ringing' option allows you to select if only the companion device will ring or if both ConnectUC and the Companion Device will ring.
Contacts Settings
The Contacts section allows users to import and export contacts, including user contacts and shared contacts.
If the ‘Enable Contact Matching’ option is disabled, there will be no contact lookup performed for inbound calls, and they will instead display the name that was included with the call invitation.
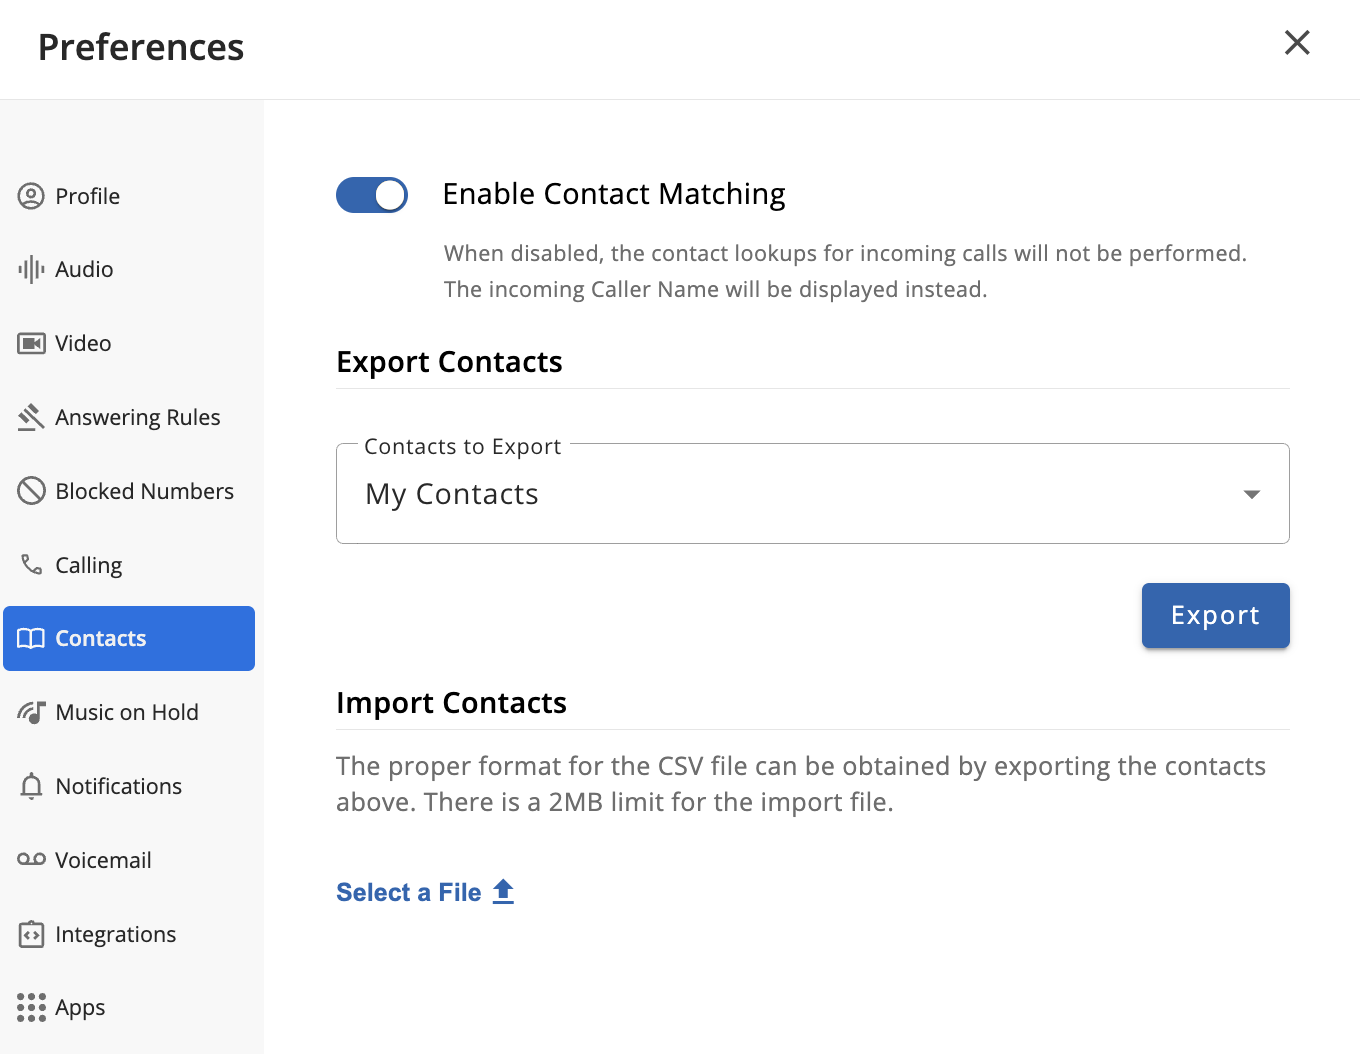
Users can easily export their Shared or Personal contacts via the Export Contacts drop-down menu and the 'Export' button.

After selecting the type of contact you wish to export and clicking the export button, the CSV file containing the contact information will be downloaded.

Contacts can also be easily imported via a CSV file (by clicking 'Select a file', but please be sure the information is in the same format as when exporting contacts, sample below). Users with higher authority may also use this method to update/edit Shared Contacts.

Note: To avoid having empty contact records, imported contacts must have at least a first name, last name, or company name.
Music on Hold Settings
The Music on Hold section allows users to manage their Music on Hold files and settings, including the ability to upload new MoH audio files. From the Music on Hold section, users can enable/disable the feature and can also enable randomization so the available music files play in a random order.
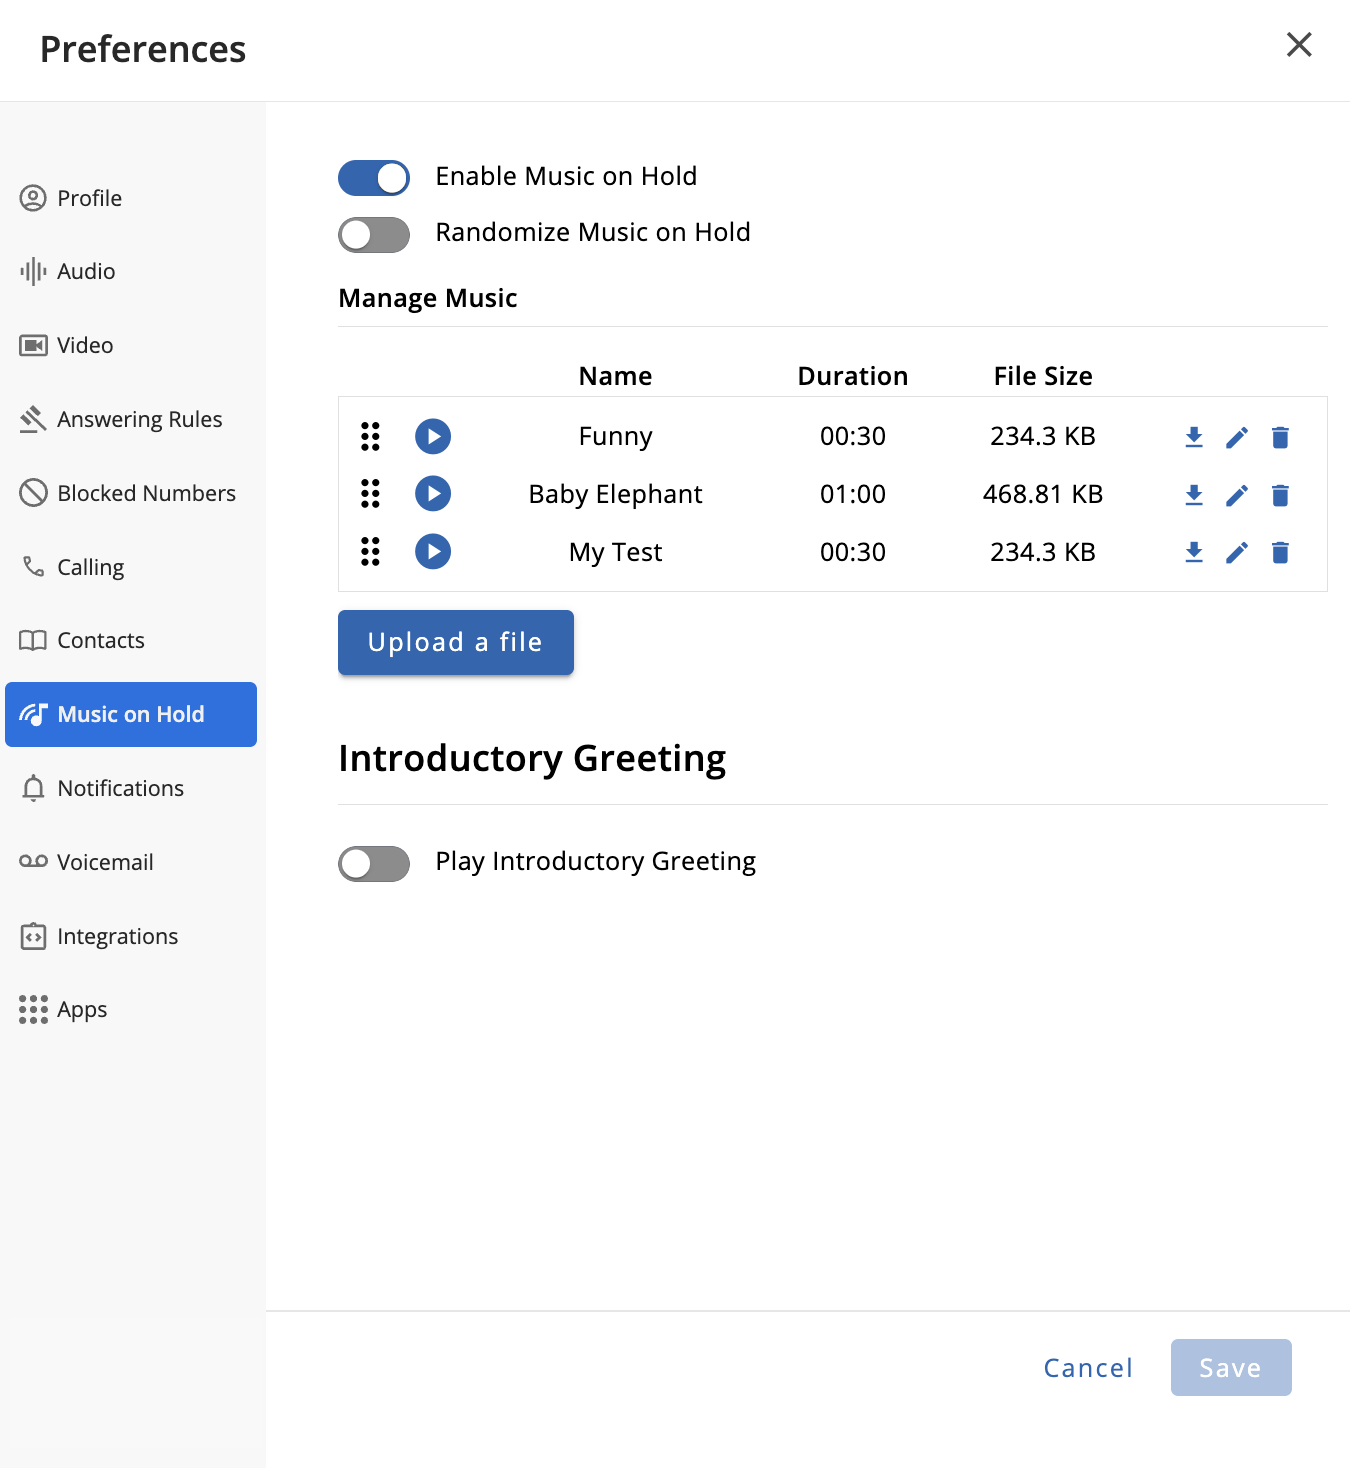
When uploading files via the 'Upload a file' button, users will be asked to select the file from their computer and provide a name and description.
 To change the name of an existing Music on Hold file, click the "Pencil" edit icon to the right.

If the Introductory Greeting settings are enabled (via the toggle switch at the top of the Introductory Greeting section), users are provided with several greeting options, including Text-to-Speech, uploading an audio file, and recording a new greeting from the current device's microphone.
If a user opts for a Text-to-Speech greeting, they will be asked to enter the desired message and applicable language, and they may select the voice type used in the greeting.

Notifications Settings
The Notification section allows users to customize their notification settings, including the ability to enable/disable notification sounds, enable/disable minimized notifications, and set custom tones/sounds for individual notification types.
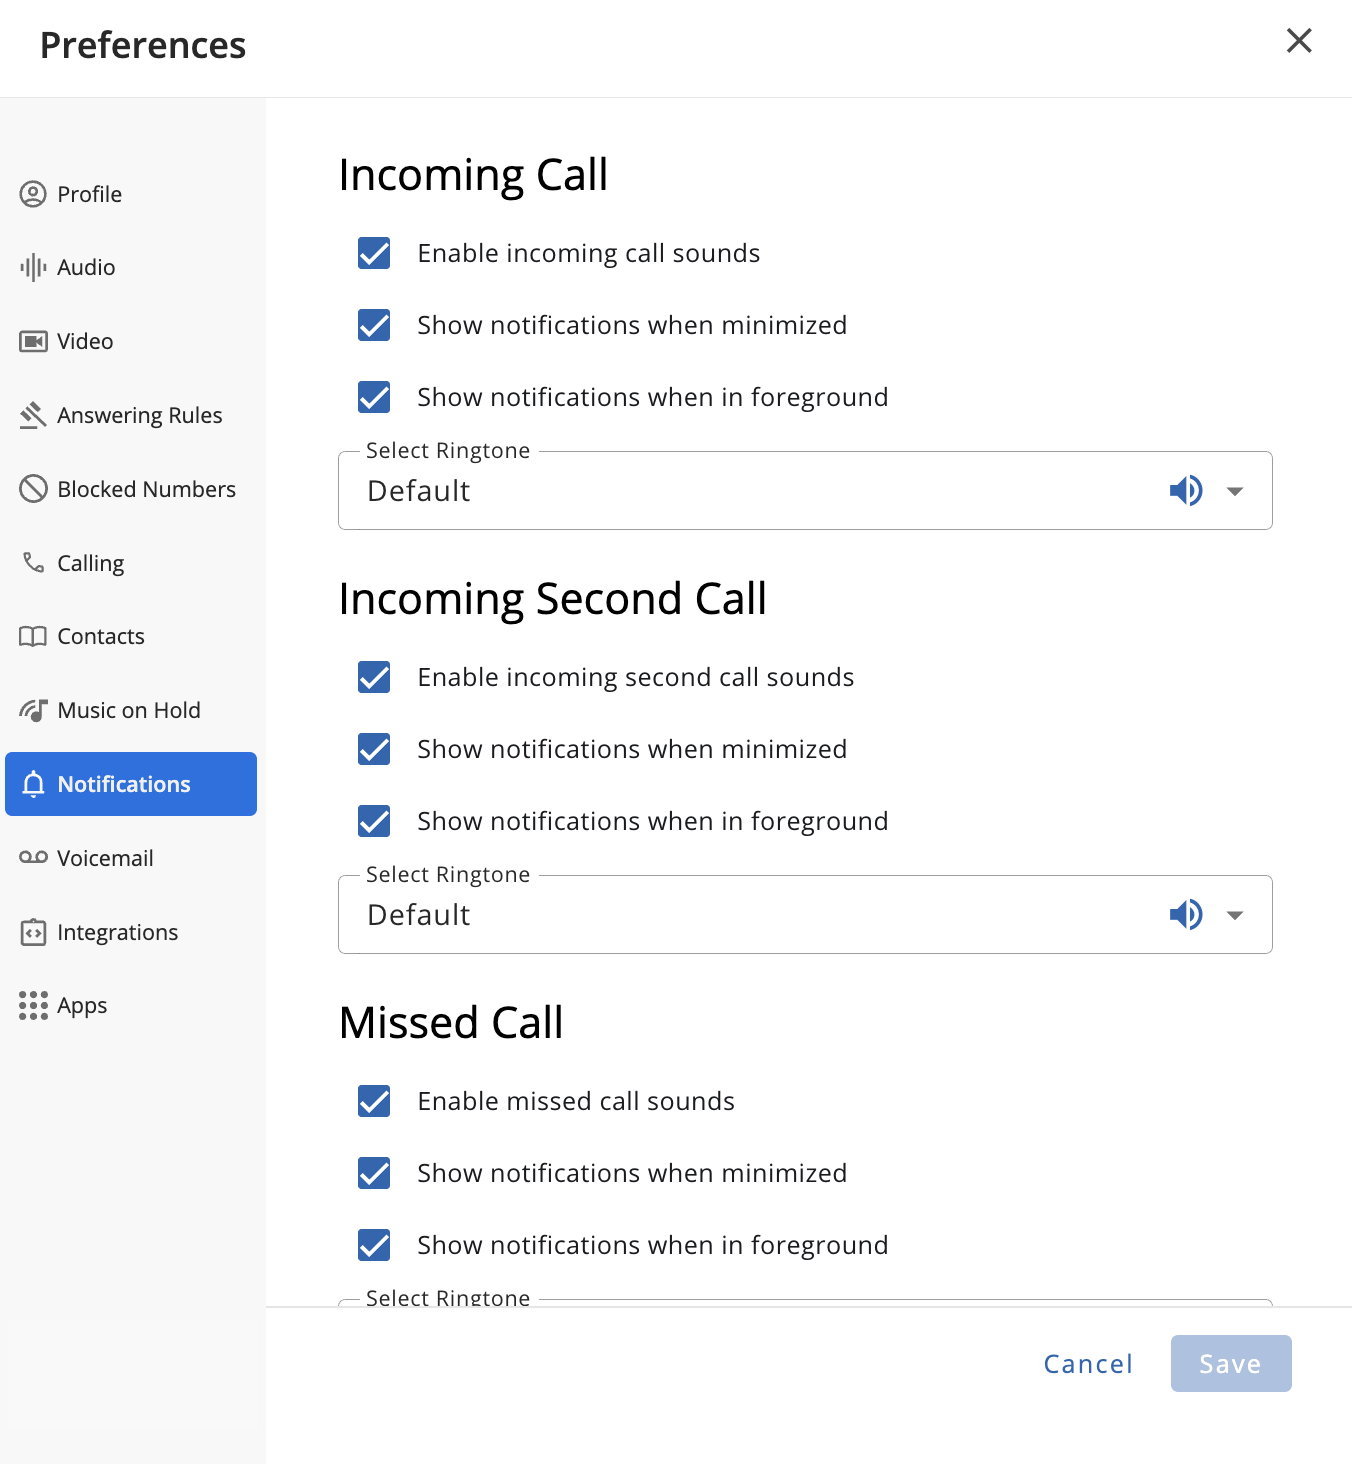
The following Notification types can be managed individually from this menu:
Note: You may individually toggle incoming second call sounds, notifications when minimized, notifications when in foreground, and select the second call ringtone for all sections listed below.
- Incoming Call
- Incoming Second Call
- Missed Call
- Group Chat Meeting Started
- Someone Joins a Group Chat Meeting
- Incoming Voicemail
- SMS
- Chat
- Incoming Fax
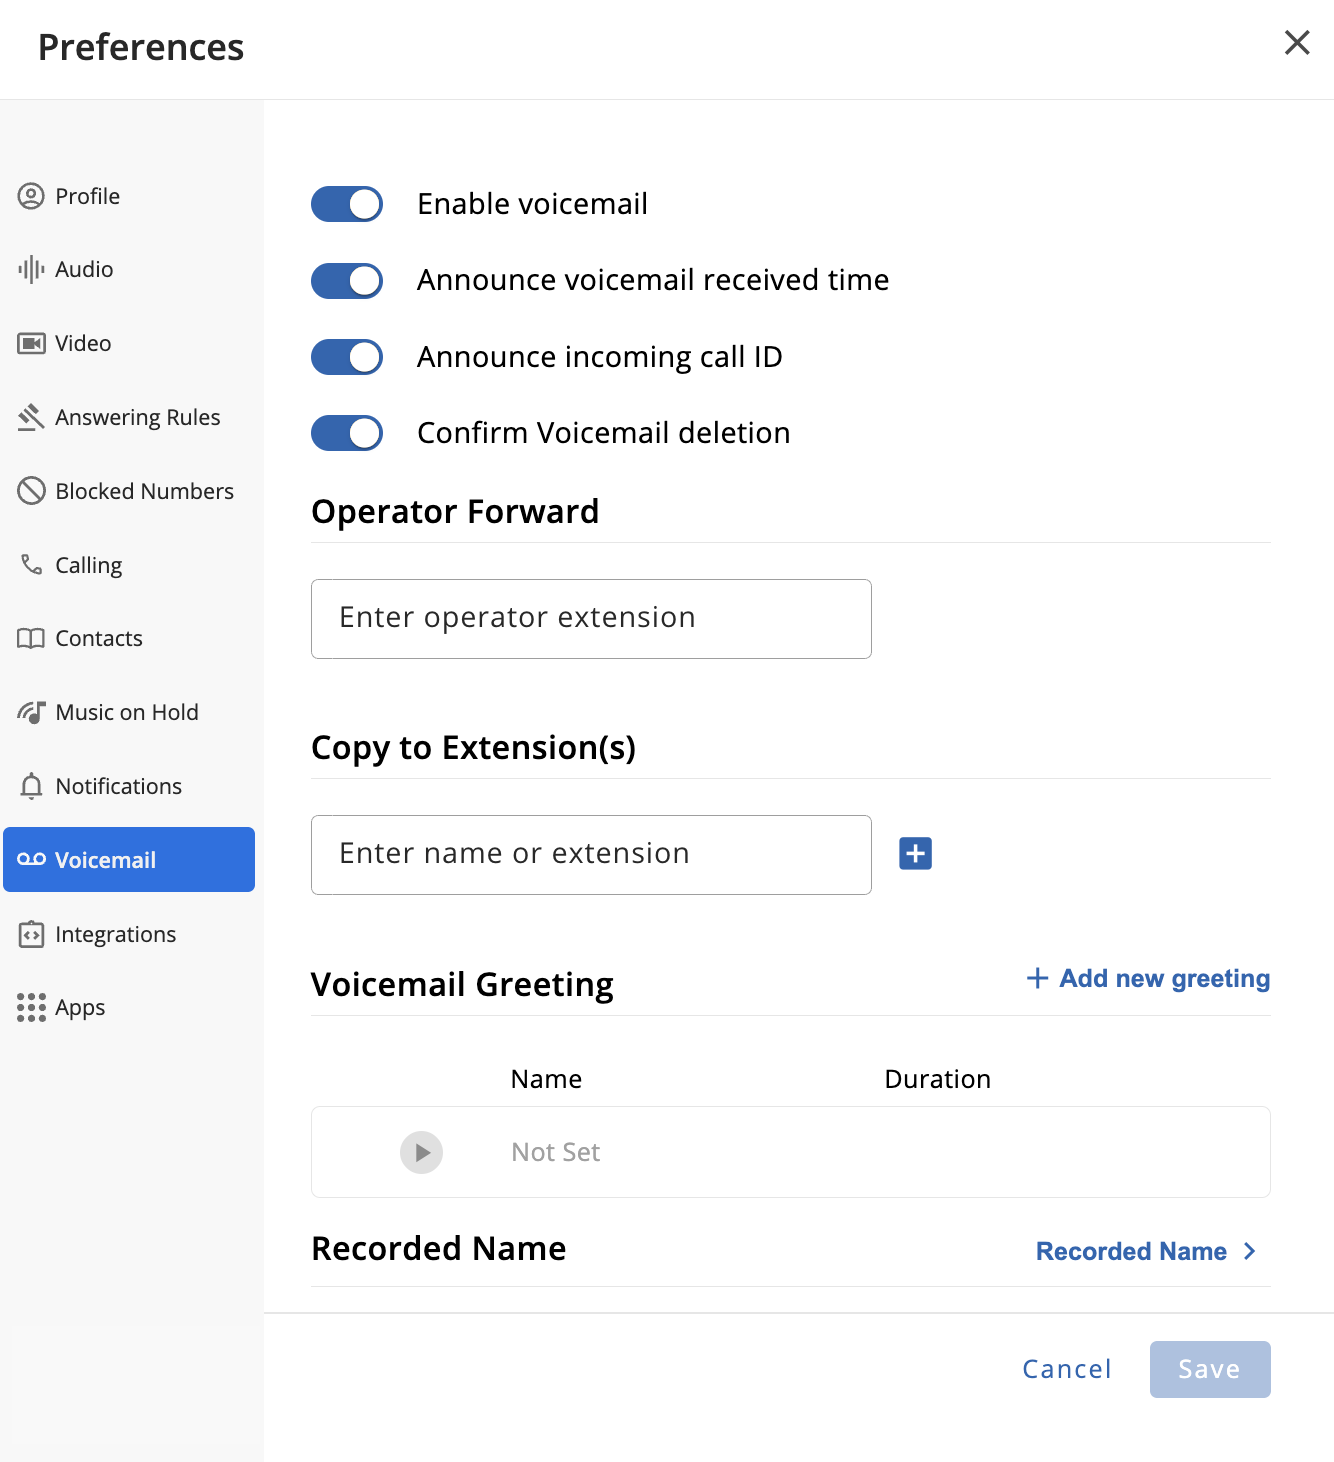
Voicemail Settings
The Voicemail section allows users to manage various related settings, including:
- Toggle Voicemail
- Toggle Sort VM to show the latest message first
- Toggle Announce VM Rec'd time
- Toggle Confirm VM Deletion Message
- Operator Forwarding (Enter extension)
- Copy to Extension(s) (Enter name or extension)
- Voicemail Greeting (Manage/Add)
- Recorded Name (Manage/Add)
- Unified Messaging (Send email options)
- Change Voicemail PIN
When adding a new greeting, users can opt to upload a file, record the greeting from their device, or they may use Text-to-Speech greeting options, where the user can enter the text of the greeting message, the message language, and voice.
 After entering a text-to-speech message, you may listen to the greeting and selected voice by clicking the 'Play' button to the right of the 'Voice' section.
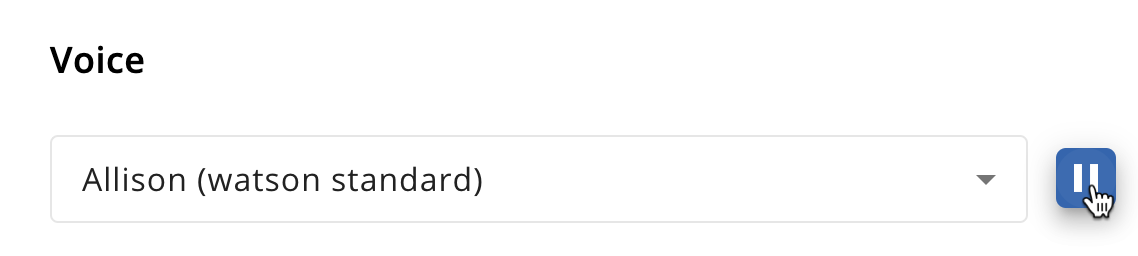
Similarly, when managing a recorded name, users can upload a file, record the name on their device, or use Text-to-Speech for the recorded name.

Finally, when selecting the "Change voicemail PIN" option at the bottom of the page, users are able to set the new PIN right from within the same menu, with the option to show/hide the entered PIN.

Integrations Settings
The Integrations section allows users to install the ConnectUC PWA (Progressive Web App) and the ability to register for One-Click Calling.

Apps Settings
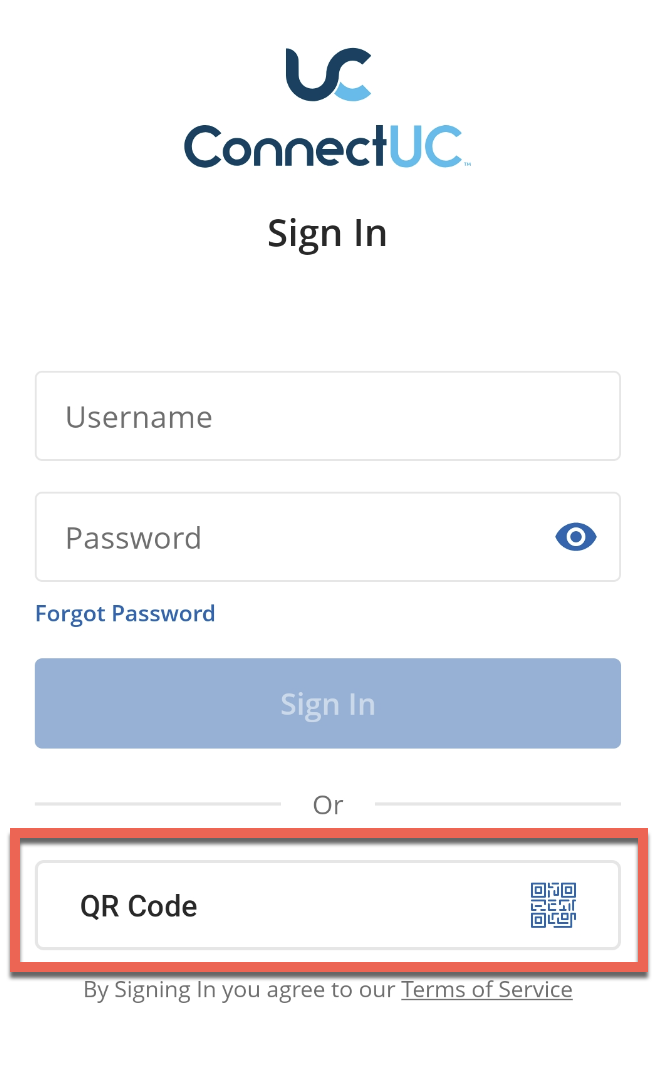
The Apps section provides users with convenient links and QR codes to login via the mobile app (if installed) and download the Mobile and Desktop apps.

Note: When using the Mobile App Login QR code, you will need to first open the mobile app and select the QR code option from the login screen, then scan the code and you will be logged in.
- Scanning the Mobile Login QR Code with your camera app will not work, it must be scanned using the QR code option on the Mobile Login screen.
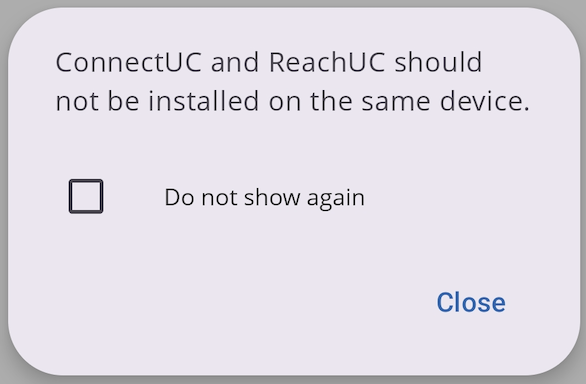
- Additionally, if ReachUC is installed on the mobile device while ConnectUC mobile is installed, you will be prompted to uninstall ReachUC as both applications being installed on the same device may cause issues.