Screen Sharing and Lightboard
Objective
In this article, you will learn how to use Screen Sharing and Lightboard on the Corenexa Desktop and Browser applications.
How To
Screen sharing in CoreNexa Video is available in any meeting or room. A feature unique to CoreNexa Video is that each user in the meeting can share their screen at the same time.
There are two modes of sharing, full-screen and windowed.
Additionally, there’s a feature available in sharing called Lightboard that we’ll also explore.
Starting Screen Share
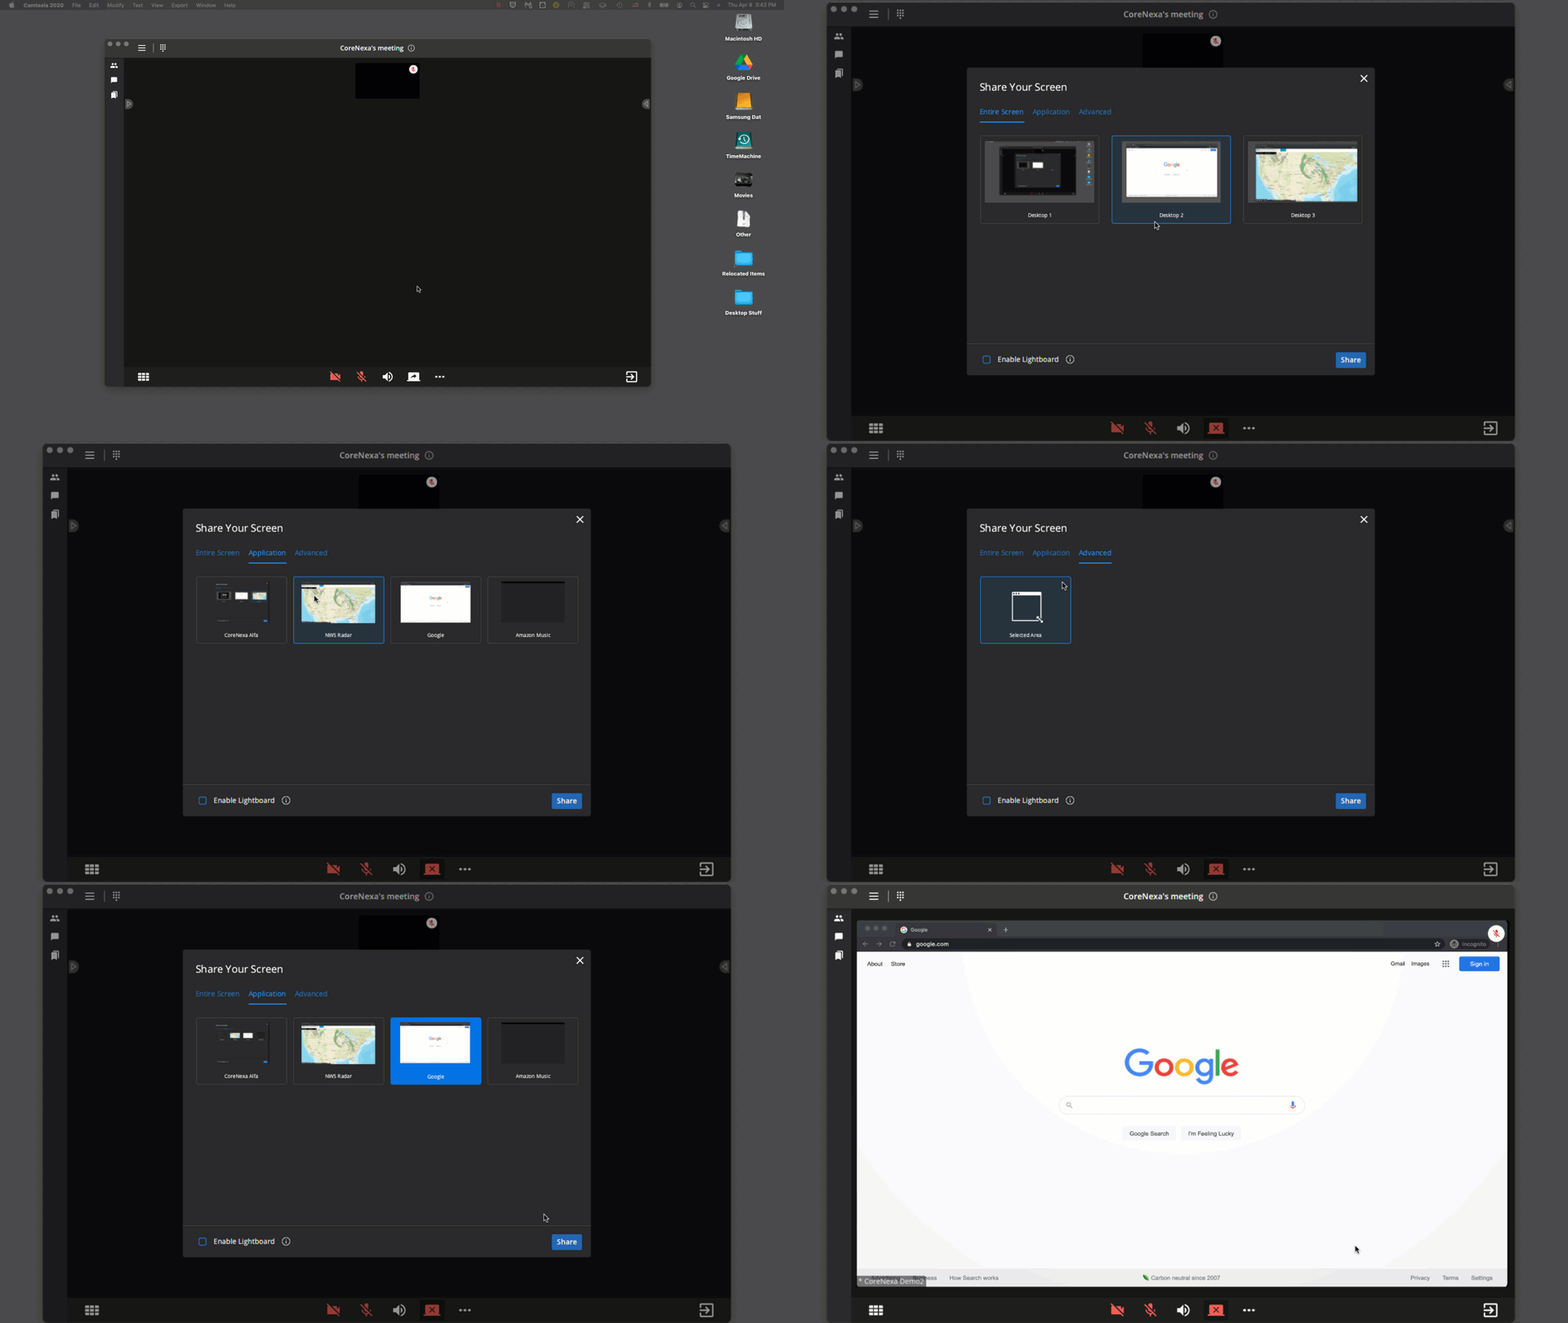
To initiate screen sharing, in the meeting room click on the screen share icon at the bottom of the screen. The user is next prompted with a box where across the top the user can select to share an entire screen, an application, or choose the advanced option of selecting an area of one of your screens to share.

To stop sharing, click on the red screen share icon.
Advanced - Selected Area
The Selected area mode allows the user to control precisely what is shared. To initiate selected area mode, click on the Screen Share icon at the bottom of the screen and then click on Advanced, Selected Area and then click on the Share button.
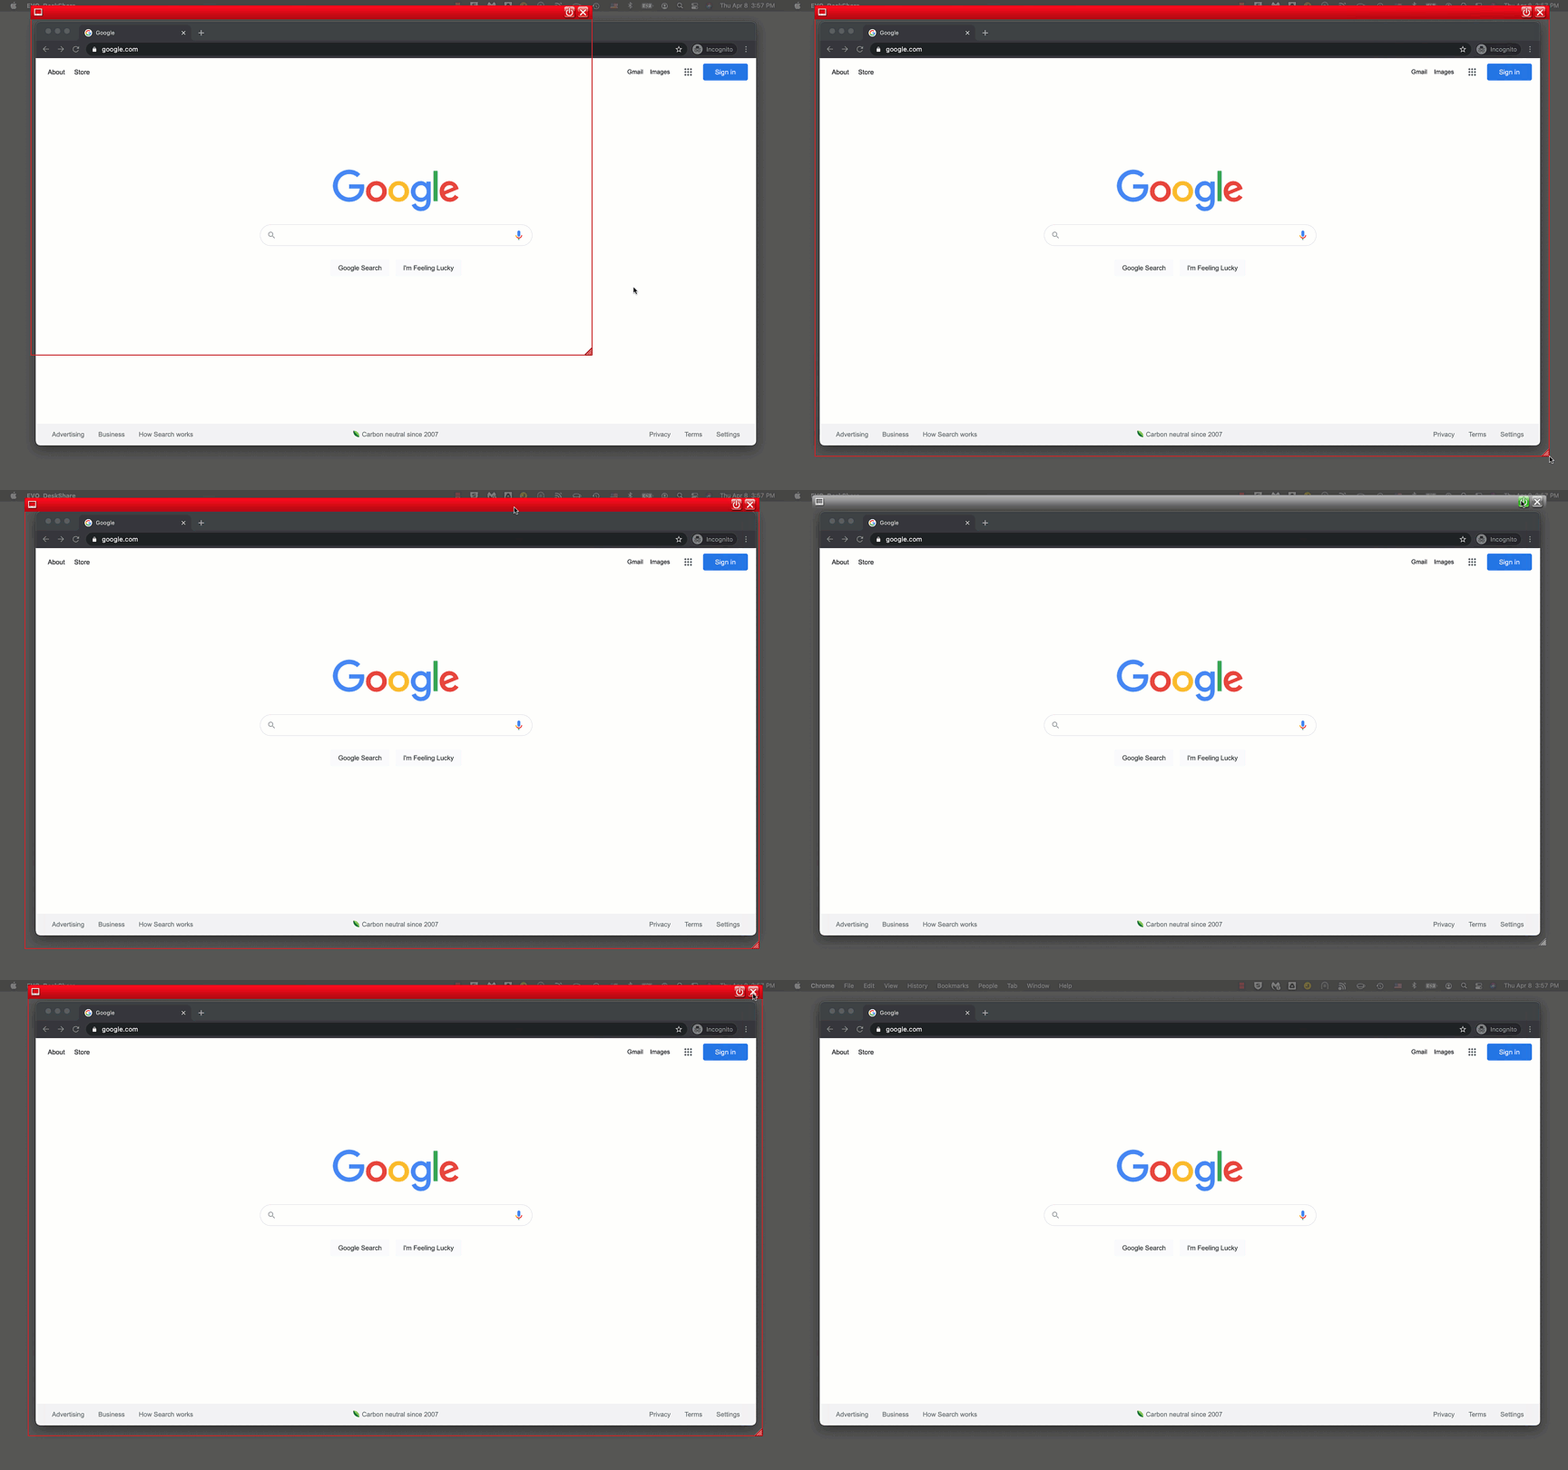
A red window will then appear on the screen (on the monitor that has CoreNexa on it or where it was last positioned). Anything inside the red box will be shared with the rest of the meeting. Double clicking on the top bar toggles the window to full screen or makes it a smaller size.
The sizing handle is in the lower right corner of the box. Click and drag the control to make the window smaller.
Click and hold the top bar to move the window around.
Also in the top bar is a power button used to pause the shared screen and an X to stop screen sharing.

Lightboard
The Lightboard feature for CoreNexa allows the user to engage an audience in an innovative way. With Lightboard a user can replace a color within a screen share window with the output from their camera.
The color that will be replaced is called the ‘key color’. So, if the key color is set to “black” then everything inside the deskshare window that is black will be replaced with the camera.
The following is an example of how this feature can be used.
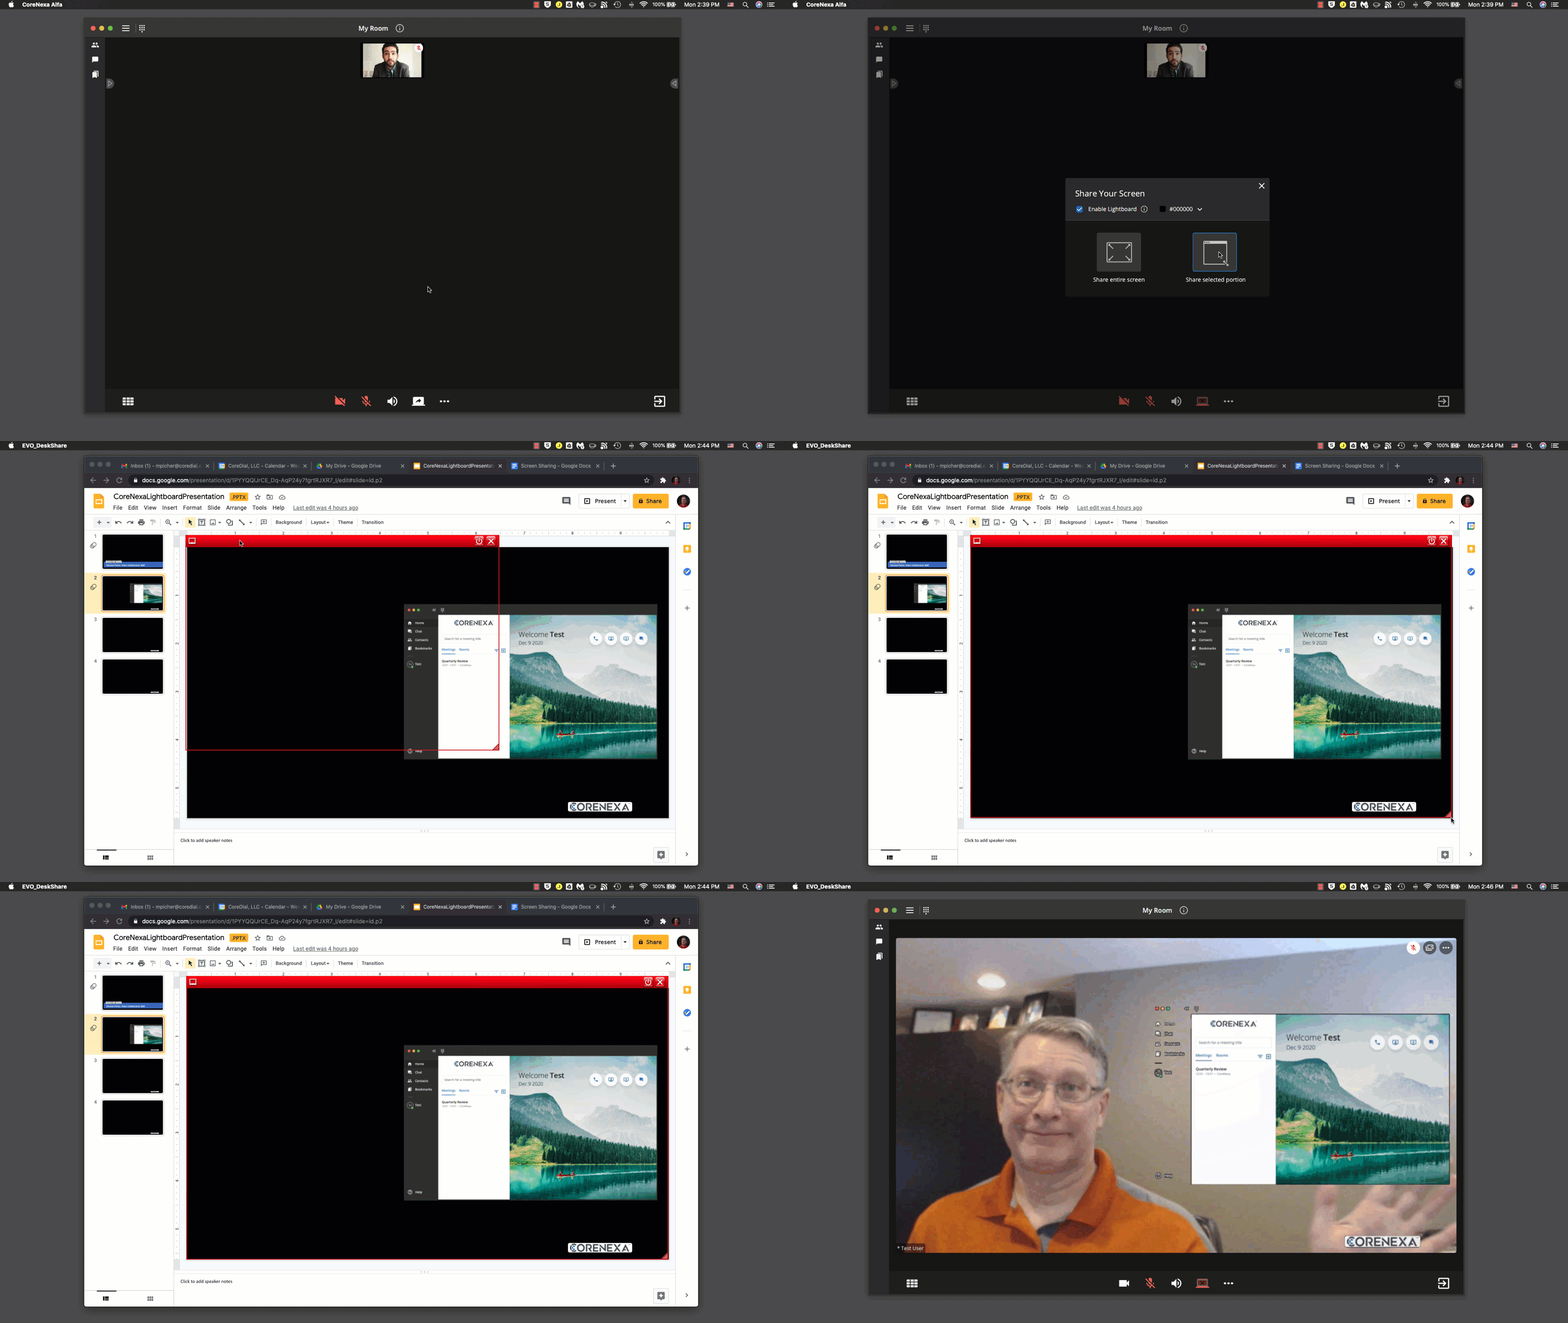
Create a presentation and set the background color for the slides to be your key color. In this example we’ll use black as follows:

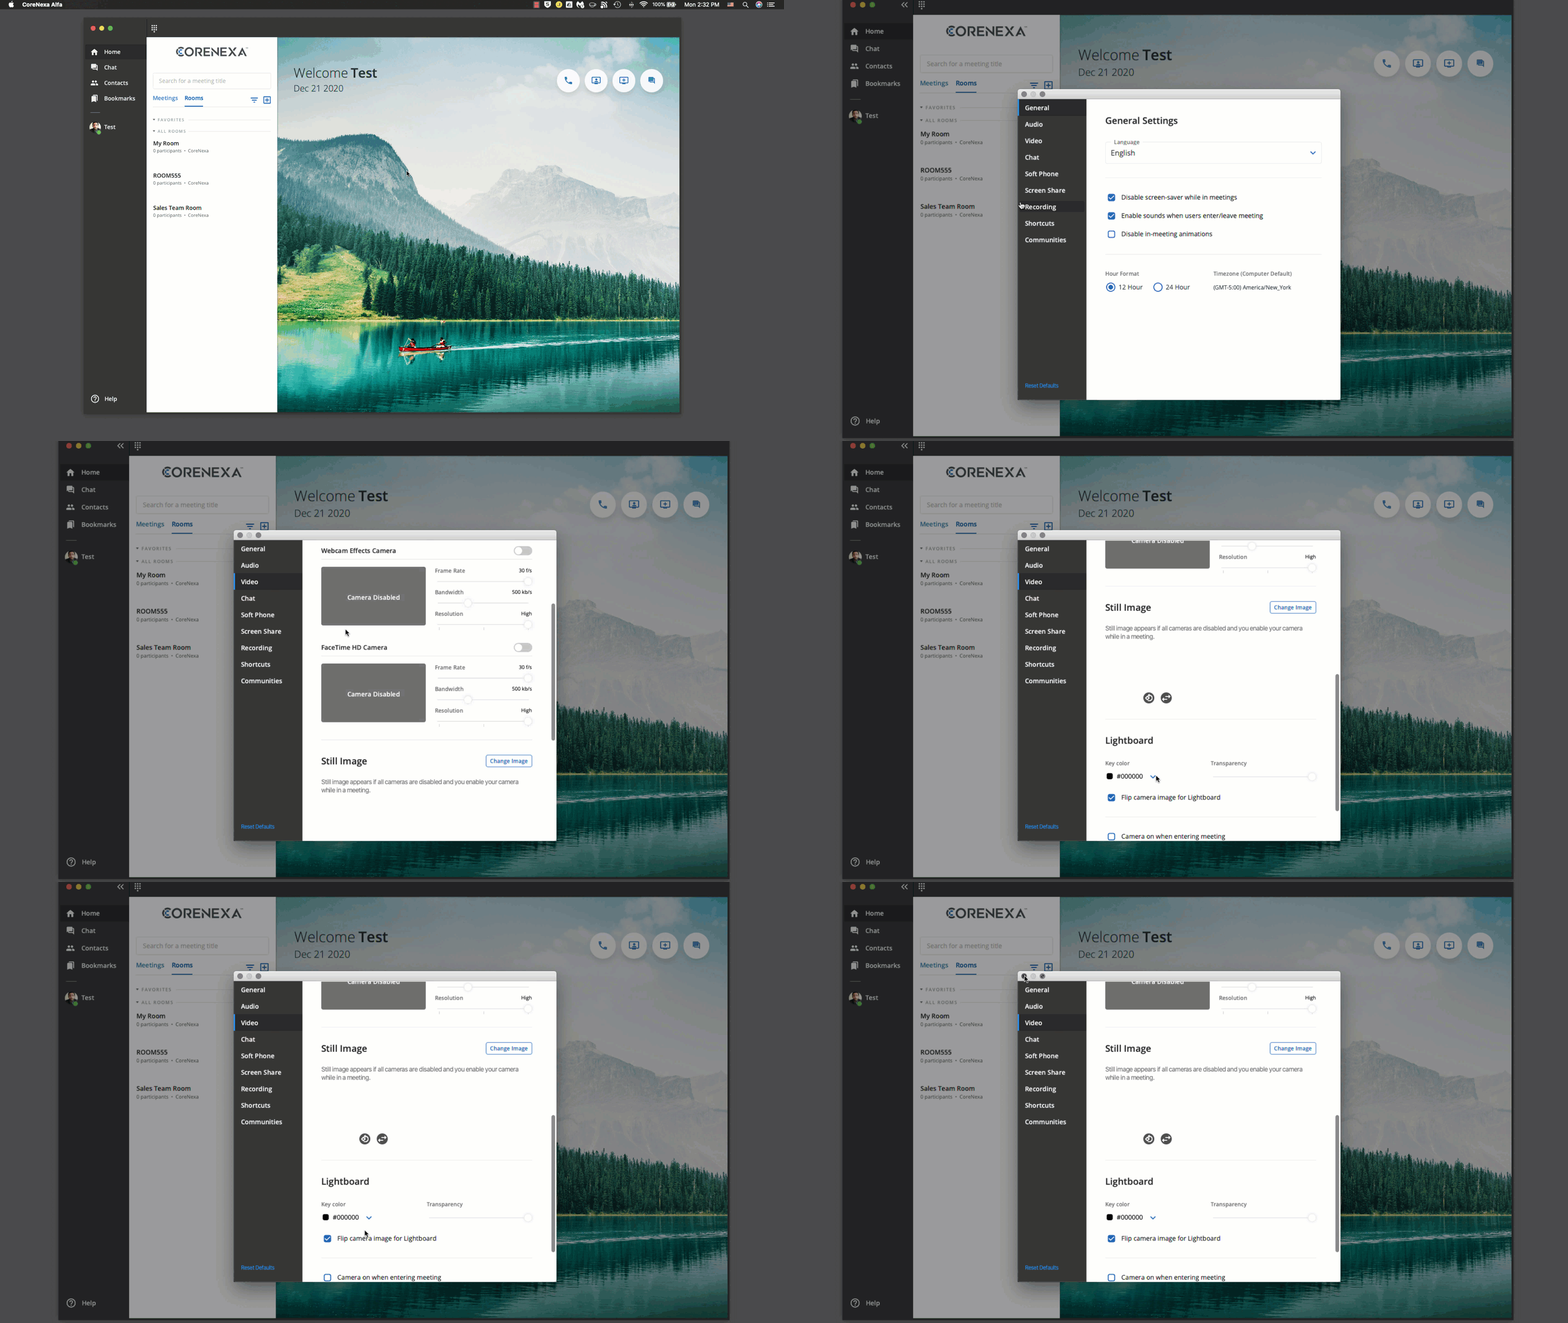
In the desktop client’s Video settings, set the key color you’d like to use. Look for Lightboard in the Video settings page. Set the key color you’d like to use.

To use the lightboard feature, when starting screen sharing select ‘Enable Lightboard’. It’s best to use the ‘Share selected portion’. Once screen share starts, place the red box around your presentation application output.
The participants in the meeting will see your video everywhere there’s black inside the red box.

Lightboard takes a little getting used to in order to build proper presentations. Use larger fonts than you might normally use and keep text on the screen to a minimum.
