Getting Started on Corenexa
Objective
Objective of the article
How To
Getting Started on CoreNexa Desktop Client
Learn how to quickly get started with the CoreNexa Desktop client. It unifies video collaboration, instant messaging and voice communications into a single easy to use application. CoreNexa enables employees to stay connected while working from home. It delivers the best in quality for voice, video and desktop sharing within a single communications application.
CoreNexa Desktop Client (Windows, Mac or Linux)
Sign In and Join a Meeting
Launch the CoreNexa Desktop Client from your Applications or Start Menu. After launching CoreNexa the user may see a blue bar, this indicates that the application is updating. The user will then be prompted to Sign In or Join a meeting.
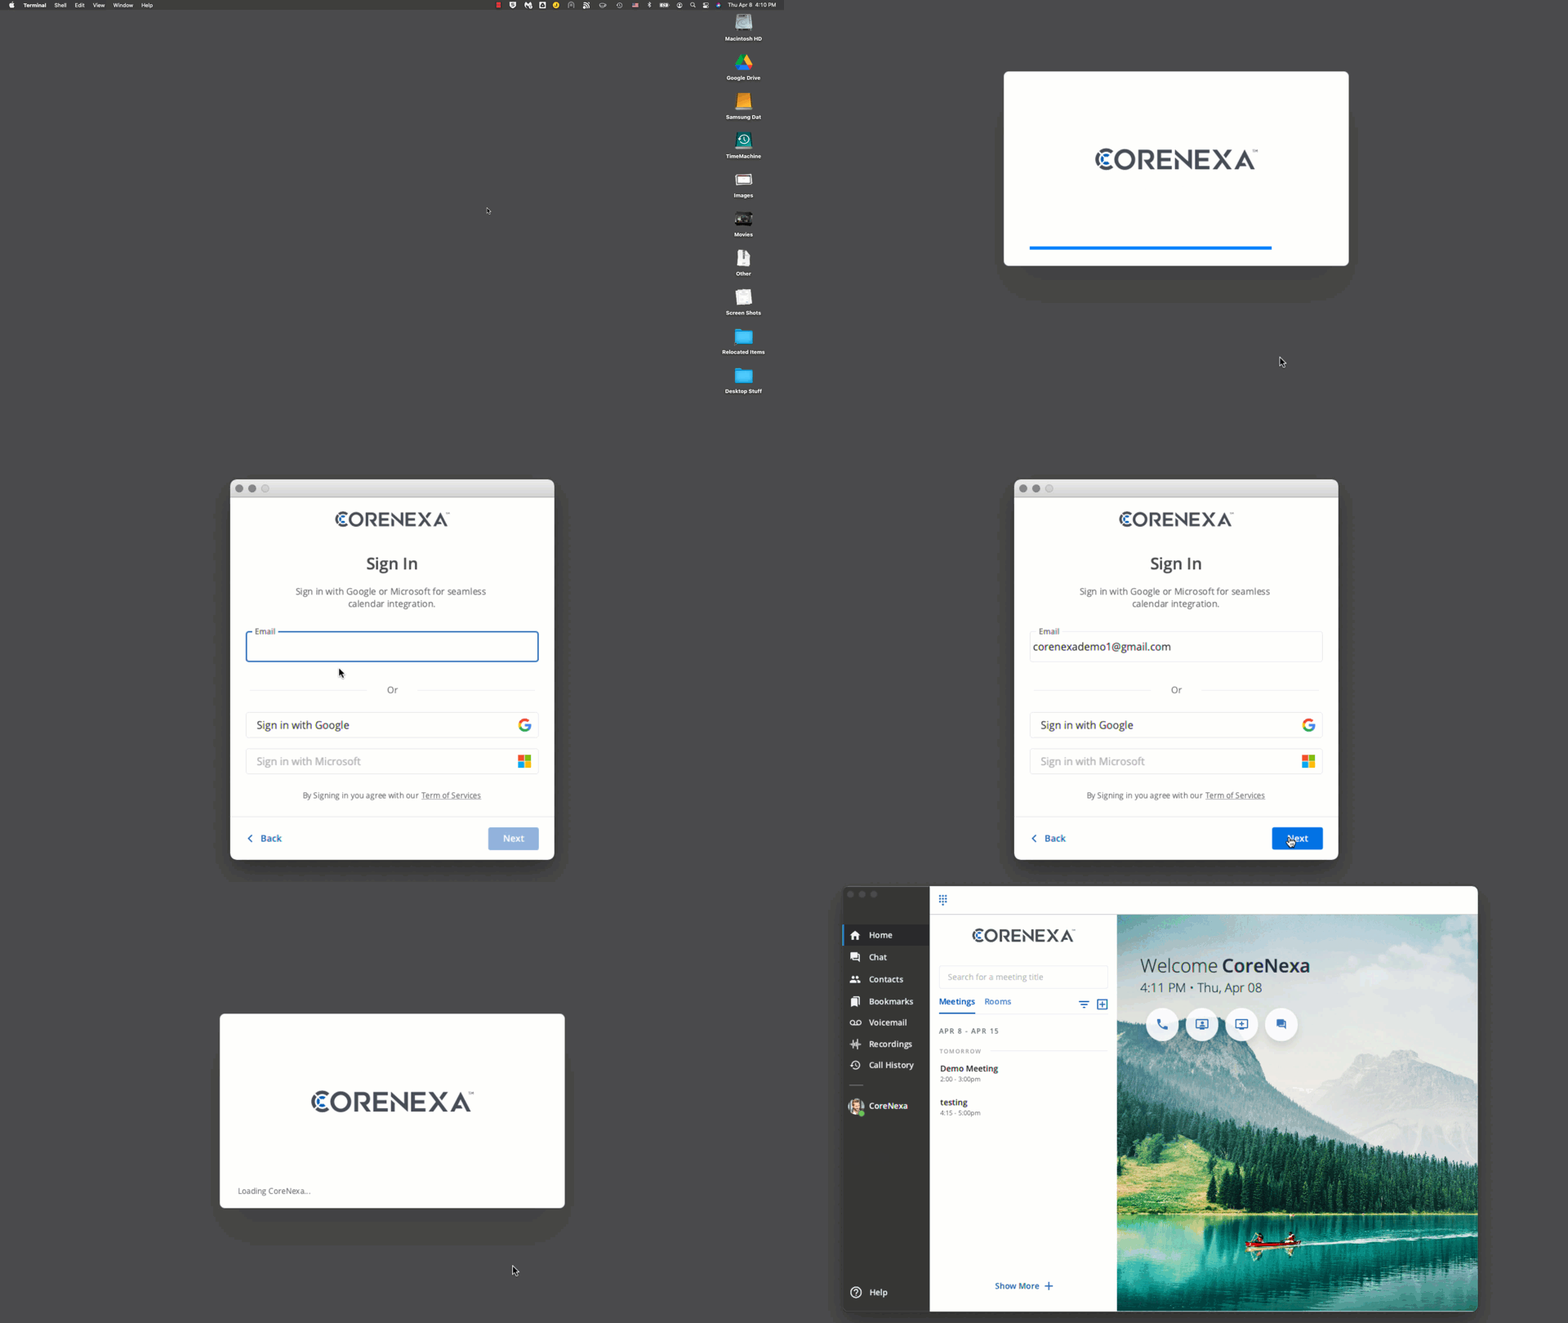
The “Join a meeting” option is typically used by guests to simply enter a meeting by providing a meeting number, meeting PIN, and a name.
Home
After signing in, you will see the home screen as follows:

There are quick application links in the upper right hand corner of the home screen. A tool tip will show if you mouse over them

Phone Call: Place a phone call with the phone handset icon.
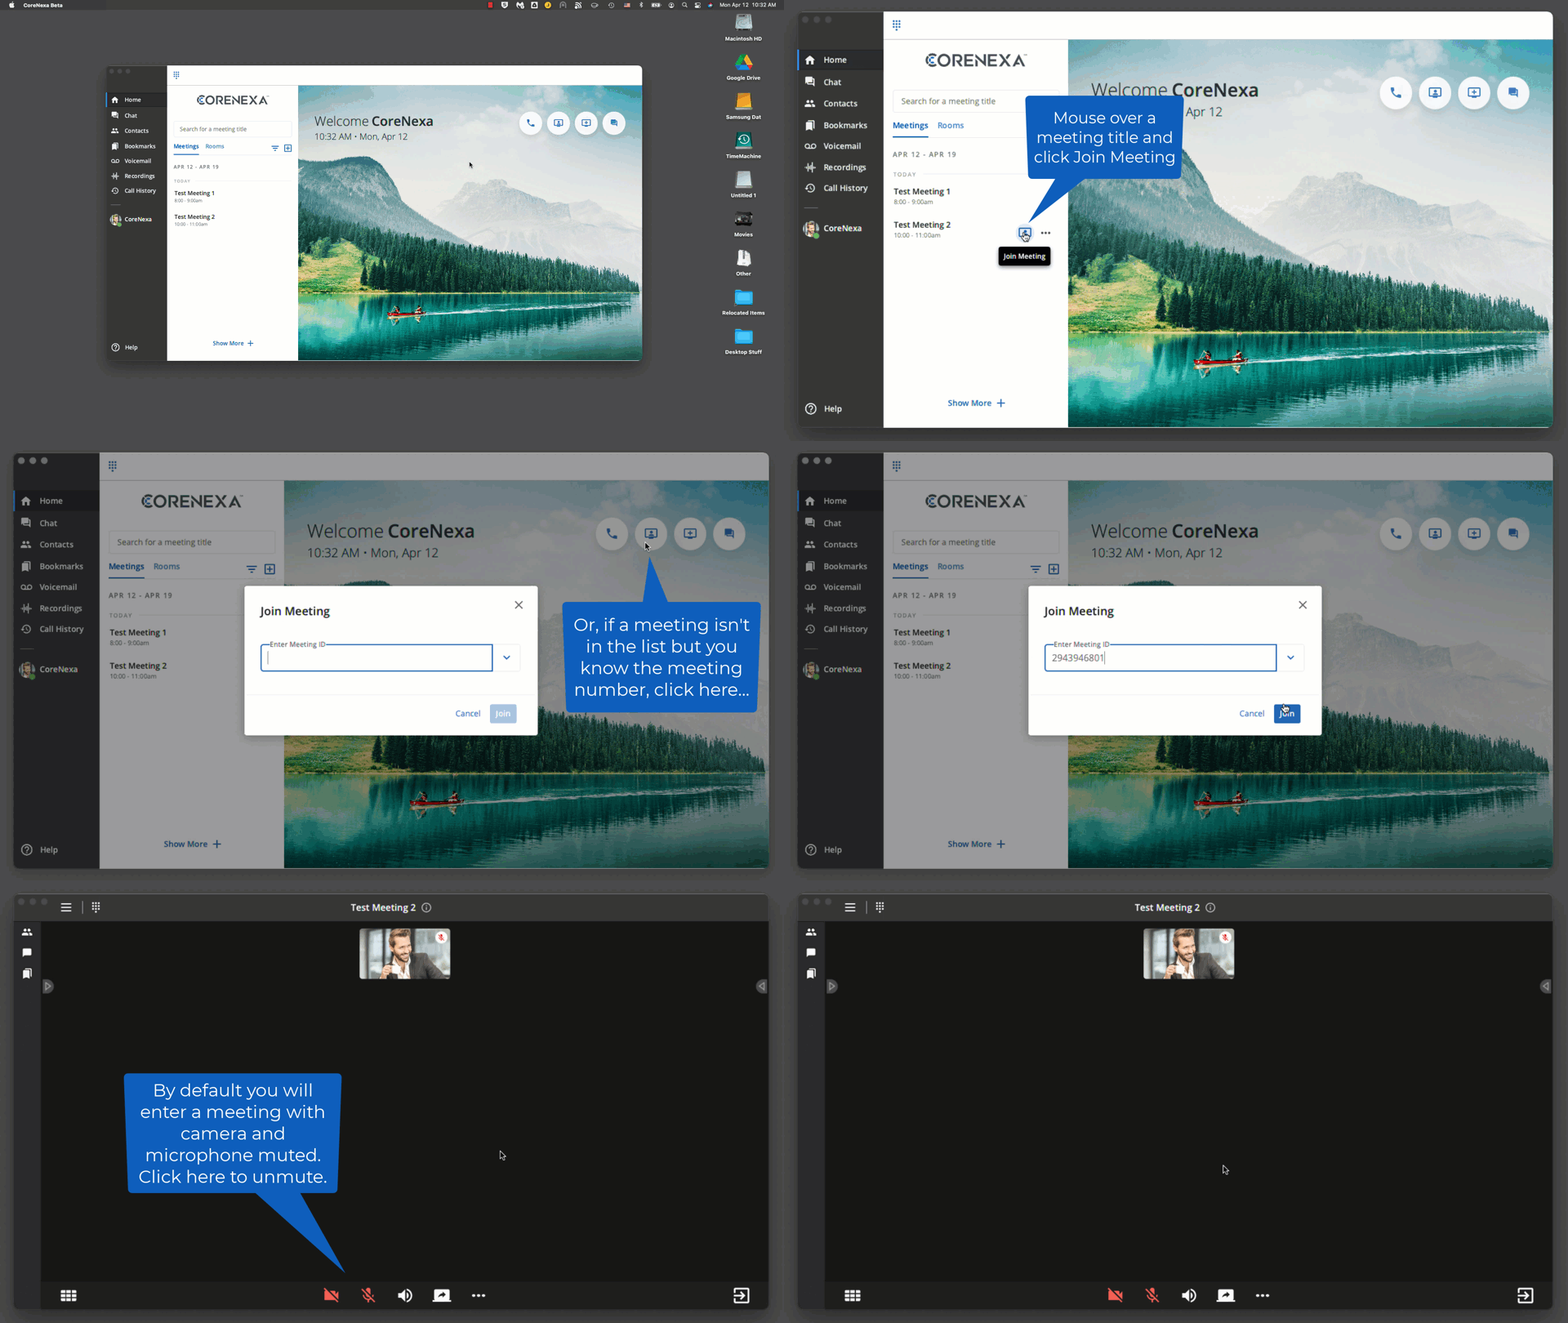
Join a Meeting: Join a meeting with the meeting id.
Create a Meeting: Create an instant meeting, scheduled meeting or a permanent room.
Chat: Open the chat interface.
Meetings and Rooms
Instant and Scheduled meetings will appear on the home page under Meetings. Scheduled meetings will appear 10 minutes before the meeting starts.
If you have integrated your Google account, the Meetings space by default will show a copy of your Google Calendar.

Rooms are meetings that last for an unlimited amount of time. They’re useful for teams of people or virtual rooms for actual physical rooms.
Different filters are available to control which meetings you can view. My Google Calendar shows a copy of all of your calendar items. My Scheduled meetings displays all CoreNexa video meetings that have been scheduled by this account. All Active meetings shows all currently running meetings in the user's community (scheduled meetings appear 10 minutes before the scheduled start time).

To join a meeting, hover over the meeting with your mouse and a Join button will be displayed as shown below.
Chat
The individual and community chats can be found by clicking on Chat in the left side menu.

Chats with other individuals can be started on the Contacts screen as shown below. Locate the indvidual to chat with and click on the ‘More’ three dot button beside their name, select ‘Start a chat’.
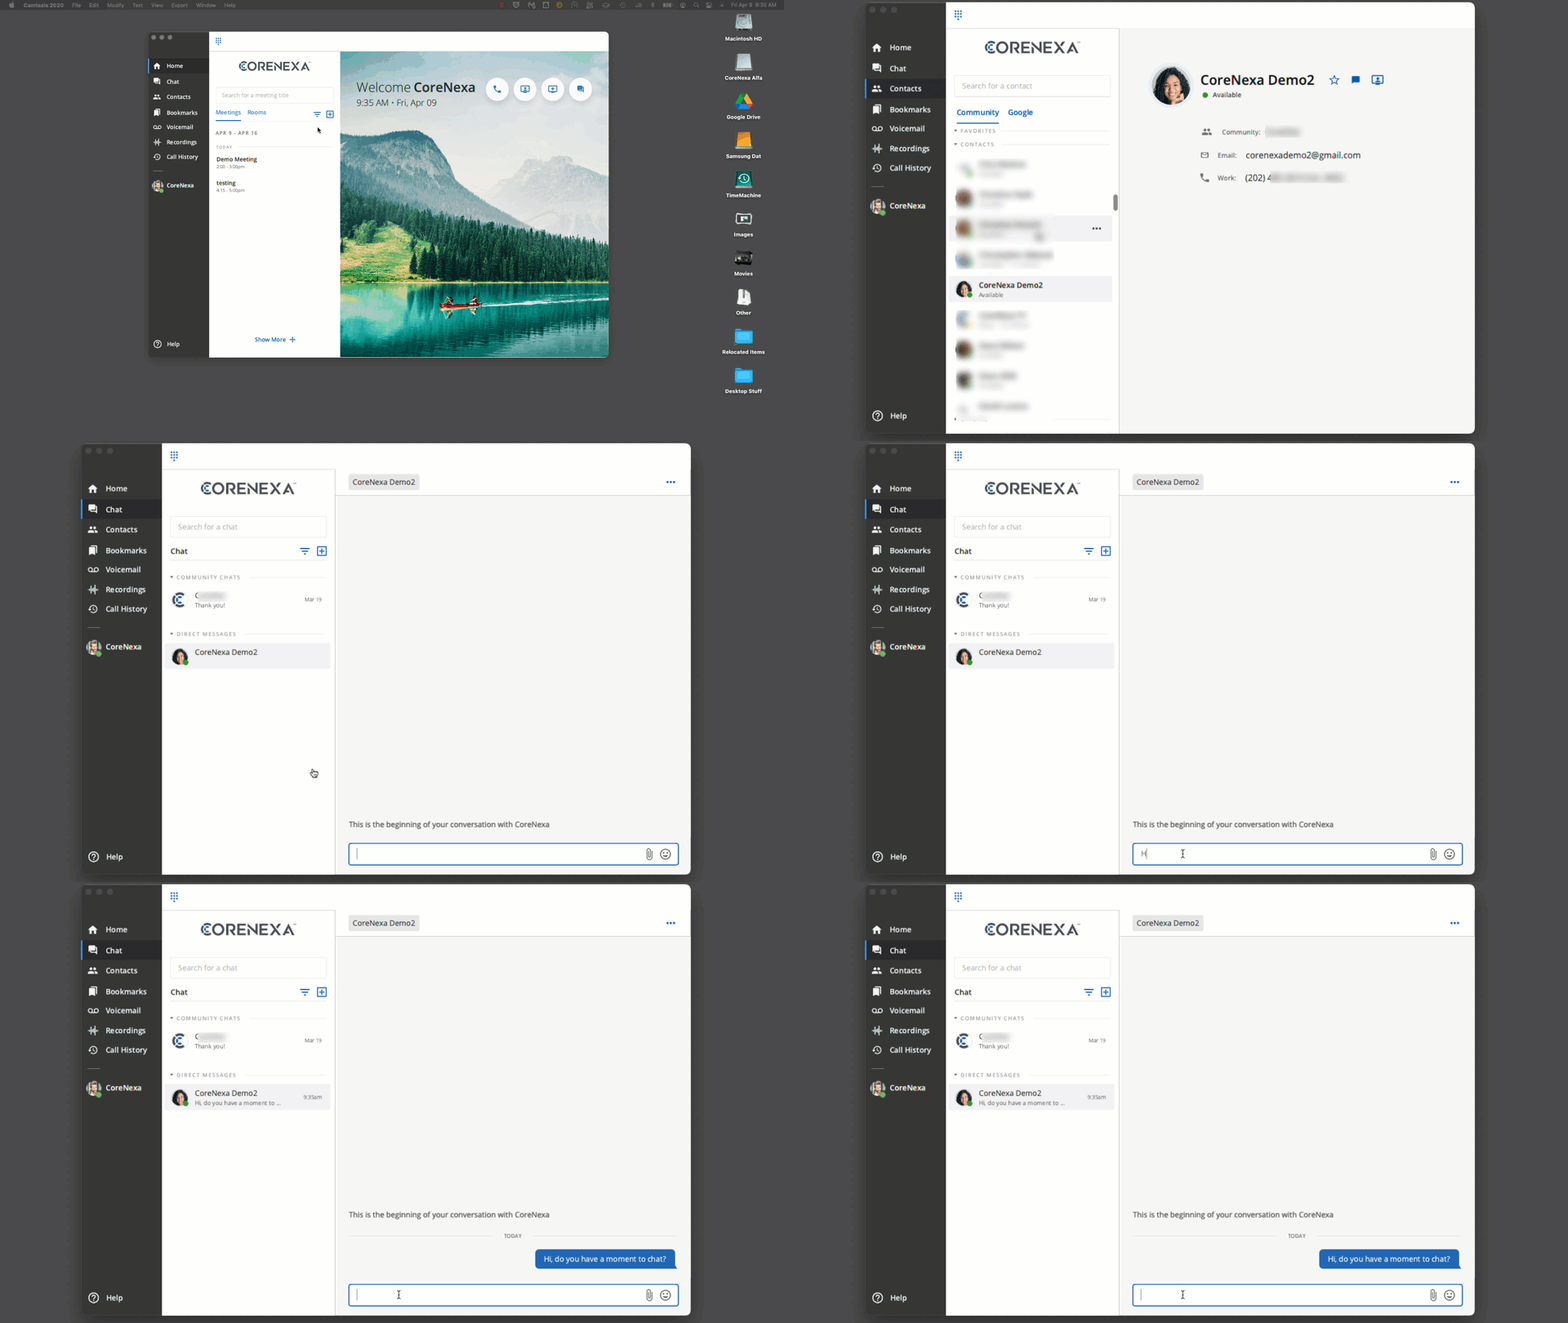
Clicking on Start a Chat on a contact will initiate a chat session. Likewise Start a Meeting will create an adhoc video meeting with that contact.
Bookmarks are a way to make web applications available in CoreNexa. They can be configured for an account or tied to particular meeting rooms.
To create a personal bookmark, click on Bookmarks in the left panel and then enter a URL or use one of the pre-selected web applications. Personal bookmarks follow the user to every meeting and room. They are always available.
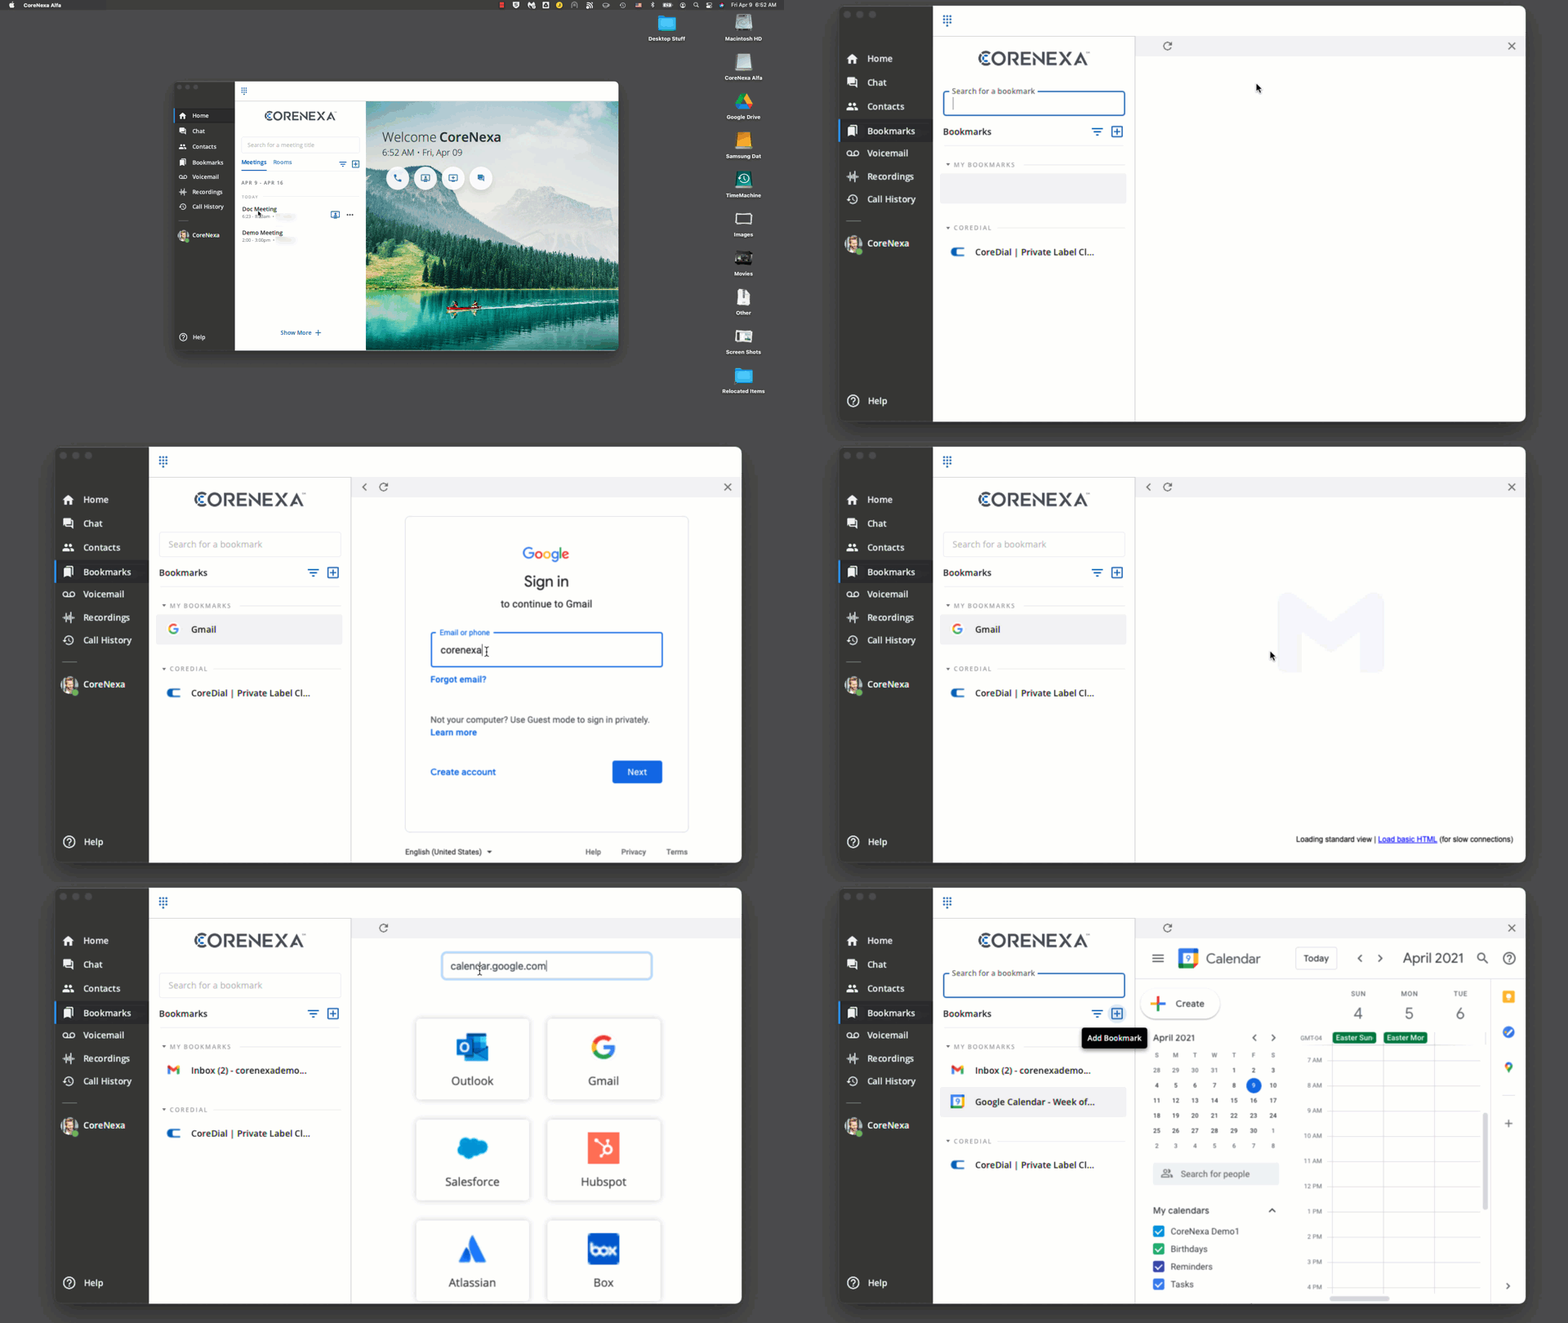
While in a meeting or room you’ll also see a Bookmarks icon in the left panel. This will allow the user to configure specific bookmarks to be available in that room each time they visit that room.
The phone dial pad icon at the of the application appears when the CoreNexa desktop client is successfully registered to a SIP phone system, such as CoreNexa's integrated voice platform. In the left side menu you will find access to Voicemail, Recordings and Call History if you are utilizing CoreNexa for phone system functionality.
Once the call is connected, mute, hold, add a party, transfer, and hangup call controls will appear at the top of the page on the right hand side.
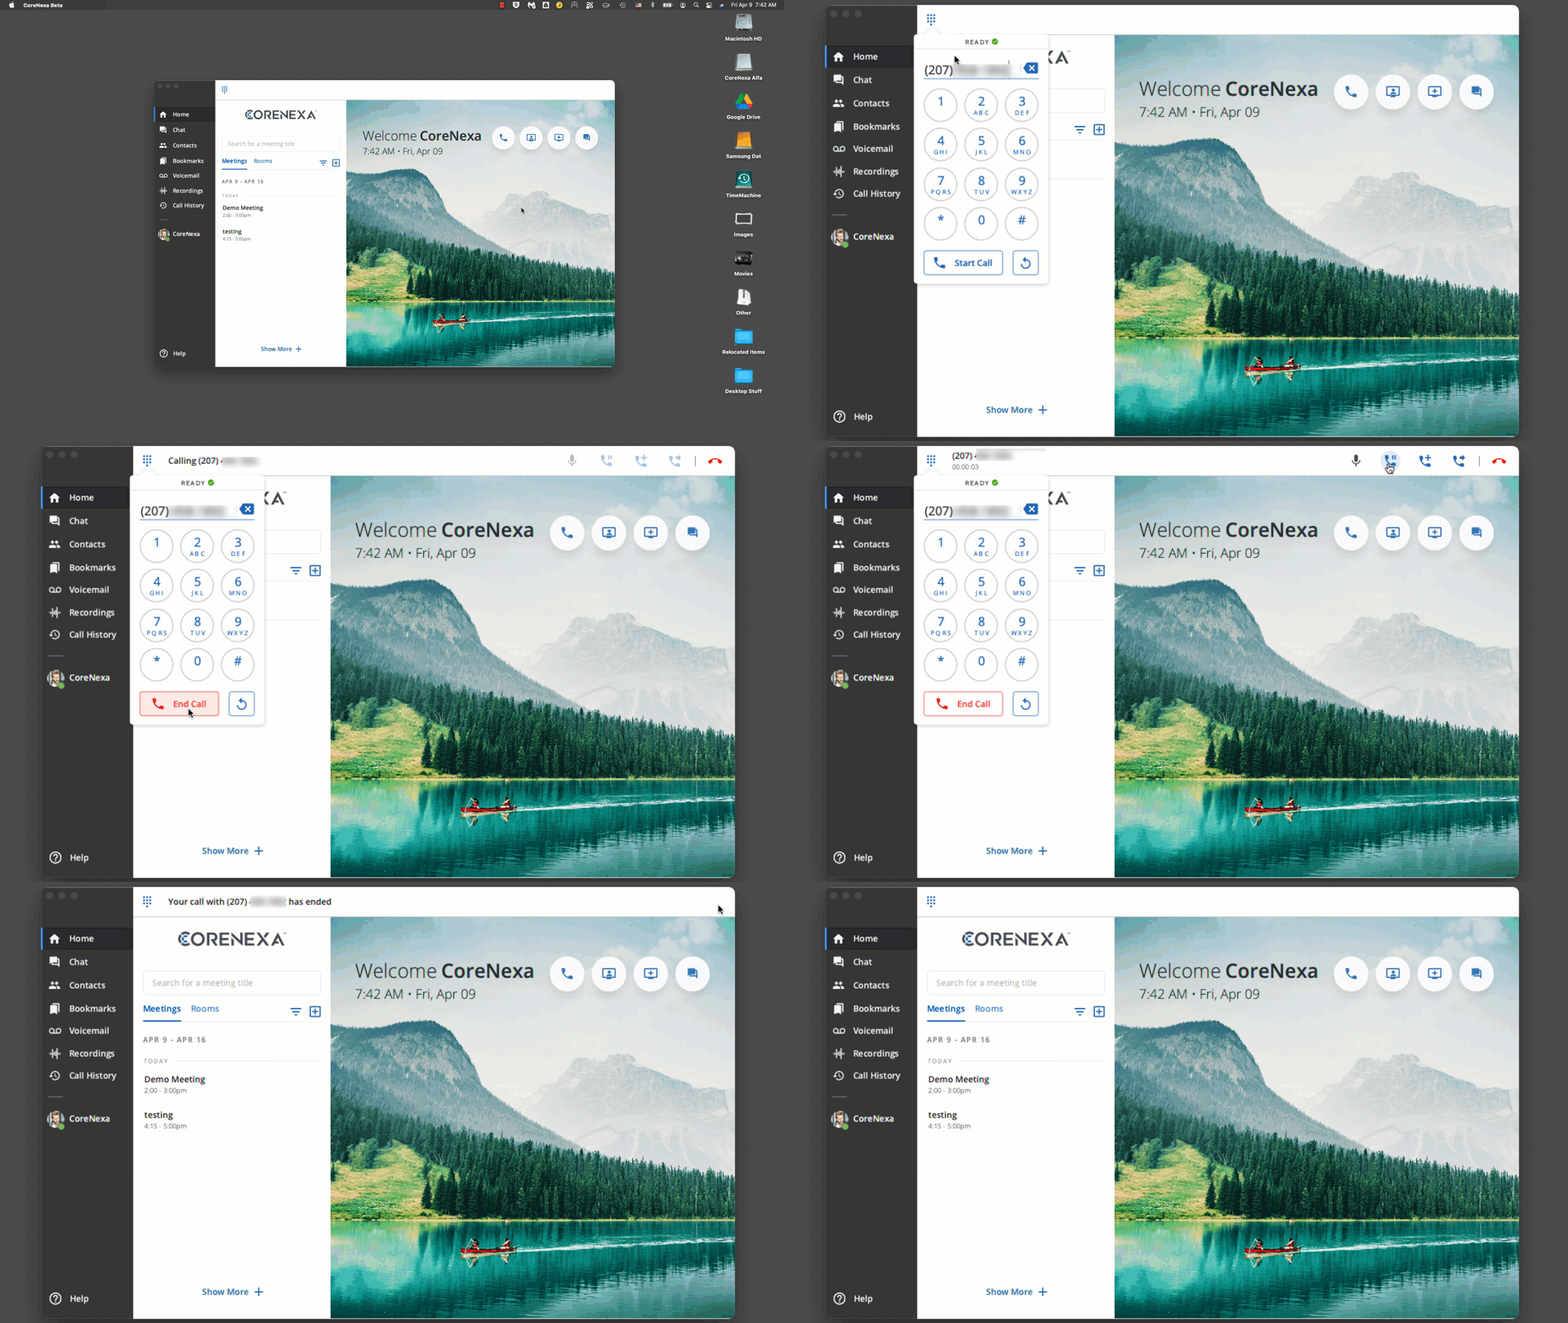
Third party phone systems can be utilized by entering SIP credentials in Preferences → Soft Phone. If this feature is used, there is no integration for third party voicemail, recordings, or call history in the left side menu.
The in-meeting controls are located below the video tiles. There you find (from left to right) Video Layout, Camera Enable/Disable, Microphone Mute/Unmute, Sound Enable/Disable, Screen Share, Settings and to the far right Exit Meeting.

There are several video layouts available including Grid, Speaker, Click to Select, Horizontal, Limited Bandwidth and Disable all remote videos.
