PBX Admin Guide - Working with Time Frames
8. Working with Time Frames
Using time frames, you can tell the system about the times when your office is open, closed, or celebrating a holiday.
Time Frames will not be activated until you assign them to either an Answering Rule of a routing user or an Auto-Attendant Greeting. Once applied, the first corresponding time frame that matches will become active, prioritized from top to bottom. Please note that only one time frame can be active at a given time. If you wish to alter the priority, use the up/down arrows as necessary.

- Displaying the Time Frames Page
- Working with Time Frames
- Adding Time Frames
- Editing Time Frames
- Deleting Time Frames
- Viewing Begin and End Dates
Displaying the Time Frames Page
All time frame tasks are performed from the Time Frames page. To display this page, click the Time Frames  icon on the menu bar.
A search field at the top-left of the page allows you to review a specific user's personal time frames by entering a user time frame, and then clicking the magnifying glass icon.

The  button at the top-right side of the page refreshes the information on the page.
From the Time Frames page, you can:
- Add time frame.
- Edit time frames.
- Delete time frames.
- See begin and end dates for a time frame.
Caution: Once a Time Frame is deleted, it will not revert back to default settings. Time Frames must be set in order to function. Please remember to add a Time Frame after one is deleted.
Working with Time Frames
When you create a new time frame, you assign a unique name to it and then specify one of the following times associated with the time frame:
- Always = time frame applies to all hours of every day (24/7/365).
- Days of the week and times = commonly used to define office open hours such as Monday-Friday 9am – 5pm. Each day has its own check box. Check the days to which the time frame will be applied, and then use slide bars to define the time ranges for each checked day.
When you check a check box, a blue control bar covers the times 9AM to 5PM for that day. Drag this control to change the time according to your requirements. If you need to add more ranges for a day, click the icon to the right of the time range.
As an example, a time frame called Open Hours, could cover the period of 9 AM to 5 PM hours for the days Monday through Friday.
This time frame might be used with another time frame called Holiday, which covers holiday periods. You might even create a time frame called Closed Hours (default already exists), which would be an “Always” rule but would not always be active since it can be set for lower priority than Holiday or Open Hours.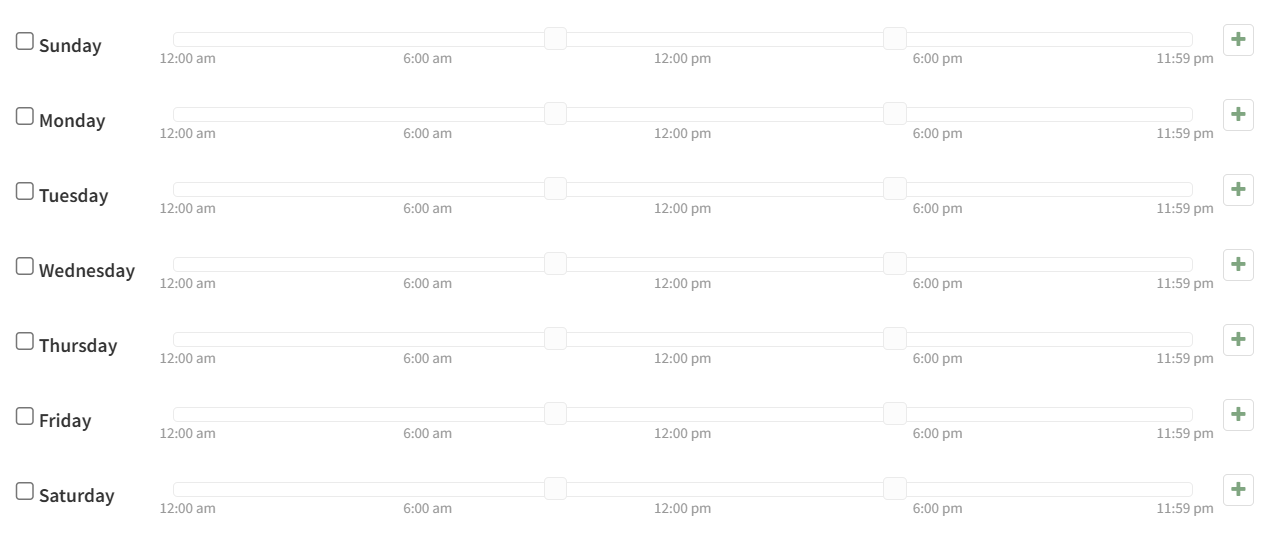
- Specific dates or range = commonly used to define holidays or other special events such as New Year’s or a training closure. Use pop-up calendars to select the To and From dates with a time slider to specify when the time range will apply. You can add more dates by using the Add date range
 icon or remove them with the Remove
  icon.
icon.
Adding Time Frames
To add time frames:
- From the Time Frames page, click the Add Time Frame button. The Add a Timeframe pop-up window appears.
- Complete the fields (see Table 8-1 below).
- Click Save.
Table 8-1. Adding/Editing Time Frame Settings
| Setting |
Description |
|---|---|
| Name | Adding a time frame: Enter a name for this time frame. The name should allow you to differentiate this time frame from other time frames you configured. Editing a time frame: read-only field that shows the name of the time frame. |
| When | Select when the time frame will be applied. Choices are:
|
Editing Time Frames
There might be times when you need to edit time frames. For example, you might want to change when they occur.
- From the Time Frames page, either:
– Click a name
OR
– Click the edit icon at the far right of the time frame entry. Either step displays the Edit pop-up window.
 - Complete the fields (see Table 8-1 above).
- Click Save.
Deleting Time Frames
If you no longer need a time frame, you can delete it from the system.
- From the Time Frames page, hover over the time frame, and then click the delete
 icon at the far right of the row. A confirmation prompt appears.
 - Click Yes to delete the time frame or No to retain it.

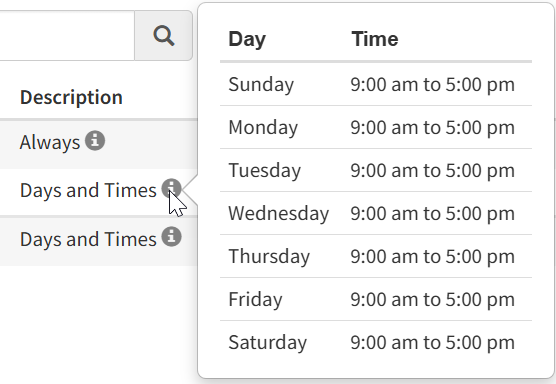
Viewing Begin and End Dates
To view the beginning and end dates for a time frame:
From the Time Frames page, hover over the description. A pop-up window will appear showing the beginning and end dates for the time frame.