
PBX Admin Guide - Working with Reporting
11. Working with Reporting
The Reporting page is where you can view the call history, audit logs, and content logs for the domain.
- Displaying the Reporting page
- Viewing the Call History
- Viewing the Audit Logs
- Viewing the Content Logs
Displaying the Reporting Page
All reporting tasks are performed from the Reporting page. To display this page, click the Reporting  icon on the menu bar.
The refresh button at the top-right side of the page refreshes the information on the page.
Viewing the Call History
From the Reporting page click on the Call History tab to view the details of the calls that have happened within the domain for a certain period of time.

From here you can:
- Filter the call history
- Export the call history for the domain
- Scheduling an export of the call history
- Listen to a call recording
- Download a call recording
- Viewing a Call Recording Transcription and Summary (BETA)
- Look at the call trace
- Look at the Cradle to Grave information
- Add notes to a call
Filtering Call History
Using the Filter button, you can filter your call history and view only the events of interest to you.
- From the Call History tab, click the Filters button. The Call History Filters pop-up window appears.
- Fill in the fields you need (see Table 11-1 below).
- Click Filter and the Call History page will show only the events that match your criteria. If no events match your criteria, a message informs you that there are no matches to your filter.
Table 11-1. Call History Filter Settings
| Setting | Description |
|---|---|
| From | The beginning date and time for the events you want to view. |
| To | The end date and time for the events you want to view. The maximum From-To range is 31 days. |
| User | Enter the name or extension you want to view. |
| Department | Enter the name of the department you want to view. |
| Site | Enter the name of the site you want to view. |
| Caller Number | Enter the caller number you want to view. |
| Dialed Number | Enter the dialed number you want to view. |
| Call Type | Enter the type of call you want to view. Choices are:
|
Exporting Call History
You can export the call history in CSV format, and then open the information in Microsoft Excel for further manipulation.
- From the Call History tab, click the Export button.
- When prompted, click Save.
Scheduling an Export of the Call History
You can set to export the call history on a certain date and time and/or set it to repeat for a set schedule. The export of the call history will be in a CSV format.
- From the Call History tab, click the Scheduled Exports button.
- Click the New Export button in the next page.
- Fill in the fields regarding the schedule (See Table 11-2 below).
- Click Add when done.
Table 11-2. Schedule New Export Settings
| Setting | Description |
|---|---|
| Basic tab | |
| Name | Provide a name for the schedule. The name can be no more than 64 characters long. No special characters other than a hyphen, space, or underscore. |
| Enabled | Select either Yes or No. |
| Type | You can choose between the following:
|
| After Completion |
After scheduling the export, choose where the data should be exported to: "Do Nothing" (which downloads the data to the portal only), "Email Attachment", "FTP" (File Transfer Protocol) server, or "SFTP"(Safe File Transfer Protocol) server. FTP/SFTP Info:
|
| Email Notification | This field is required if “Email Attachment” was chosen for After Completion. Will send an email to the desired email address notifying that the export is ready to be downloaded. If the user has “After Completion” as “Email Attachment”, then the email will contain the attachment. |
| The email address where Email Notification is sent. | |
| Options tab | |
| User | Filter calls pertaining to this user. Leave blank to see call history from all users. |
| Include Inbound Calls | The default is "Yes". Toggle to choose whether to include inbound calls in the export or not. |
| Include Outbound Calls | The default is "Yes". Toggle to choose whether to include outbound calls in the export or not. |
| Include Headers | The default is "Yes". Toggle to choose whether the generated .csv file should include column headers or not. |
| Off-net Calls Only | The default is "No". Toggle to choose whether to include only off-net calls or not. |
| Format | Format of the csv export. Is currently only set to deliver the Advanced format. |
Listening to a Call Recording
If a call has been recorded a listen  icon will appear on the right of the call entry which when clicked will replay the recording.
Download a Call Recording
If a call has been recorded a download  icon will appear on the right of the call entry which when clicked will initiate a download of the recording in a WAV format audio file.
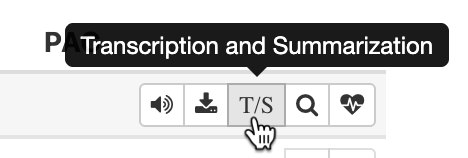
Viewing a Call Recording Transcription and Summary (BETA)
Note: This feature is currently only available for Site Manager, Office Manager, and Call Center Supervisor user roles.
If a call has been recorded a Transcription/Summary icon  will appear to the right of the call.
If the selected call has not been transcribed yet, the user will be presented with the option to Generate Transcription.
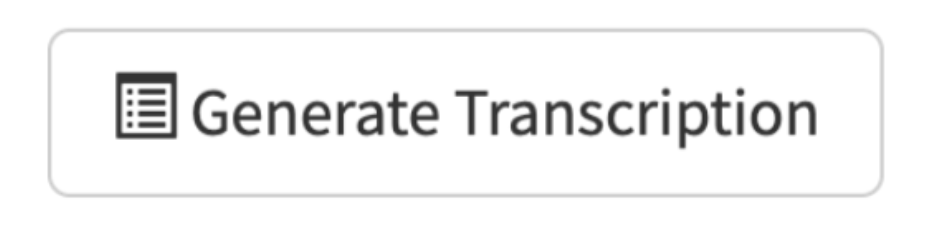
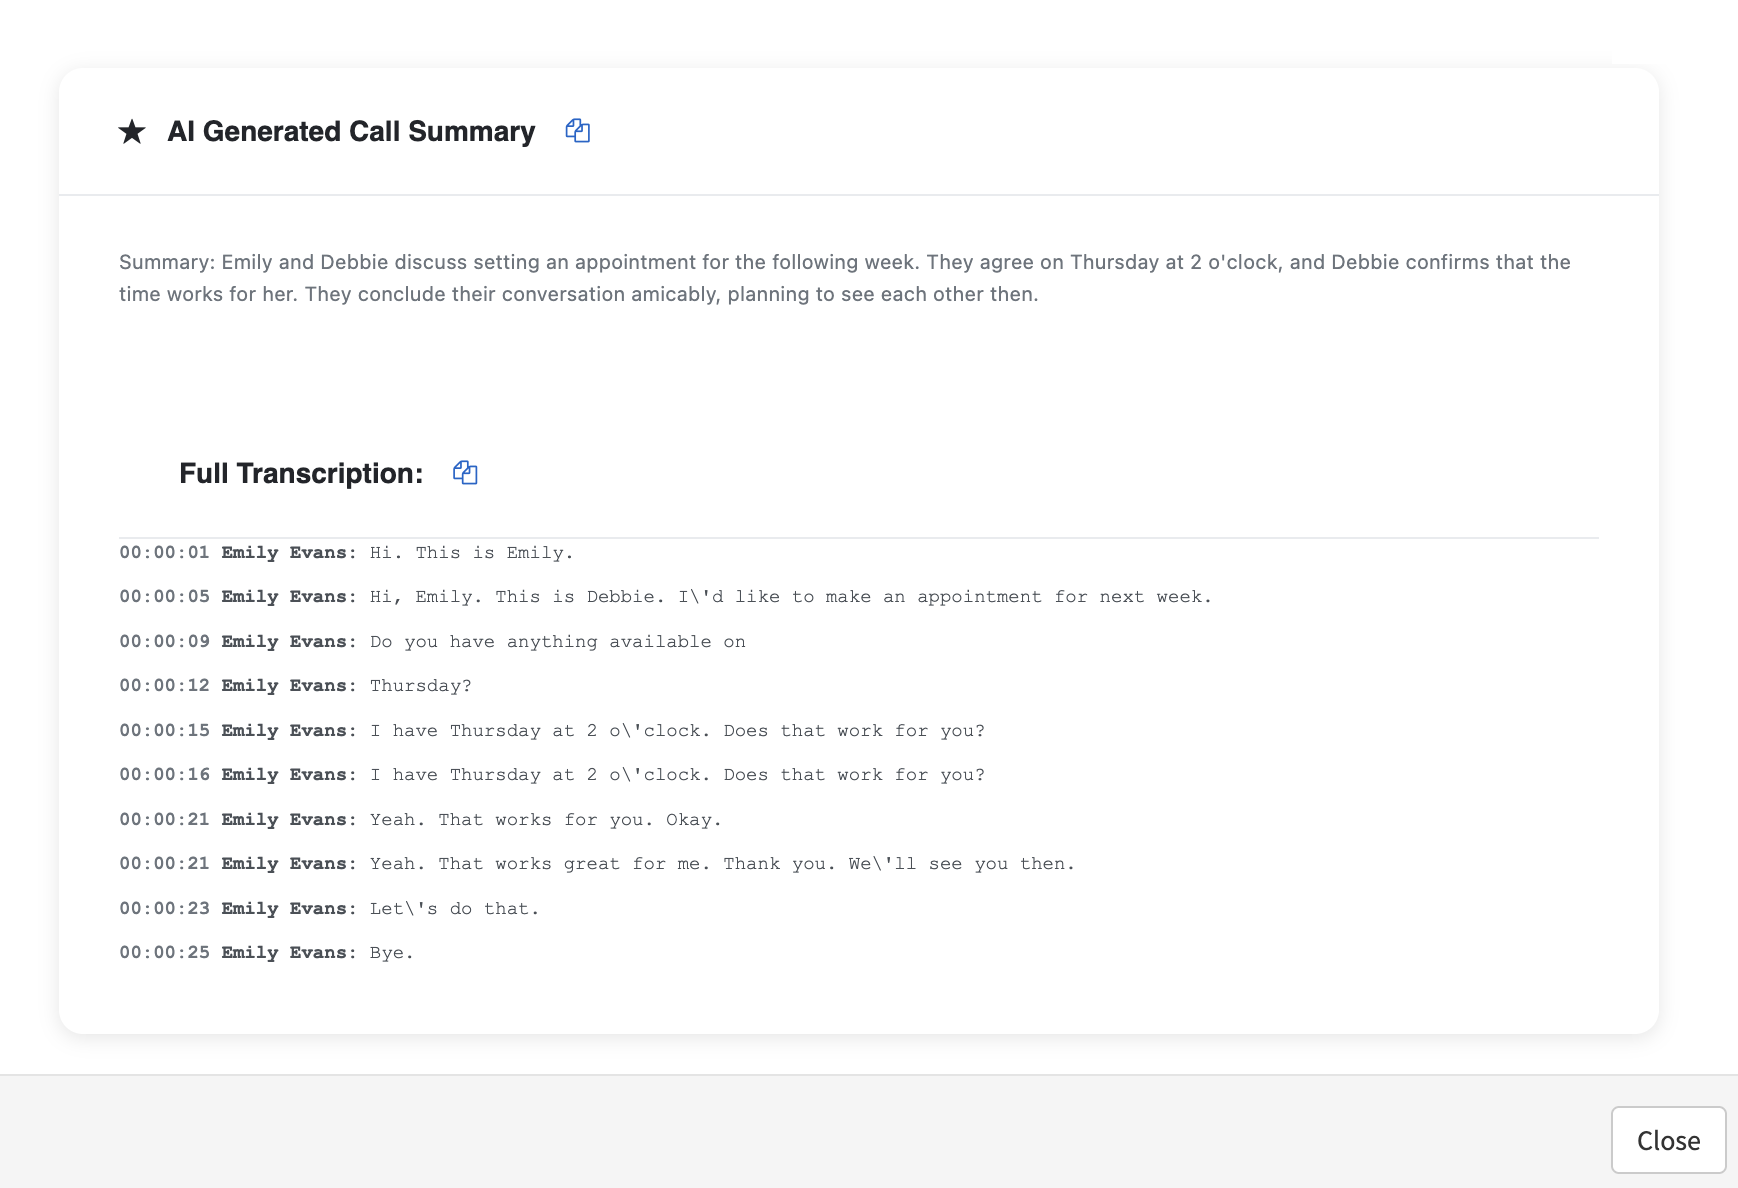
Once a Transcription is generated, you may also generate an AI summary of the transcription by clicking the Generate Summary button.

Once a Transcription/Summary has been generated for the selected call, you can view an AI Summary and Transcription of the call by clicking the T/S icon.
Look at the Call Trace
The SIP Flow  icon opens a comprehensive listing of all technical information captured during the call from the moment a connection is first being attempted until the call ends. This is also known as a Call Trace.
Look at the Cradle to Grave information
The Cradle to Grave  icon, when clicked, will present all call events that occurred from the beginning to the end of a call through a simplified display. For more information see the article Cradle to Grave.
Add Notes to a Call
The Add Notes  icon is a way to add the call disposition to a call, where a user can store notes about the conversation.
Viewing the Audit Logs
Viewing audit logs allow you to see various changes made within the PBX Portal. Audit logs are used for tracking changes done historically. To view the audit logs click on the Audit Logs tab within the Reporting page.

From here you can:
- Filter the audit logs
- Export the audit logs
- Show more details for a logged event
Filtering Audit Logs
Using the Filter button, you can filter the audit logs and view only the events of interest to you. See the table below for details on the filter settings you may apply.

Table 11-3. Audit Log Filter Settings
| Setting | Description |
|---|---|
| From | The beginning date and time for the events you want to view. |
| To | The end date and time for the events you want to view. The maximum From-To range is 90 days. |
| Object | The specific type of target object for the events you want to view. |
| Operation | The specific type of operation done on an object for the events you want to view. |
Exporting Audit Logs
To export the audit logs in CSV format, click on the Export button, and the download will initiate. You can then open the information in Microsoft Excel for further manipulation. Note: The downloaded logs will be based on the current filter set in place and will only contain a maximum of the first 1000 events.
Showing more details for logged event
To show more available details regarding an event click the Show more link at the right of the entry and the event will expand to show more details.

Viewing the Content Logs
Viewing content logs allow you to see events regarding various media and files within the PBX Portal. To view the content logs click on the Content Logs tab within the Reporting page.

From here you can:
- Filter the content logs
-
Show more details for a logged event
Filtering the Content Logs
Using the Filter button, you can filter the content logs and view only the events of interest to you. See the table below for details on the filter settings you may apply.

Table 11-4. Content Log Filter Settings
| Setting | Description |
|---|---|
| From | The beginning date and time for the events you want to view. |
| To | The end date and time for the events you want to view. |
| Record ID | The Record ID of event that you want to view. |
| Object | Select the specific type of target object for the events you want to view.
|
| Access Type | Select the action performed on the object for the events you want to view.
|
| User | Enter the name of the user performing the action for the events you want to view. |
Showing more details for the logged event
To show more available details regarding an event click the Show more link at the right of the entry and the event will expand to show more details.
