
PBX Admin Guide - Quick Guide to Common Tasks
Resetting a Password
- On the menu bar, click.

- Click the name of the user that needs a password change.
- Scroll down to the Change Password section, and then enter a new password in the New Password and Confirm New Password fields.
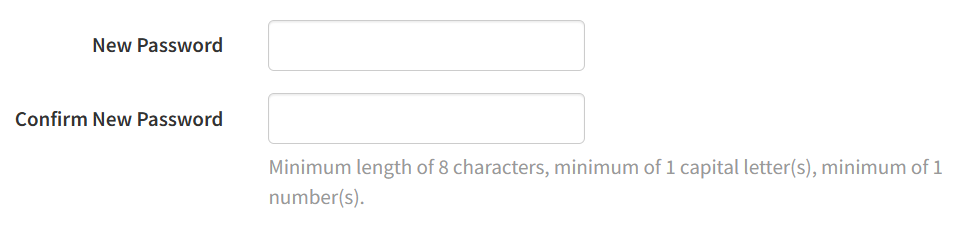 Note: Password requirements are minimum length of 8 characters, minimum of 1 capital letter(s), and minimum of 1 number(s).
 - Click Save.
Replacing Employees
If you have a new employee taking over an old employee’s Extension:
- On the menu bar, click
 .
. - Click the name of the user being replaced.
- Change any pertinent information to those for the new employee and then click Save.
- To reset the mailbox for the new employee, click the Voicemail tab, scroll down to the Data section, click Clear Data followed by Yes at the confirmation prompt, and then click Save .
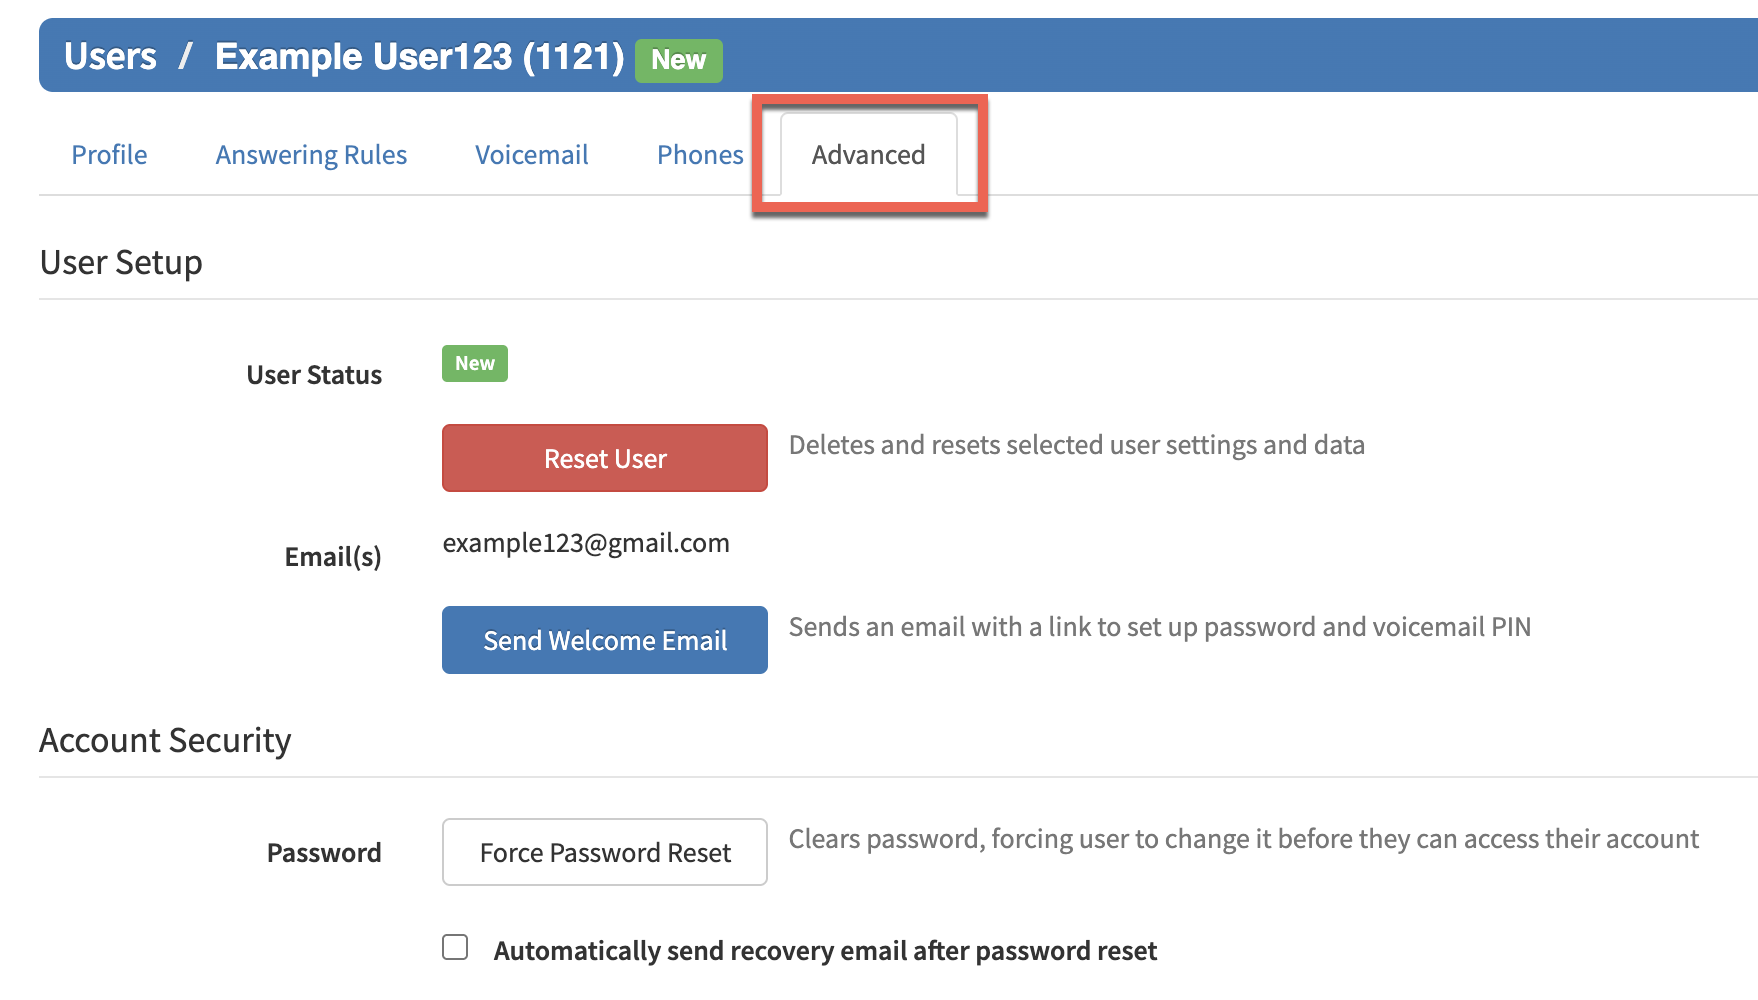
- You may also want to use the options within the Advanced Tab, such as Reset User (Allows selecting which data to delete), Recycle User (Allows renaming the user and changing the email), and Password Reset.
Please see our PBX Admin Guide - Working with Users article for more information.
Moving a Phone
If a user changes offices, we recommend moving the phone. The user’s extension will follow the phone. Otherwise, use the following procedure to reassign phones:
- On the menu bar, click
 .
. - Click the Phone Hardware tab.
- Click the MAC address of the appropriate phone.
- The Button Builder for the phone will open, reassign the extensions, and then click the Save or Save and resync button.
Changing Open Hours
- On the menu bar, click
 .
. - Click the name of the time frame you want to edit.
- In the pop-up window, change the When setting. Use the check boxes, sliders, and text fields to adjust the open hours rules, as appropriate.
- Click Save.
Setting New Holidays
Setting new holidays is a 2-step procedure. First, create or edit a Time Frame, and then configure user Answering Rules for that time frame.
- Set the time frame:
- On the menu bar, click
 .
. - Click Add Time Frame to add a new time frame or click the Name of the time frame you want to edit.
- In the pop-up window, enter or edit the name for the holiday, click when it occurs, and use the check boxes, sliders, and text fields to adjust the rules, as appropriate.
- Click Save.
- Set the user answering rules:
- On the menu bar, click
 .
. - Click the Name of a user who needs the time frame applied to him.
- Click the Answering Rules tab.
- Check to see whether the time frame already applies to that user. Otherwise click Add Rule .
- Using the Time Frame drop-down list, select the time frame you defined in step 1.
- Complete the other settings as appropriate (see Table 4-2 in Chapter
4)4). - Click Save .
- Reorder the time frames as needed to ensure the new rule will take precedence.
Setting Call Forwarding
- On the menu bar, click
 .
. - Click the name of the user you want to forward.
- Click the Answering Rules tab.
- Hover over a time frame, and then click the
 icon.
icon. - In the pop-up window, select the appropriate Call Forwarding check box and enter the extension, number, or phone.
Note: Your main number usually is associated with a user called the “Inbound Route.” For more information about the Call Forwarding options, see the Answering Rules article. - Click Save.
Blocking a Caller
- On the menu bar, click
 .
. - Click the name of the user that needs a block. To block a caller from the main number, look for the Inbound Route user.
- Click the Answering Rules tab.
- Click the Allow/Block button.
- In the pop-up window, enter the caller’s number under BLOCKED NUMBERS, and then click '+'
- Click Done.