
Get to Know ConnectUC Mobile
This article is designed to help you familiarize yourself with the various tools and options within the ConnectUC Mobile App.
To install ConnectUC on your mobile device, simply navigate to your device’s App Store (iOS devices use the Apple Store, and Android Devices use the Google Play Store), locate the ConnectUC app within the App Store, and select the option to install.

Alternatively, you may use the App Store links below:


Sign In to ConnectUC
Important: To sign in to ConnectUC, you'll need to use your UCaaS username (typically extension@domain). You will not be able to use the same account as you use for your admin/pbx portal.
Once the application is installed and you have signed in, you will be prompted to allow device permissions and notifications. Please be sure to allow these permissions, as some ConnectUC Mobile features may not work properly otherwise.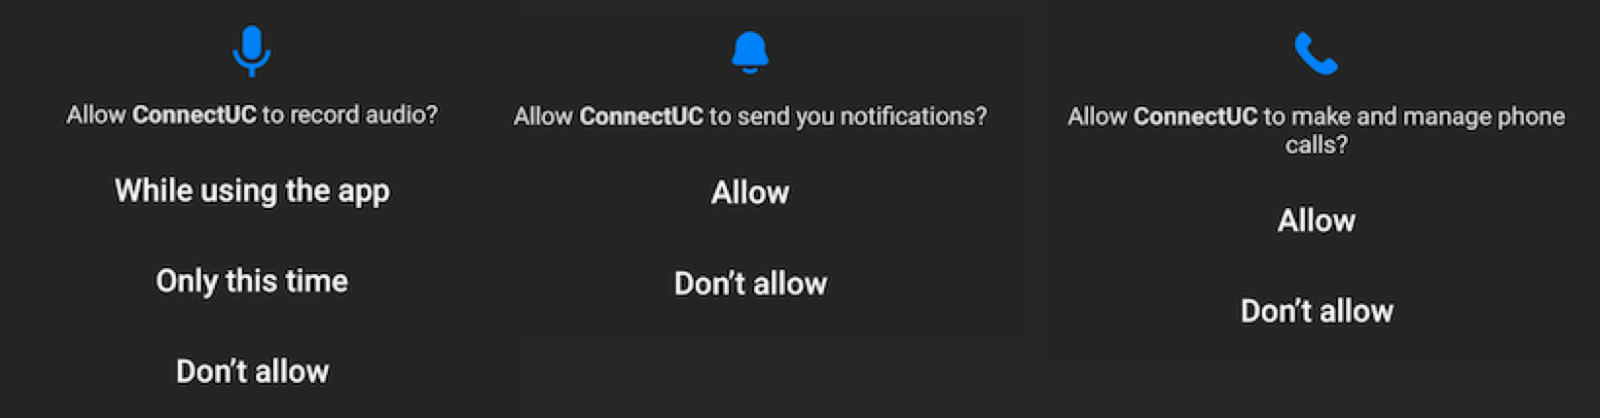
Feature Overview
Table of Contents
User Preferences and Status
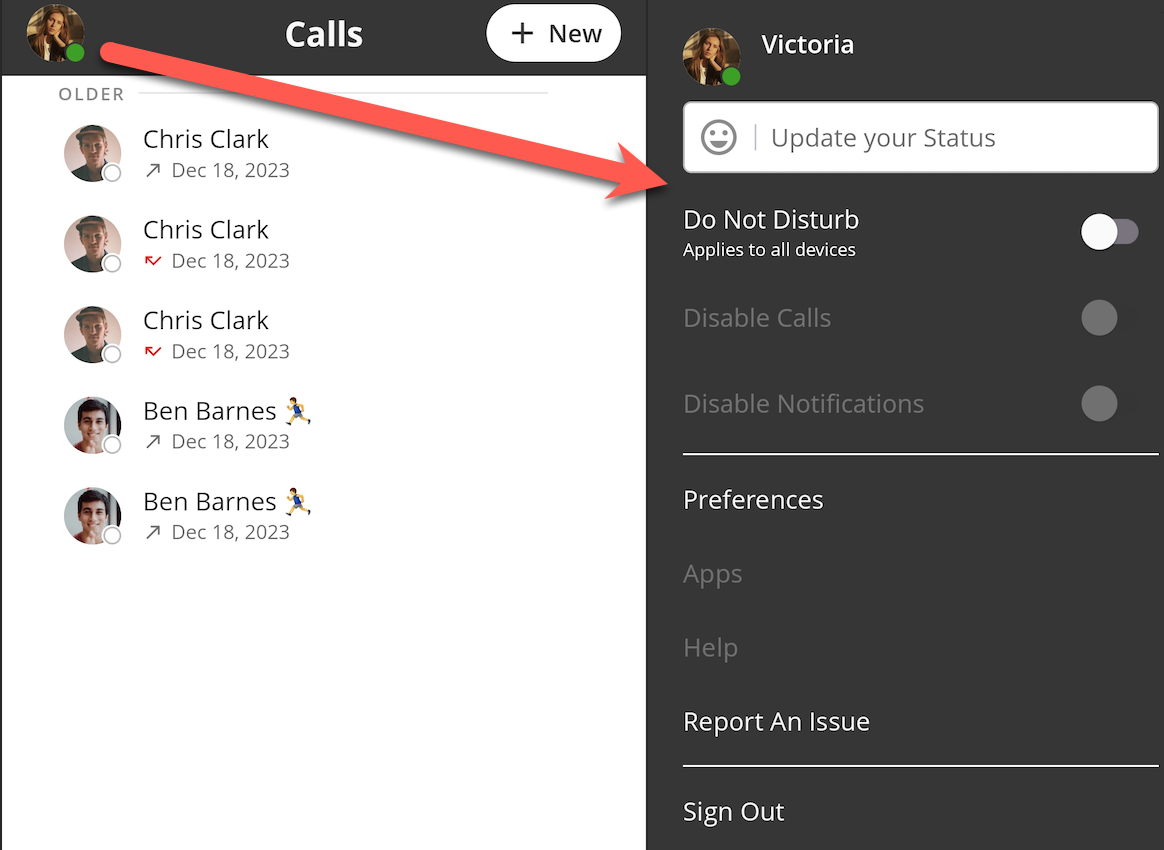
ConnectUC Mobile users can manage their preferences and status by clicking their avatar profile image found on the top left corner of the screen. Clicking your avatar will bring up a menu with quick access to important settings.
The User Preferences menu includes the following options:
- Update User Status
- Toggle Do Not Disturb (All Devices)
- Manage Profile Preference Settings
- Report an Issue
- Sign Out
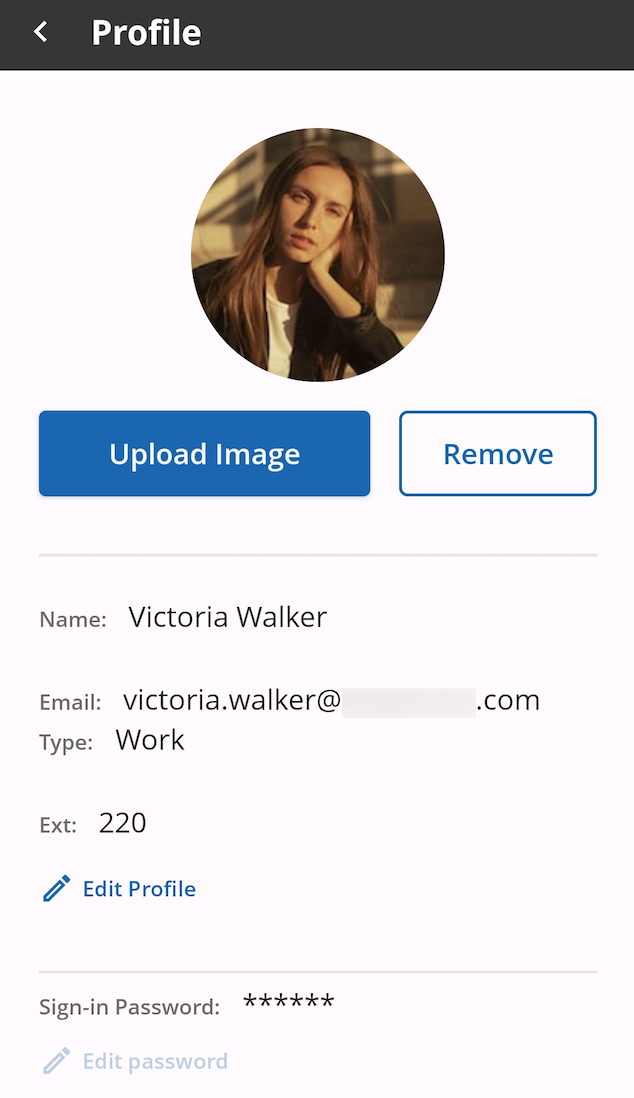
The User profile preferences page can easily be managed within the ConnectUC Mobile app, allowing for convenient profile picture changes, contact info changes, and password management.
In the event any issues occur within the app, users can report these issues conveniently within the user preferences page by selecting 'Report An Issue.'
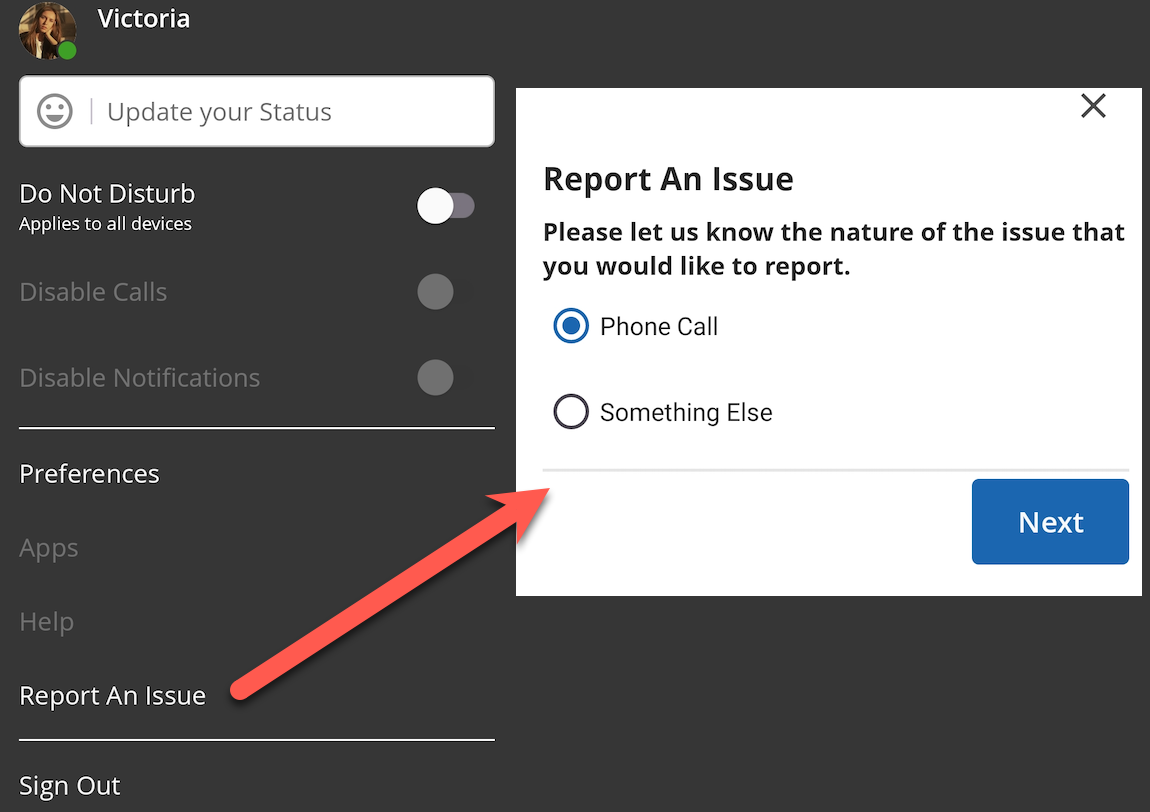
Once the 'Report an Issue' button is selected, users are asked a few clarifying questions to better understand the issue before it is reported, including the ability to select which phone calls were impacted, if applicable.
Dialer
The always-present dialer menu is conveniently located in the bottom-right corner of the screen, allowing you to dial out or view saved contacts from any tab.

Calls
The Calls tab allows users to view recent call history, including contact info and user status.
There are three ways to initiate a call from the ConnectUC Mobile App:
- Click the ‘+ New’ button found on the top right side of the page and select ‘New Call.’
- If you already see the contact you wish to call, click their contact details and select the ‘Call’ option to call them directly.
- Click the always-present blue colored dialpad icon at the bottom right corner of the screen.

Once a call has been initiated, ConnectUC mobile users will be able to access standard calling features, including mute, dial-pad, park (coming soon), add another call to the line, place the call on hold, transfer the call, enable speakerphone, record the call, access Bluetooth settings (coming soon), and end the call.

If a user selects ‘Back to app’ while on an active call, they will be able to navigate and use the app without dropping the call. To navigate back to the active call options, simply click the ‘Active call in progress’ banner at the top of the screen.

Voicemail
The Voicemail tab allows users to view, listen, and share received voicemail messages.
Similar to the Web/Desktop experience, once a new voicemail is received, the Voicemail tab will show a red number indicating the number of unread voicemails.
Once a voicemail is selected from the list, the user has the option to call the voicemail contact back, listen to the voicemail, share the voicemail as an audio file, or delete the voicemail.
If your user has voicemail transcription enabled, you will also see a text version of the voicemail, which can be a helpful time saver.

Contacts
The Contacts tab allows users to add, manage, and interact with contacts.
New contacts can be added at any time by clicking the ’+ New’ button found at the top right side of the screen. 
All contacts are displayed by default, but they can still be sorted, and users can still search directly for contacts they wish to view.
Once you find a contact you wish to interact with, simply click their information, and you will be able to see their contact info, call them, and even add the contact to the list of your favorite contacts by clicking the ‘star’ icon to the right of their name.

SMS
The SMS tab allows users to manage and view SMS conversations. The SMS top page lists all conversations for the user, including the name or number of the contact, the last message, and the time/date the last message was send/received.

To start a new SMS conversation, click the '+ New' button at the top right of the screen.
To interact with an existing SMS conversation, tap the conversation. Once selected, you can scroll up to see conversation history (if applicable), you may send a new message, and you can send attachments, such as images, via the paperclip icon.

Note: For users that have multiple SMS numbers associated, you may filter conversations by All SMS numbers, or you may select a specific number to view conversations for that specific number by selecting the drop-down menu in the top left corner of the screen. 
Park
The Park tab allows users to view and manage parking lots and parked calls.

Once a call has been parked, they will appear within the Park tab.

To pick up a parked call, simply click the 'Pickup' option to the right of the call.

Important Notes about Parking:
- If a user is not assigned to a Site, they will see all park orbits.
- If a park orbit is not assigned to a Site, all users will see it.
- If a user is assigned to a Site, they will see all park orbits for that site and all park orbits that don’t have a Site.