ConnectUC Link
ConnectUC Link is a companion application for ConnectUC that extends the functionality of the platform via integrations, including the ability to support headset device call control and enabling the ConnectUC WebPop integration.
Installation
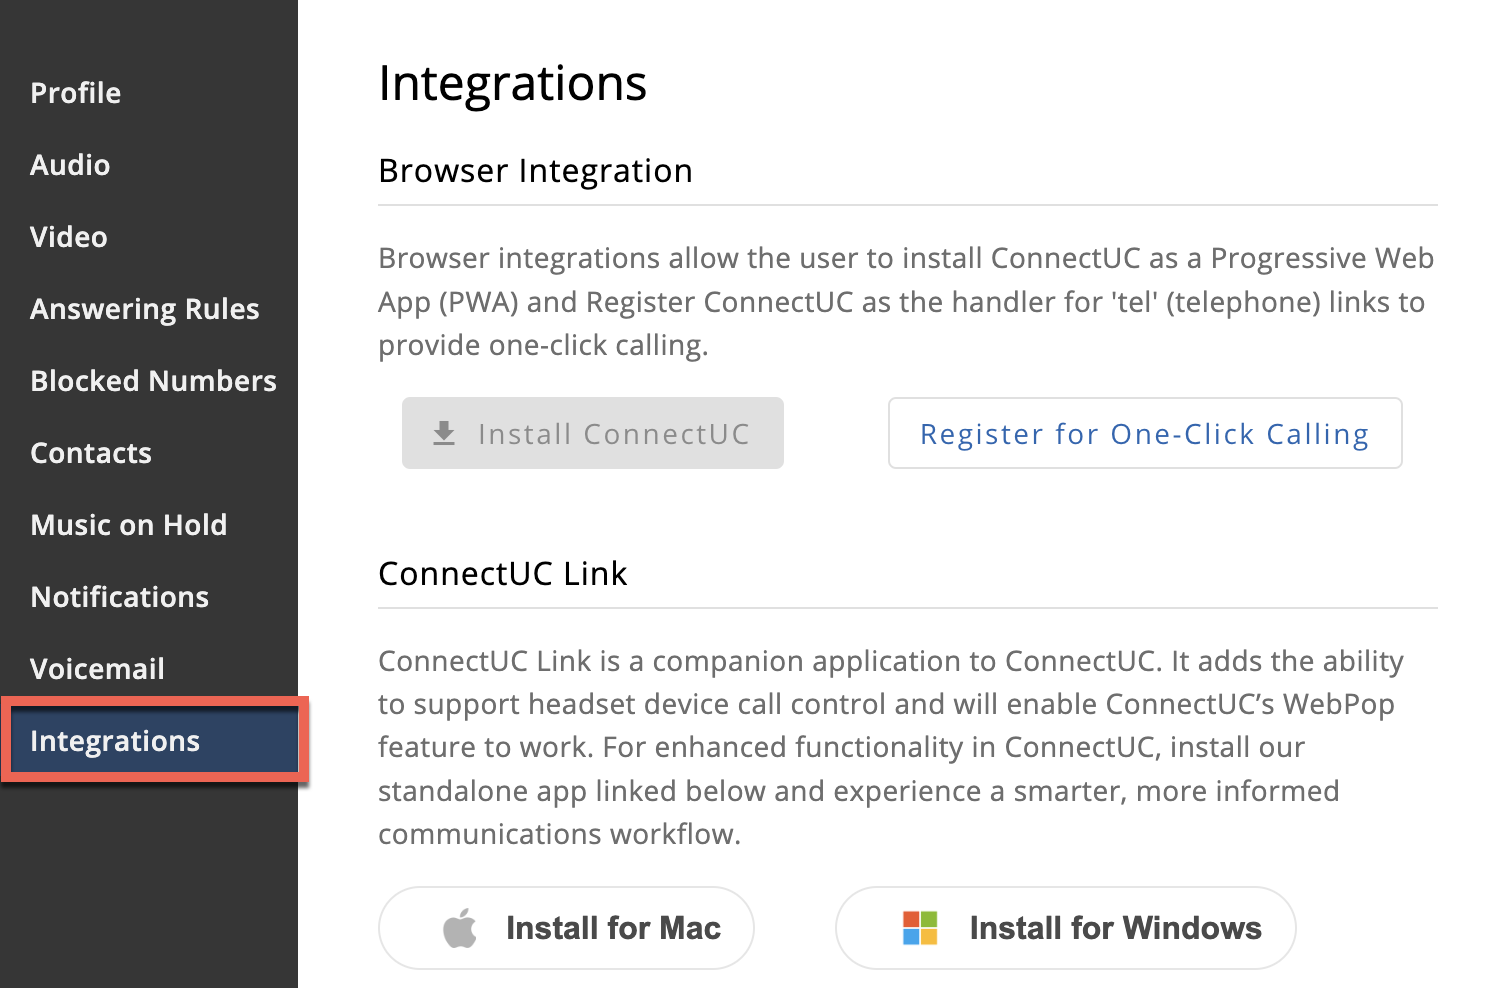
ConnectUC Link is available for download in the MacOS App store and Windows App Store. You can find links for both MacOS and Windows conveniently located under the ‘Integrations’ section of the ConnectUC settings menu.
Configuration
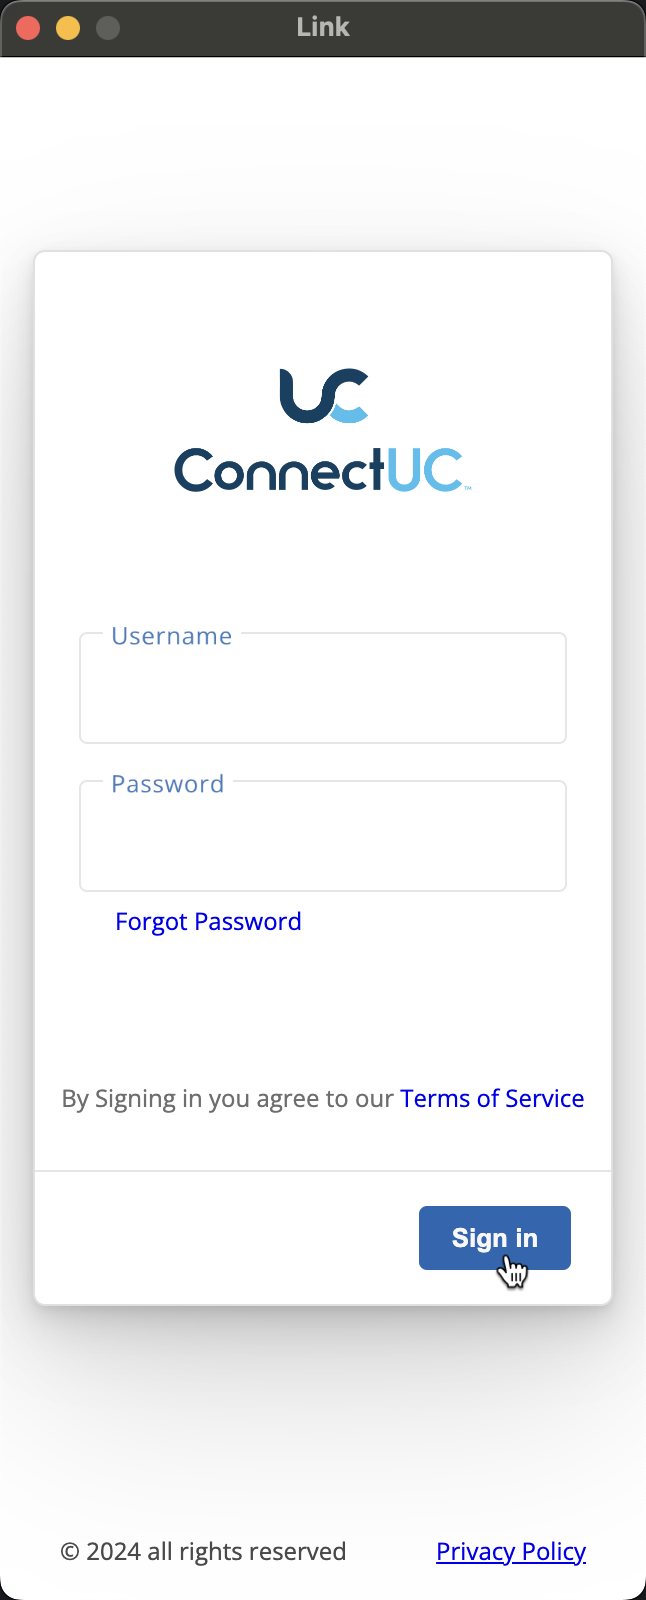
Once installed, when launching the application for the first time, you will be prompted to log in to ConnectUC. Please be sure to use the same username and password used to log in to ConnectUC.
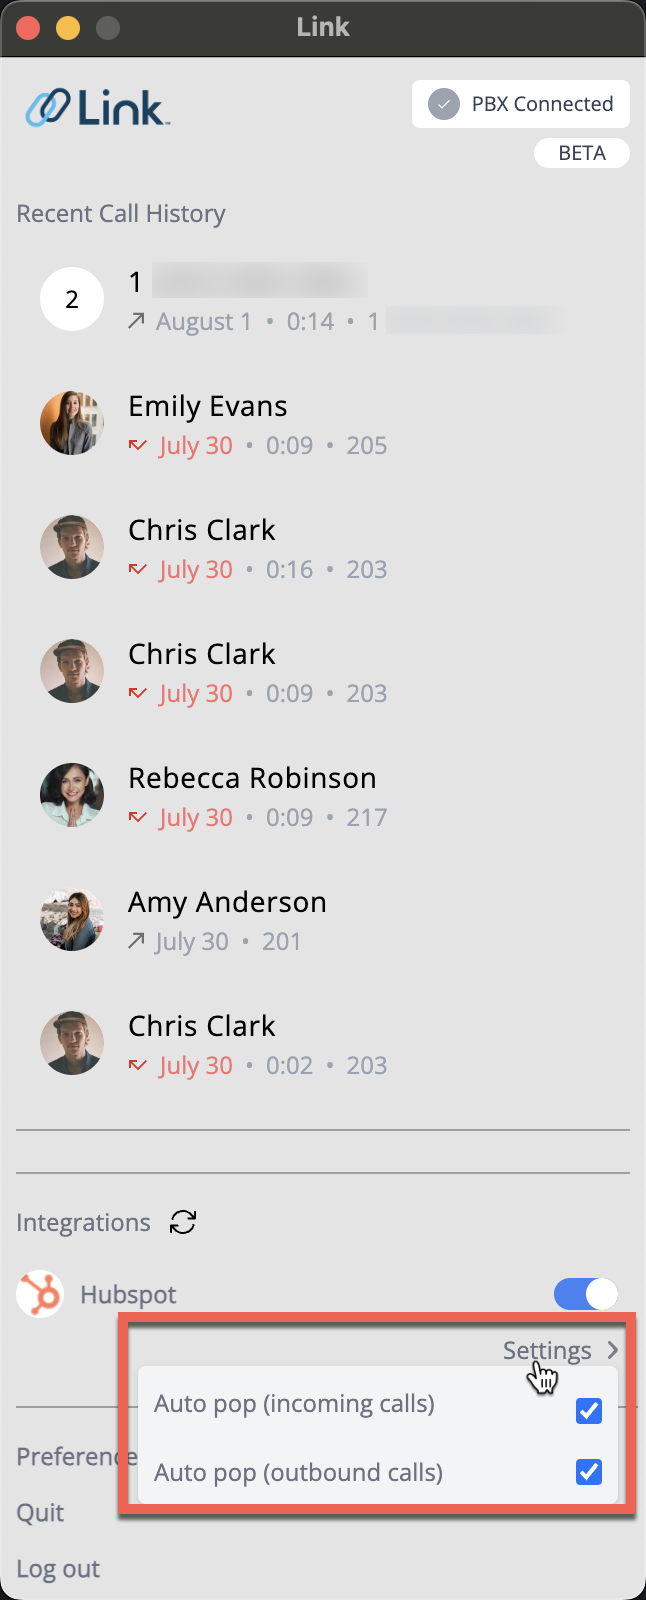
After ConnectUC Link has loaded, you will be able to see recent call history and manage integrations settings for the connected account.
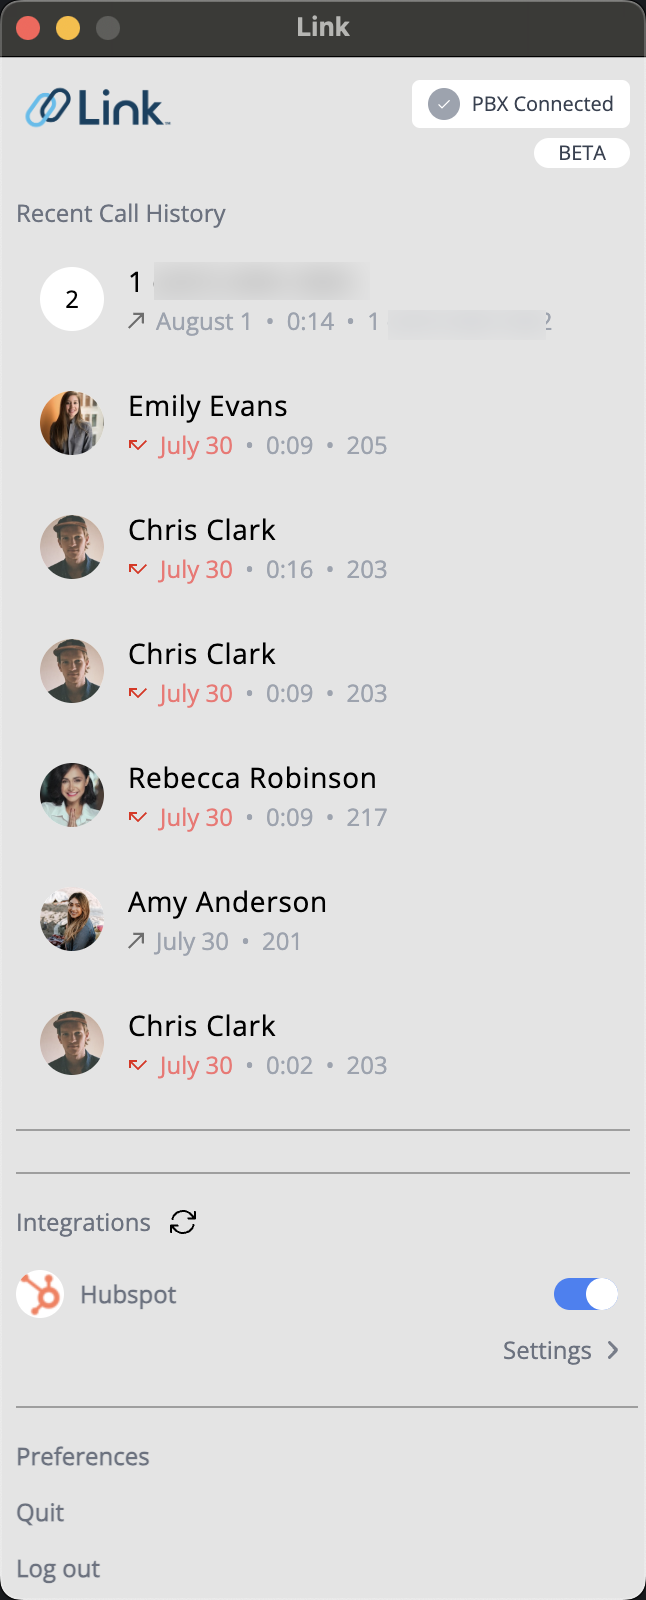
The connection status indicator found in the top right corner of the screen will display one of the following connection statuses:
- UC Connected – Connected to ConnectUC
- PBX Connected – Connected to PBX, but ConnectUC application was not found locally
- No Internet – Unable to connect to PBX or ConnectUC
You may initiate an outbound call from the recent call history page by selecting a contact and clicking the 'phone' icon. 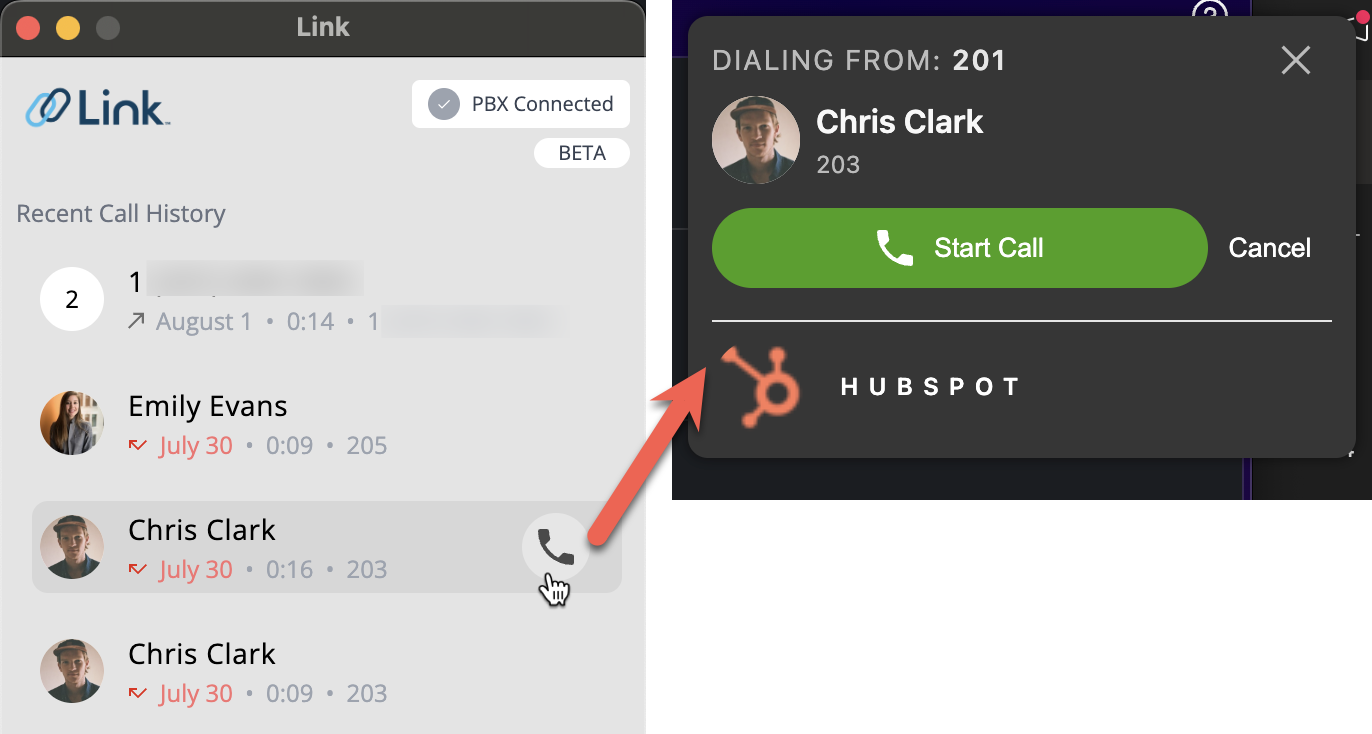
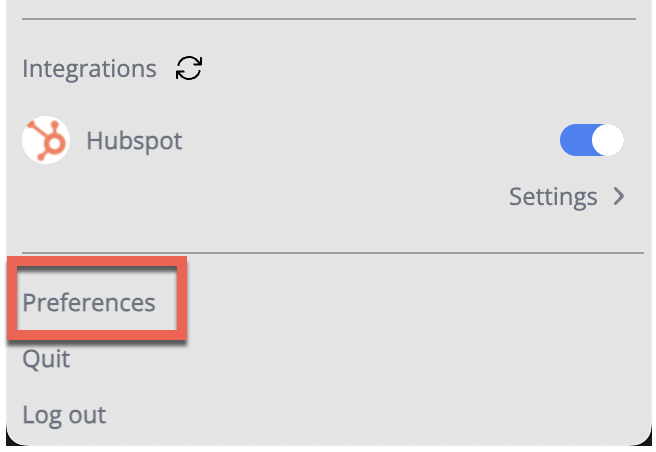
Manage Integrations (WebPop)
To manage the WebPop feature for connected integrations, navigate to the ‘Integrations’ section at the bottom of the page and select the ‘Settings’ button. Selecting this option will allow you to manage WebPop for inbound and outbound calls (Integration must be enabled first).
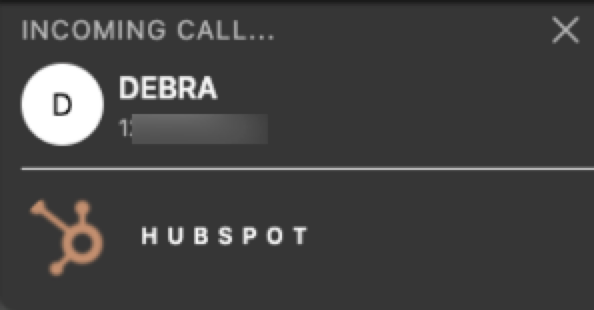
Once WebPop is enabled, a pop-up notification will appear for inbound/outbound calls (depending on set preferences).
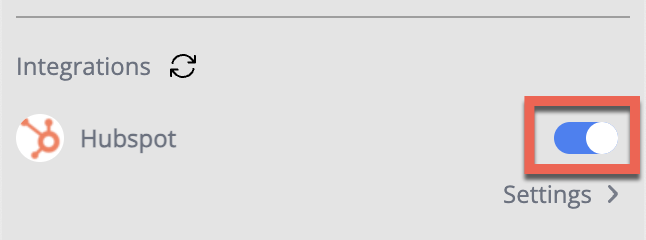
To completely disable an integration, click the ‘Toggle’ switch to the right of the integration to ‘off’ status.
Manage Preferences
To access ConnectUC Link Preferences, select the ‘Preferences’ button at the very bottom of the page.
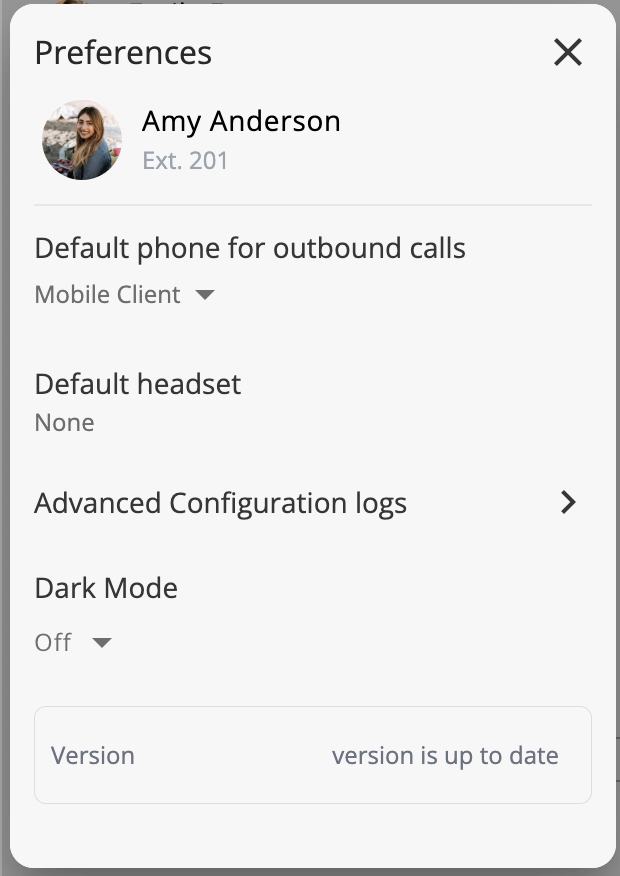
ConnectUC Link Preferences allow the following:
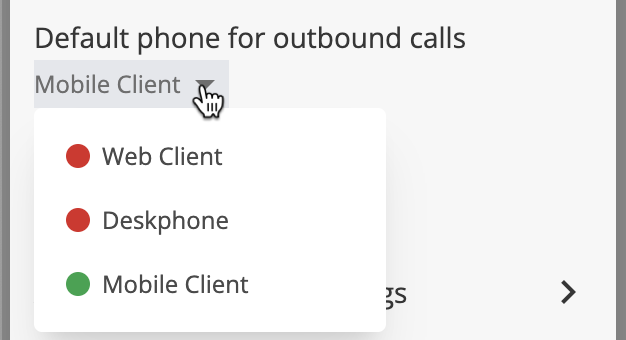
- Manage the Default Phone/Device for Outbound Calls
- Manage the Default Headset/Device
- View Advanced Configuration logs
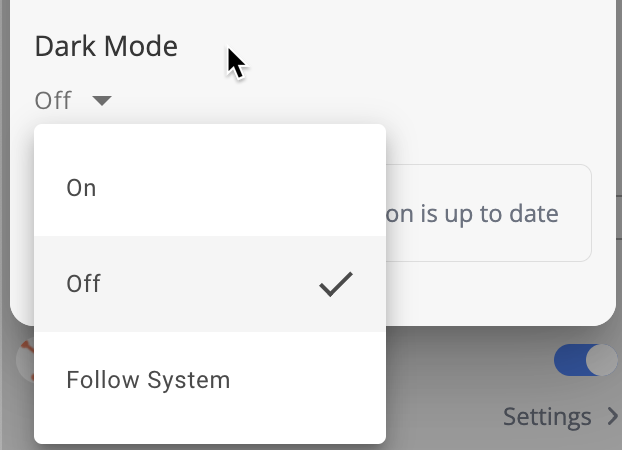
- Toggle Dark mode on/off