Call Center
Objective
This article goes over Call Center features such as Agents, Call Queues, Reason Codes and Tally Codes. Call Center is a premium feature, allowing calls to go directly into a queue, letting the caller hear hold music, rather than ringing, and allowing them to stay on the line for a longer period of time. It also removes a need for a user to have a dedicated phone, as they can sign into any business phone on your account using their Agent ID to begin taking calls.
How To
From the Automation Manager home page, select the services tab, then on the left hand side navigation, Expand the Call Center option by selecting the small arrow to the right of the name. From there, select either Queue, Agent, Reason Code or Talley Code.
Agent
Agents are people who receive incoming calls from a queue. To receive queued calls, they must first be set up as an Agent and then assigned to one or more Queues.
To access the Agents screen, click the Agents menu option in the Call Center section of the menu panel on the left. From this screen, you can search for, add and delete an agent.
Creating a New Agent
- Click the New Agent button.
- The New Agent screen appears.
- Enter the Agent ID, which must be a number from 1 to 5 digits long.
- The Agent will use this ID number to log in and out of their assigned queue(s).
- Enter the
agent’agent’s Name as it will appear in the Call Center reports. - Click the Save button.
Deleting An Agent
- In the Agent list, click the Agent ID or their corresponding Edit link to the right.
- The Agent Detail screen displays.
- Click the Delete button.
Agent Login and Pause
Once you have a queue and agents configured, agents may login to each queue. Agents may log in to multiple queues at the same time. Each queue has its own login dial code to be dialed. The login, logout, pause and unpause dial codes for each queue can be found at the top of the Queue edit screen once the queue has been saved.
-
To Login to the queue(s): Agent dials *01 + Agent ID
-
To Logout of the queue(s): Agent dials *00 + Agent ID
-
To Pause in the queue(s): Agent dials *02 + Reason Code + Agent ID (see Reason Codes for more info.)
-
To Unpause in the queue(s): Agent dials *03 + Agent ID
Queue
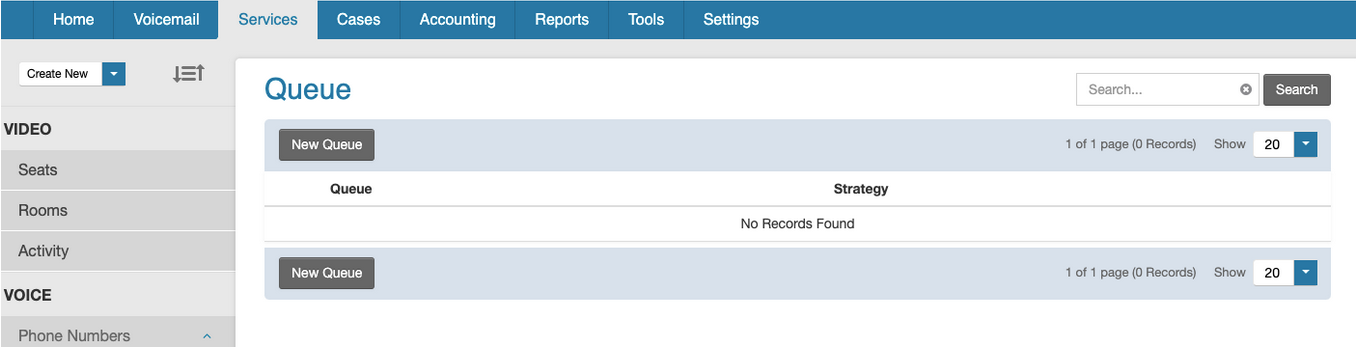
Creating a Queue
From the left panel, under Call Center, Click on Queue.
Click the New Queue button.
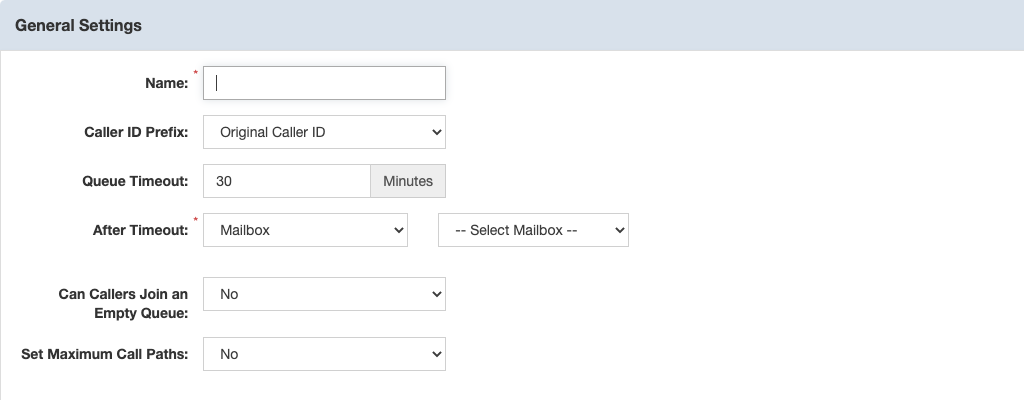
In the General Settings section, enter the following information:
| Field | Details |
| Name | A name to uniquely identify the queue |
| Caller ID Prefix |
Determines how the Caller ID of an incoming call is displayed on an agent's phone.
|
| Queue Timeout | The number of minutes that an incoming call will remain in the queue before it is routed to another location within the |
| After Timeout |
Determines where the call is routed to once the Queue Timeout (above) has expired NOTE: Selections made in the After Timeout drop-down list may prompt a subsequent choice in another drop-down list. |
| Can Callers Join an Empty Queue? |
|
| Set Maximum Call Paths |
This allows you to set an upper limit on the total number of Call Paths that a Queue can simultaneously use. The intent is to prevent one Queue from using all Call Paths for a Customer Account.
|
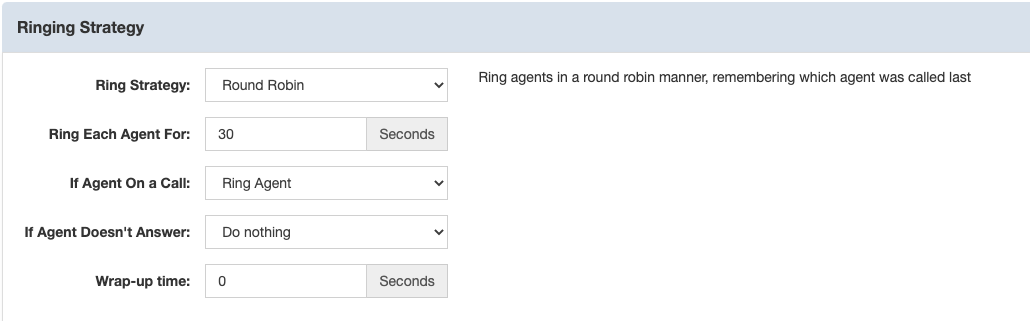
In the Ringing Strategy complete the following information:
| Field | Details |
| Ring Strategy |
|
| Ring Each Agent For | The length of time in seconds that the agent's phone will ring before the call is sent to the next available agent |
| If Agent on a Call |
Specifies the action taken if the agent is currently on a non-Queue call (such as a personal call).
Regardless of this setting, queue calls are never sent to an Agent who is currently on a Queue call. |
| Wrap-up Time | The amount of time, in seconds, that the queue should wait before sending another call to the agent once that agent finishes a queued call. Zero (0) is an acceptable value. |
Define what callers hear, and what they can do, while in the queue:
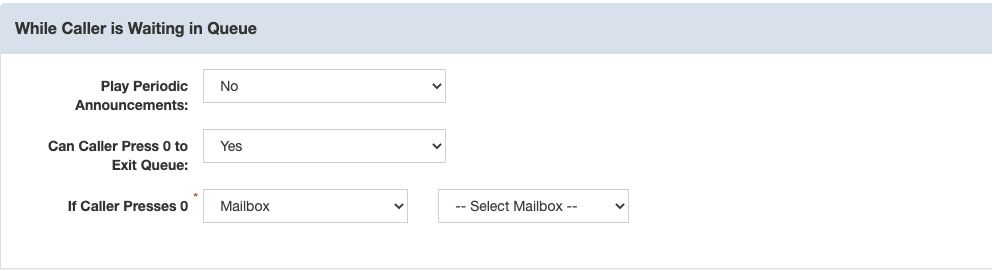
| Field | Details |
| Play Periodic Announcements? |
While callers are waiting in the queue, they will hear the hold music from your If Yes is selected, two more fields will appear:
The message must be recorded in the busy greeting of the mailbox.
While the announcement is playing, the caller is not being offered to an agent. |
| Can Caller Press 0 to Exit Queue? | If Yes is selected, your periodic announcement should inform the caller that they are able to do so. |
| If Caller Presses 0 |
Specifies where the waiting call will be routed to when 0 is pressed. NOTE: Selections made in the drop-down list may prompt a subsequent choice in another drop-down list beside or below it. |
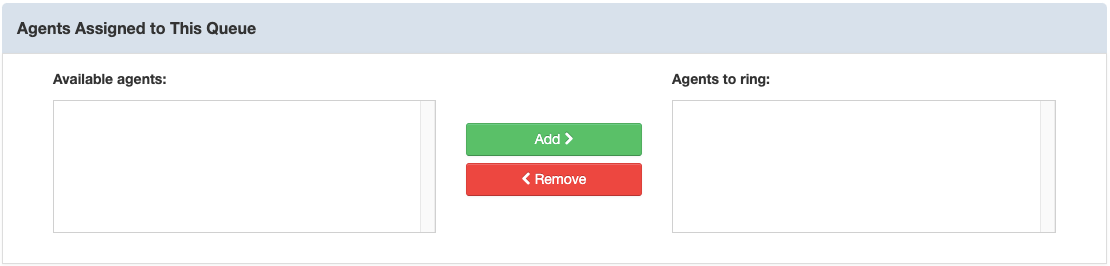
In the Agents Assigned to This Queue, do the following:
-
From the Available agents block on left, click on the agents name that you want to add to the agents to ring block and then click on the green Add button.
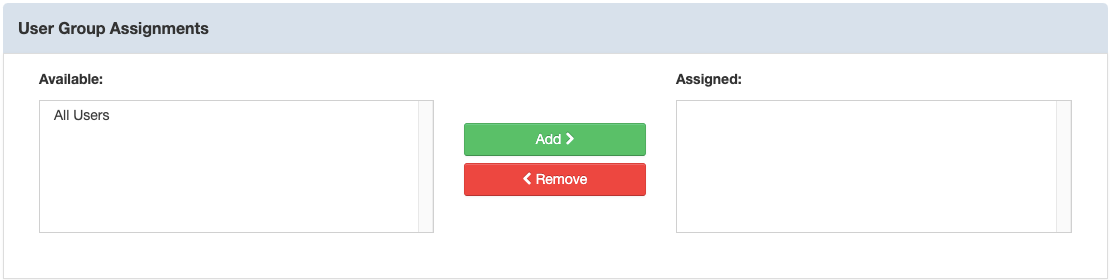
In the User Group Assignment, you can add what group you want this agent to be part of.
-
Click on the group name in the Available block and click Add. This will move that group to the Assigned block.
Click Save
Reason Code
When an Agent needs to stop receiving calls temporarily, but does not want to log out of his/her queue(s), the Agent can pause their incoming queue calls.
The Agent will be reported as logged into the queue(s) during the pause, but he/she can provide a Reason Code to indicate why. The pause event and corresponding Reason Code are logged and reported in the Real Time Console.
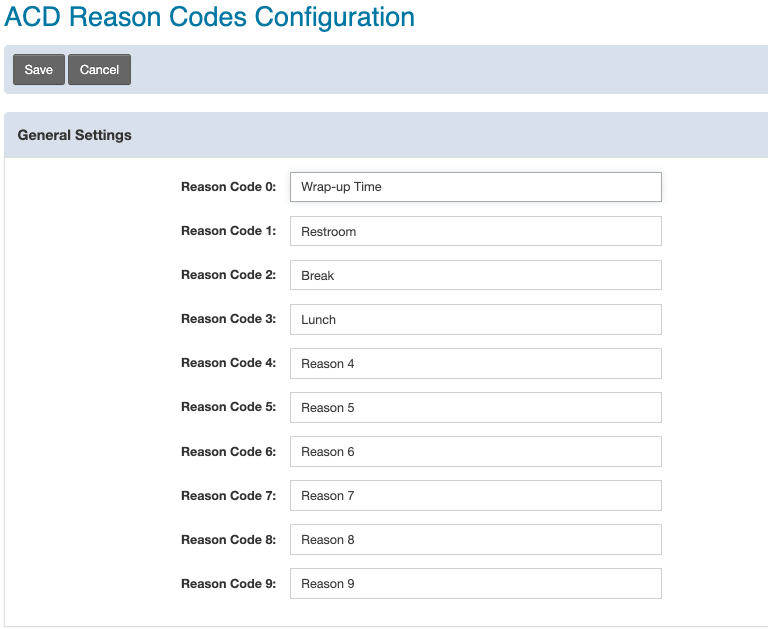
Configuring Reason Codes
From the Reason Codes screen, you can enter text for 9 different reason codes.
-
Click the Reason Codes menu option in the Call Center section of the menu panel on the left.
The ACD Reason Codes Configuration displays.
-
Enter reason codes in the fields provided for Reason Code 1 through Reason Code 9.
Enter as many as needed.
-
Click the Save button.
Tally Code
When an agent receives a queued call and needs to assign it to a specific category for billing or other purposes, he/she can provide a Tally Code to indicate the nature of the call.
From the Tally Codes screen, you can enter names or descriptions for 10 Tally Codes. Tally Codes are tracked in the Queue Call Activity Report.
Configuring ACD Tally Codes
- Click the Tally Codes menu option in the Call Center section of the menu panel on the left.
- The ACD Tally Codes Configuration screen displays.
- Enter ACD Tally Codes names or descriptions in the fields provided for Tally Code 0 through Tally Code 9.
- Enter as many as needed.
- Click the Save button.
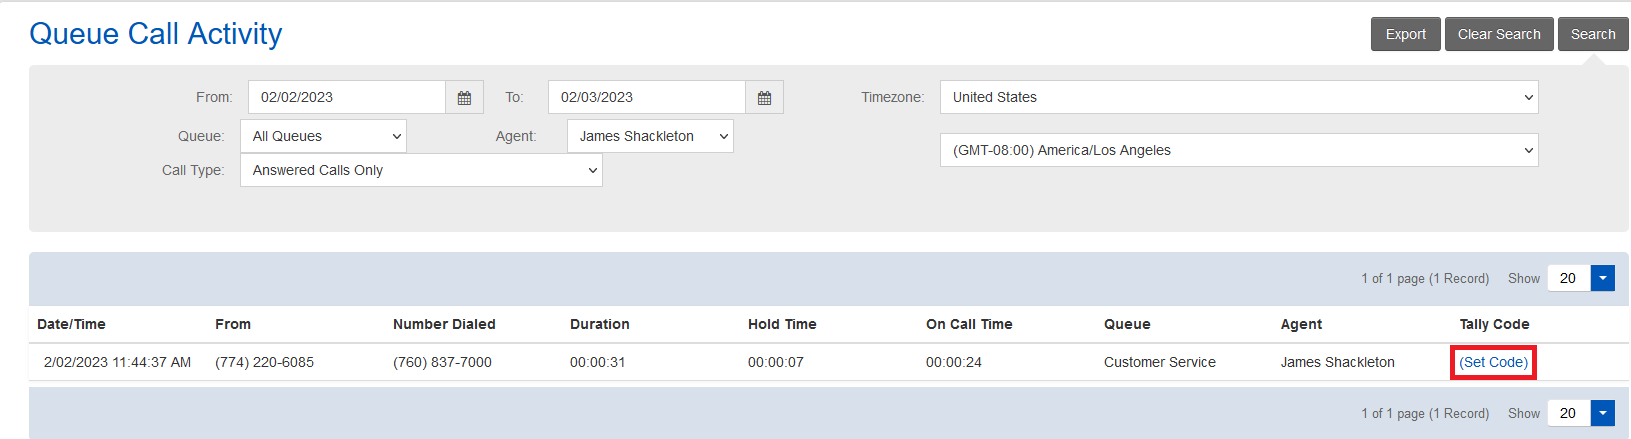
Using Tally Codes
The Tally code input occurs inside of the Automation Manager, under the reports tab in the Queue Call Activity report.
The user would need enter a Tally Code for a call after the call has completed.
-
Click on Reports Tab
-
Select Queue Call Activity Report
-
Click on Set Code link under the Tally Code option for the particular call you are wanting to Tally.